Stageplot Builder
The Stage Plot Builder lives inside what is known as the 'side slider'. The side slider can be found on the right hand side of the Act Page and gives access to a number of focused pages for different tasks.
The Stageplot builder gives the user the ability to build stage plots from scratch using a set of pre-defined icons and objects as well as import external images, such as existing stage plots for further annotation.
All icons that come with Master Patch are vector graphics, which means the user can scale them infinitely without any loss of resolution.
The Stageplot builder is built with a set of tools which allow the user to make highly customized and consistent stage plots with any level of detail desired.
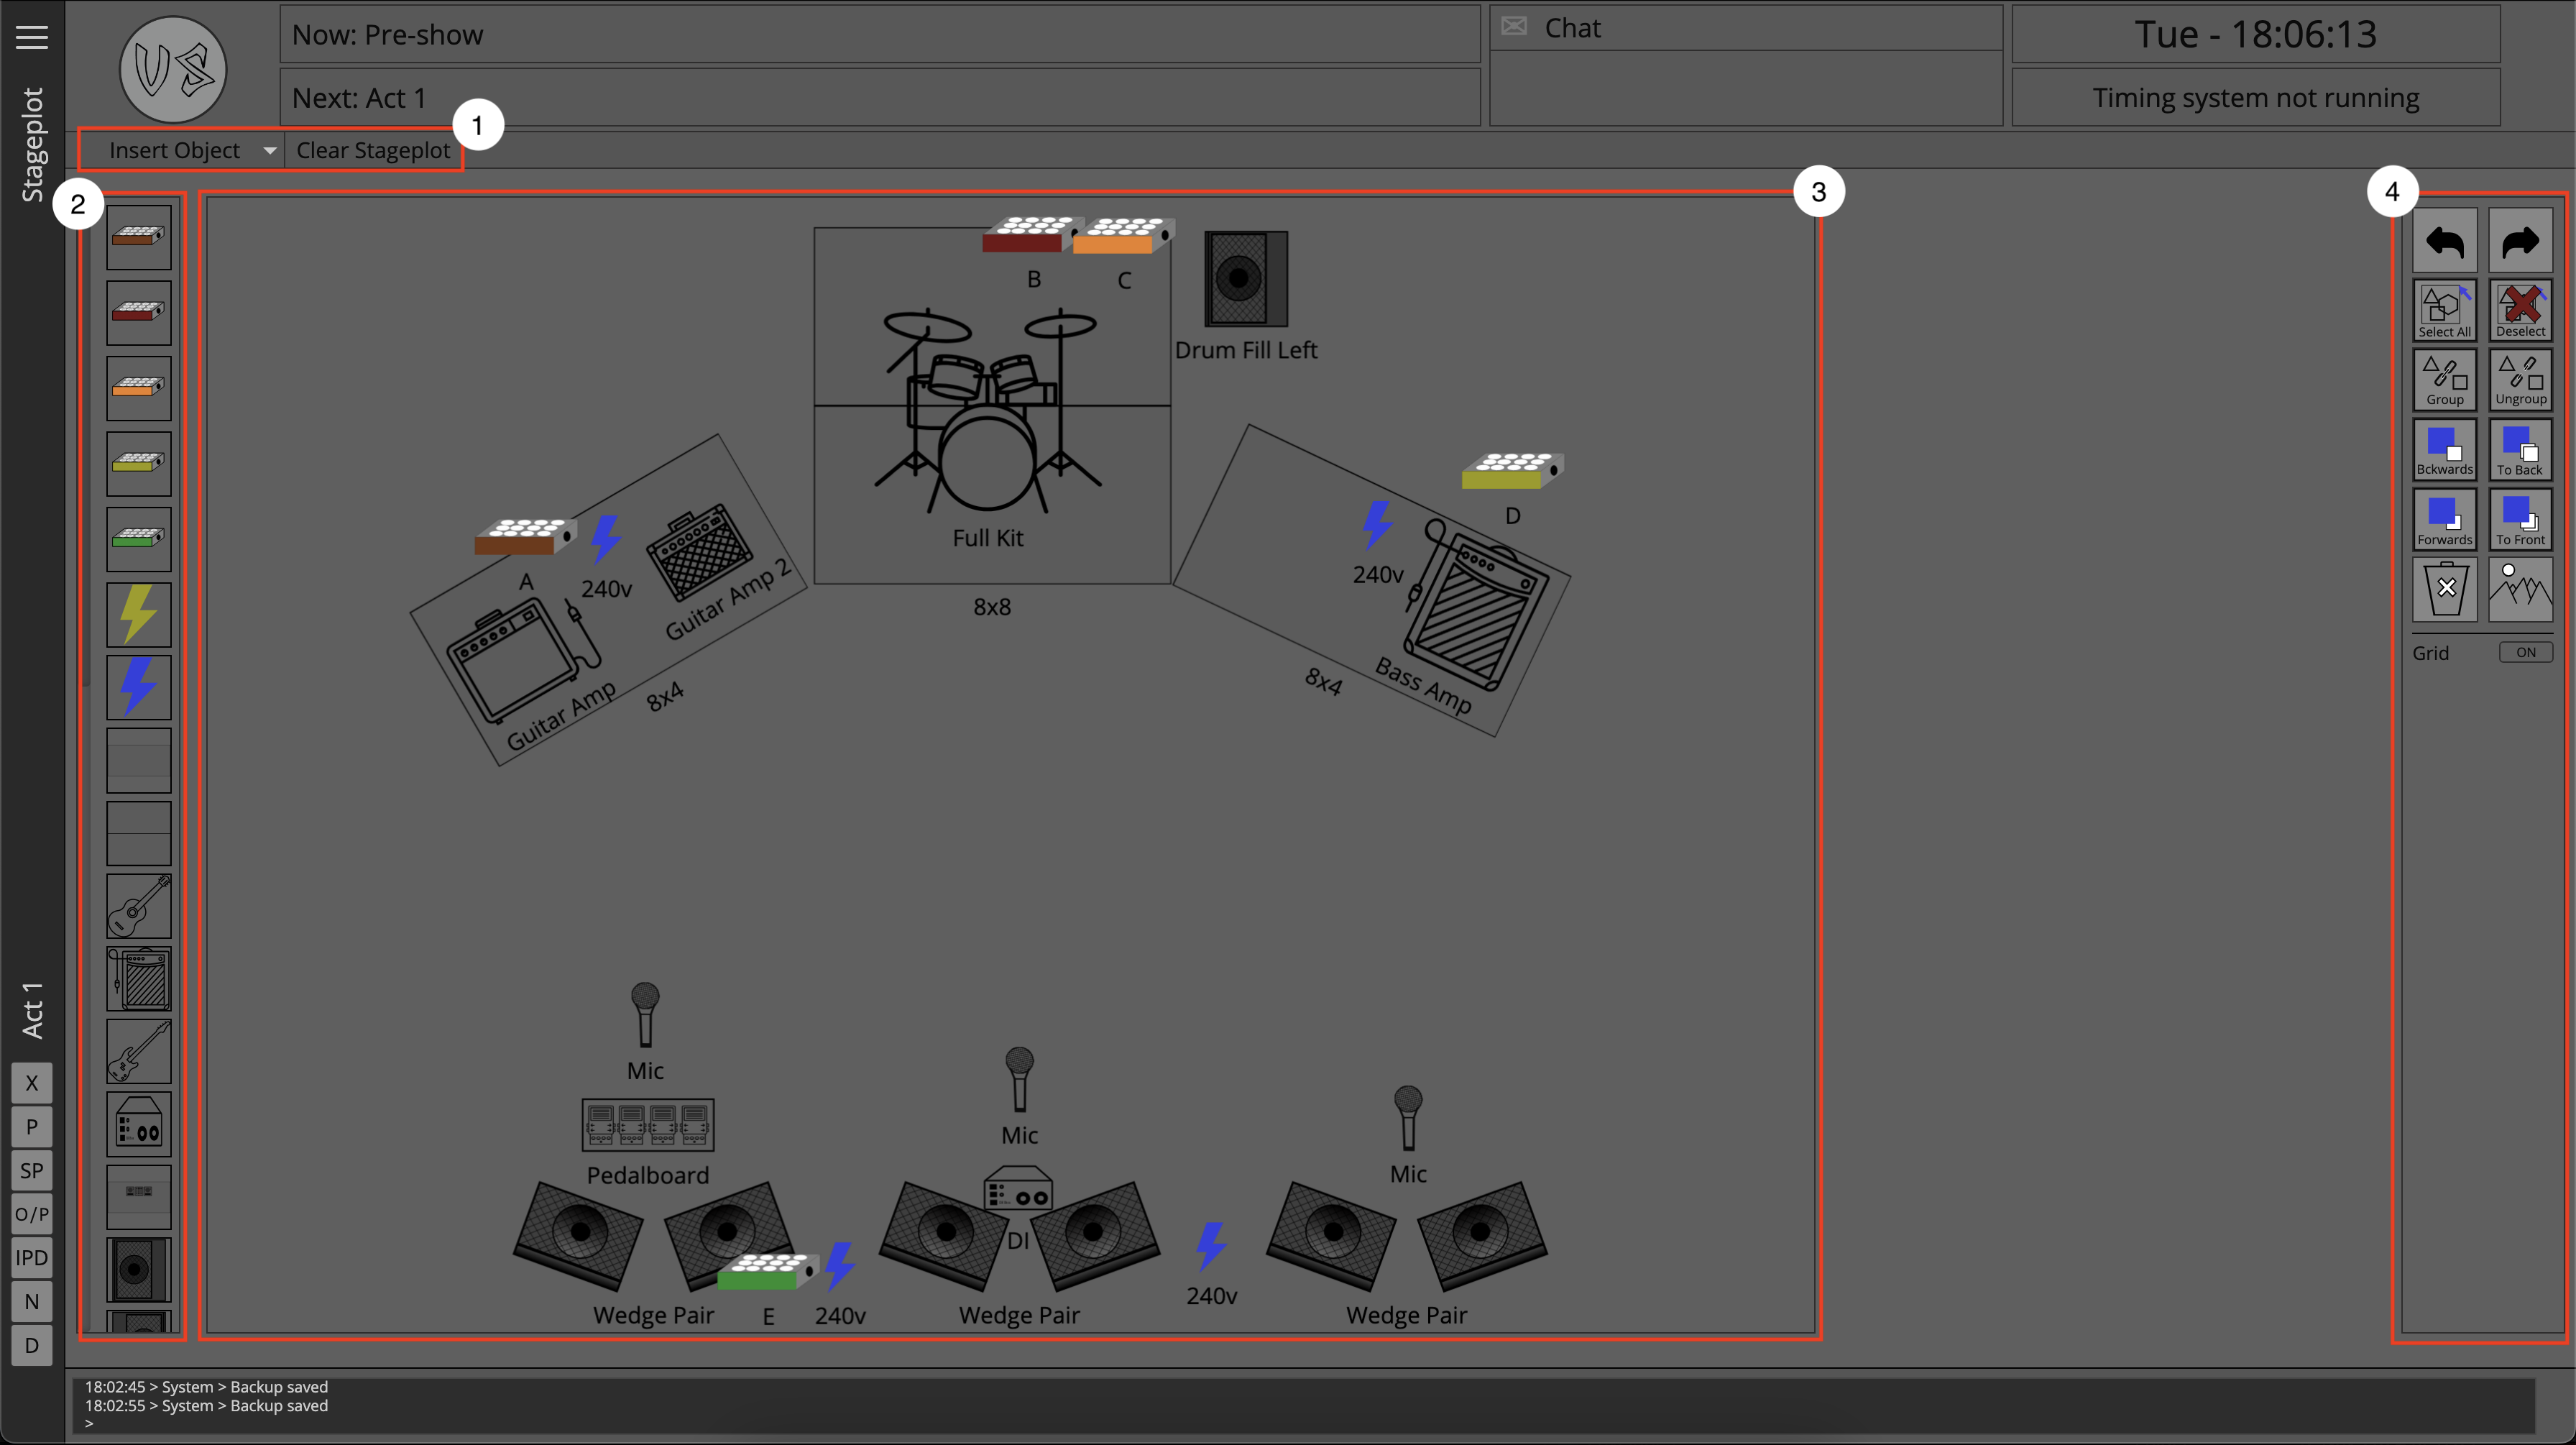
The Patch Matrix page is made up of the following areas:

- The Ribbon Menu
- The gallery
- The canvas
- The Icon Options menu
The Ribbon Menu
The ribbon menu contains additional functionality related to the Stageplot Builder.
Insert Object
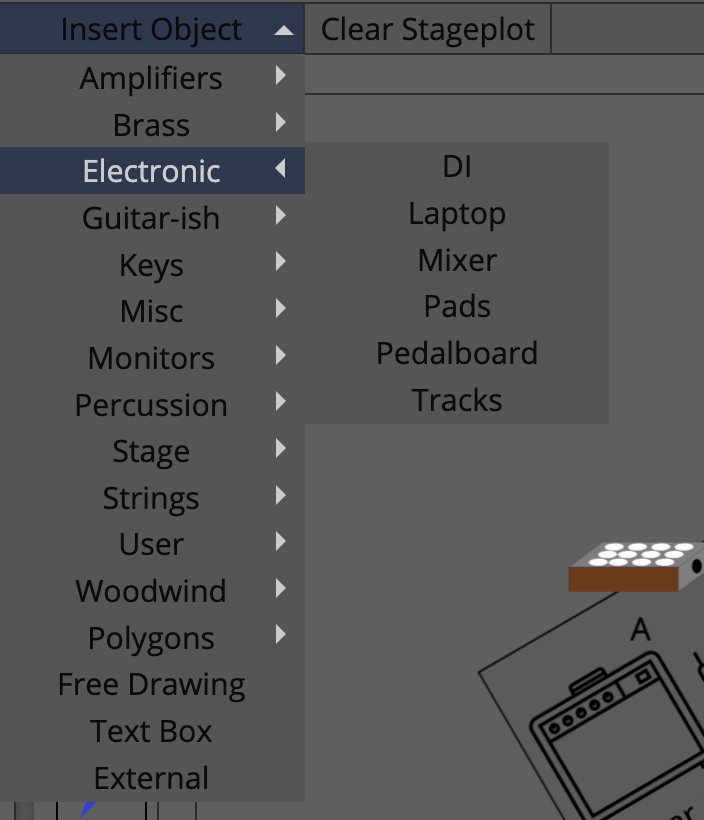
Insert object opens a drop down menu giving the user access to an expanded icon set for insertion to the canvas via a selection of additional categorized sub menus.

Background image
At the bottom of the dropdown menu the option 'insert external' can be seen. This is a feature which allows the user to insert an image into the canvas, this can be useful for example if the user already has a highly detailed stage plot and they would rather annotate it than draw it from scratch.
Stageplots are limited to one imported image per plot in order to keep the overall size of an event from becoming too large and bulky.
Only one background image may be inserted per act with a maximum file size of 10MB.
Only PNG and JPEG files types are accepted.
Clear stageplot
This button clears the stageplot entirely, which can be useful when the user needs to start from scratch and does not want to clear each icon individually.
The Gallery
To the left of the canvas the gallery can be found. The gallery offers quick access to common icons that the user is likely to often use when building a stageplot. The gallery is also where the user can see the icons for the input devices as defined in the project.
It is important to know that if an input devices has been inserted into a stageplot and the user then changes the colours of the line system, that the icons already in a canvas space will not be updated to match. However, the icons in the Gallery will be updated to match the changes made to the project.
The gallery is also scrollable to see more icons.
The canvas
The canvas is where the user is able to manipulate icons and images inserted from one of the other menus.
Here, icons can be resized, moved, mirrored and arranged. Text on an inserted icon can be edited by double clicking on the text.
By selecting an icon in the canvas, additional actions become available from the Icon Options menu, such as grouping and stack order of icons.
The Icon Options menu
The Icon Options menu allows further manipulation of a selected icon(s).
With an icon selected the user is able to manipulate properties such as stack order and grouping of icons.
With an external image inserted into the stageplot the user is also able to crop the image as well as define it as a 'background', which embeds it into the background of the canvas and locks it in place.