Quick Start Guide
This page is intended to guide the user through their first steps with Master Patch and Stage Viewer.
For more detailed and specific information on functionality within applications, please see the specific page for that topic.
This quick start guide we will cover the following topics:
- What is Master Patch?
- What is Stage Viewer?
- Creating and defining an event
- Creating a running order for a day
- Inputting Channel list data on the Act Page
- Building a Stage Plot
- Building an Input Patch
- Building an Output patch
- Tracking other act related data
- Publishing the finished act to the network
Master Patch
Master Patch forms the control centre of a the system.
Here, all data is input, managed, manipulated and distributed to other users.
A single instance of Master Patch allows multiple users to connect and access data.
Master Patch requires a license for operation. For more information on licensing, head to the Licensing page.
Master Patch is available for both Windows and MacOS operating systems.
Stage Viewer
Stage Viewers are what is referred to as a 'viewer' application. Viewers connect to an instance of a Master Patch server to gain access to event data.
Stage Viewer instances receive live updates and warnings as data is managed from Master Patch.
Stage Viewer is available for Windows and MacOS operating systems. A portable iOS application is also available.
Create an event
On first load of Master Patch the user will land on the start page.
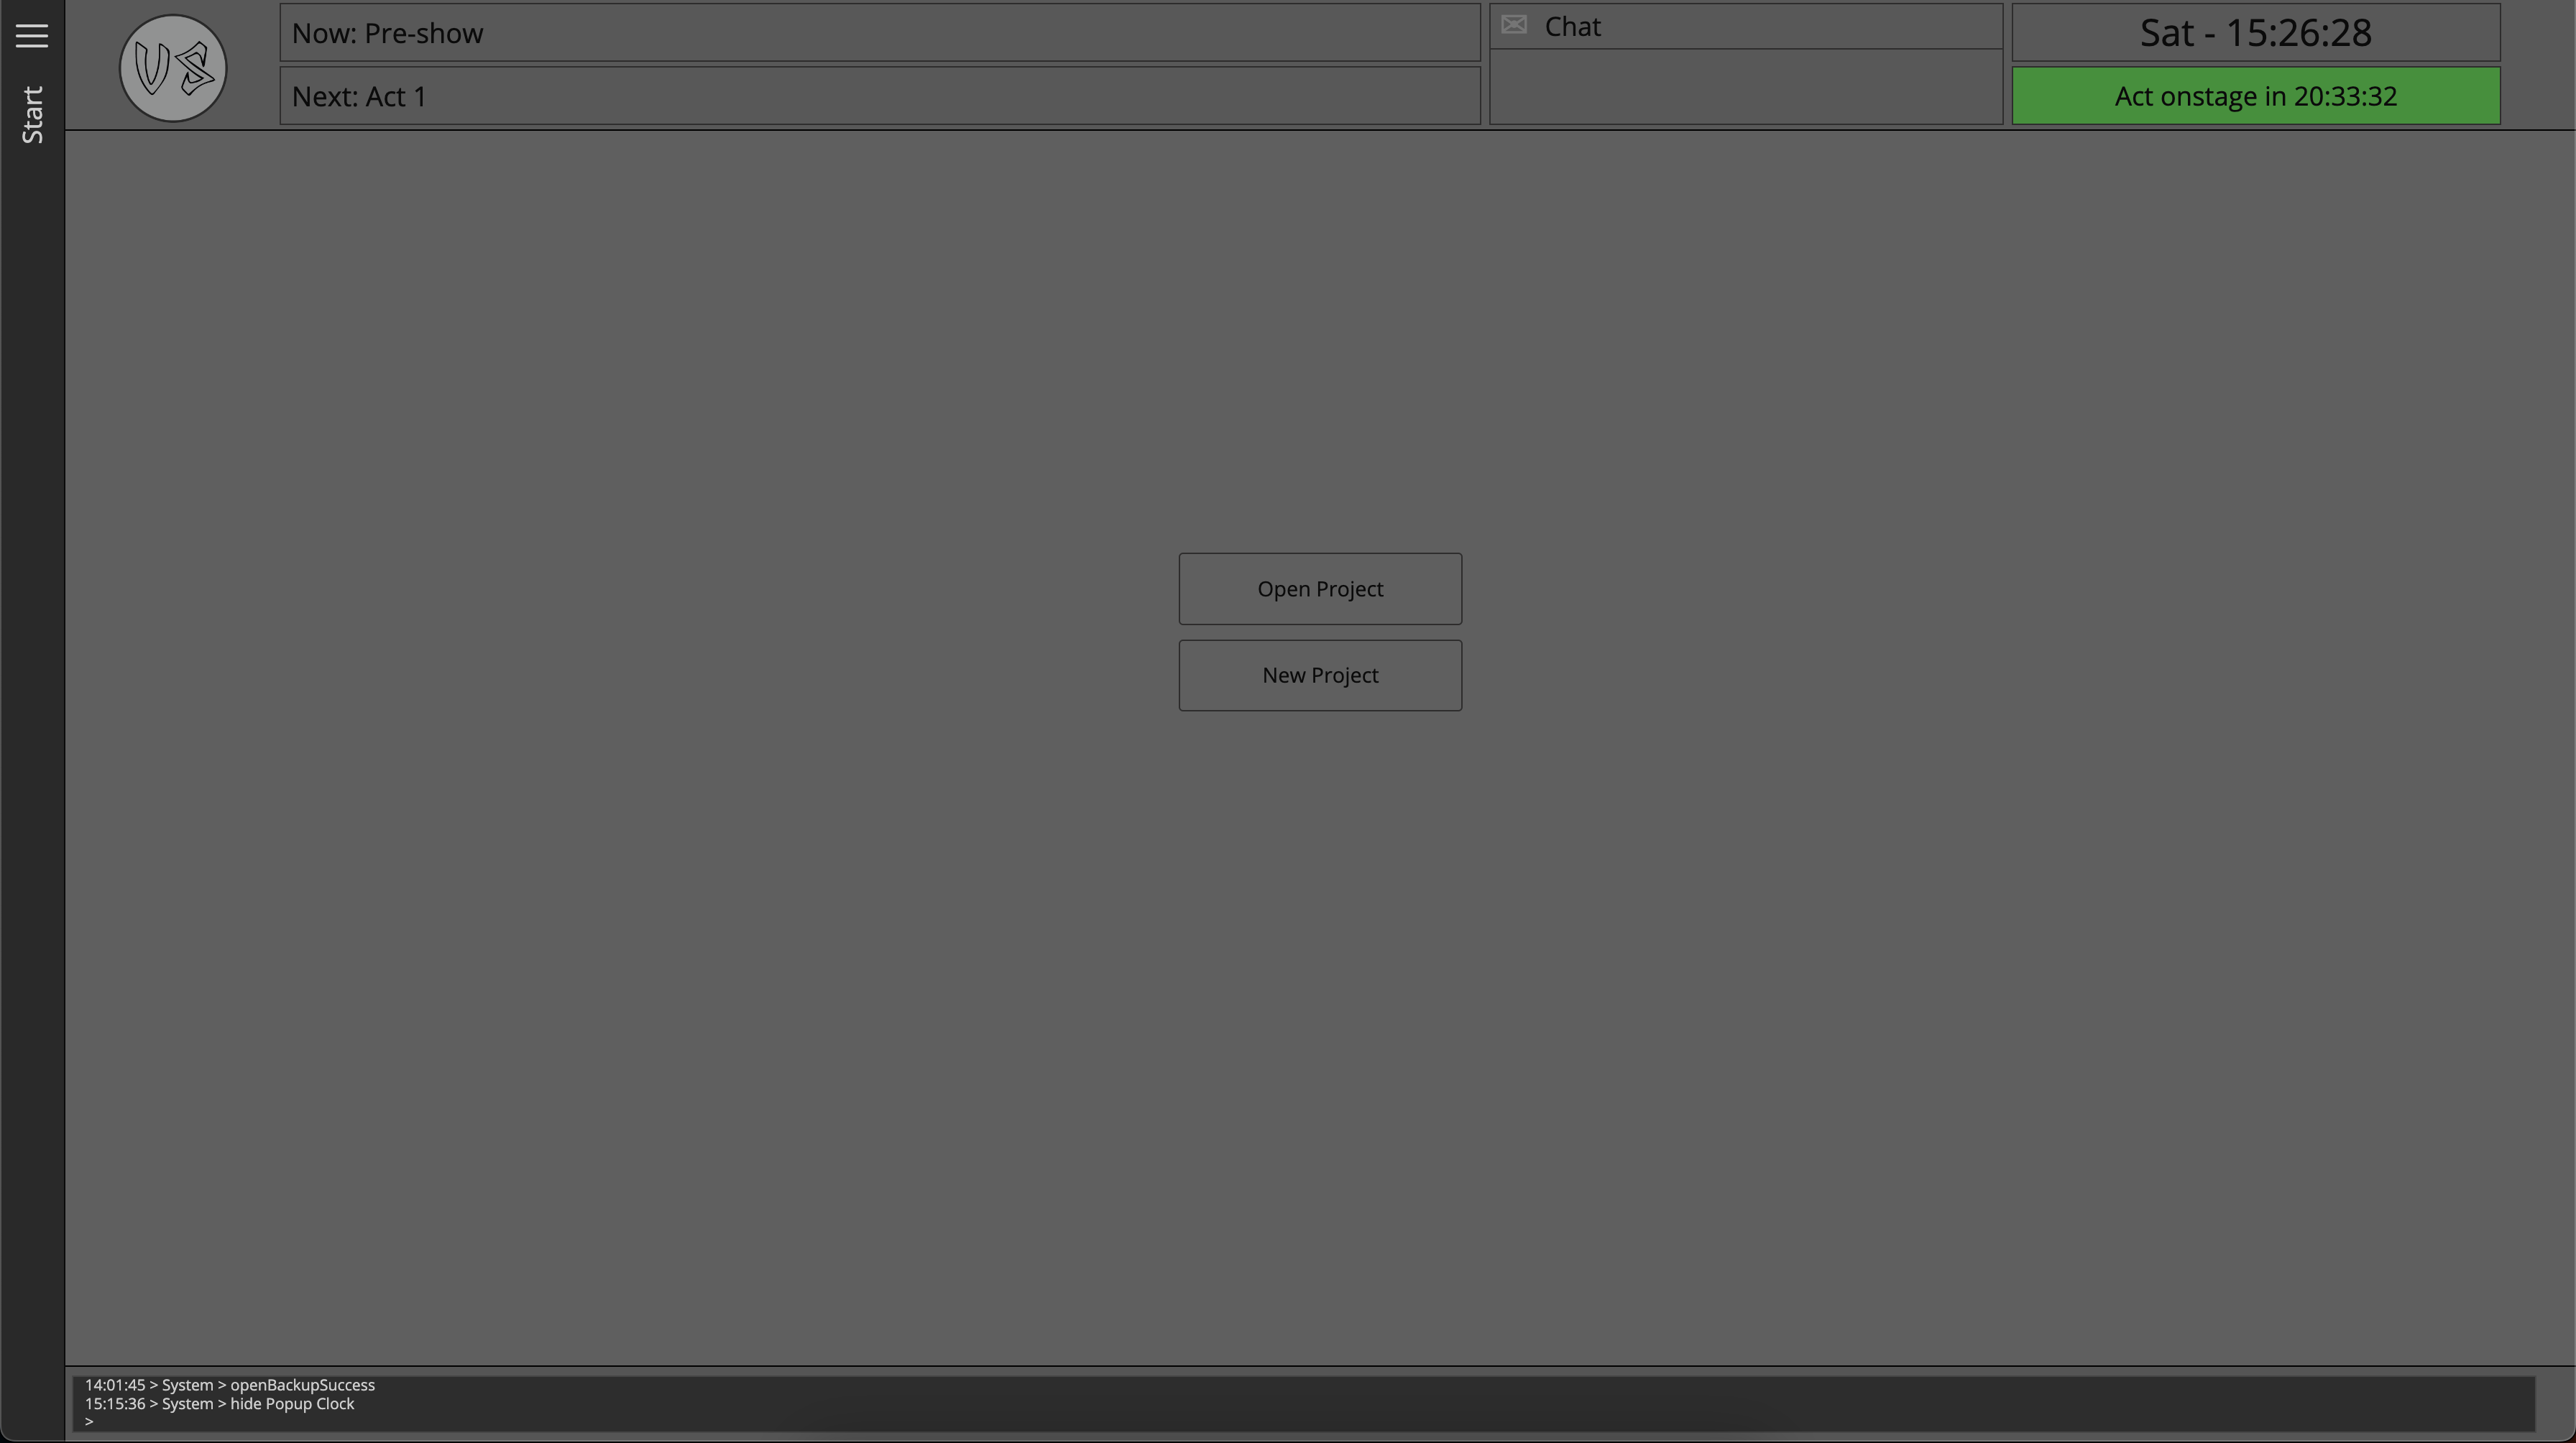
From here, the user can start a new project or load an existing project.
Let's start a new project.
Defining an event
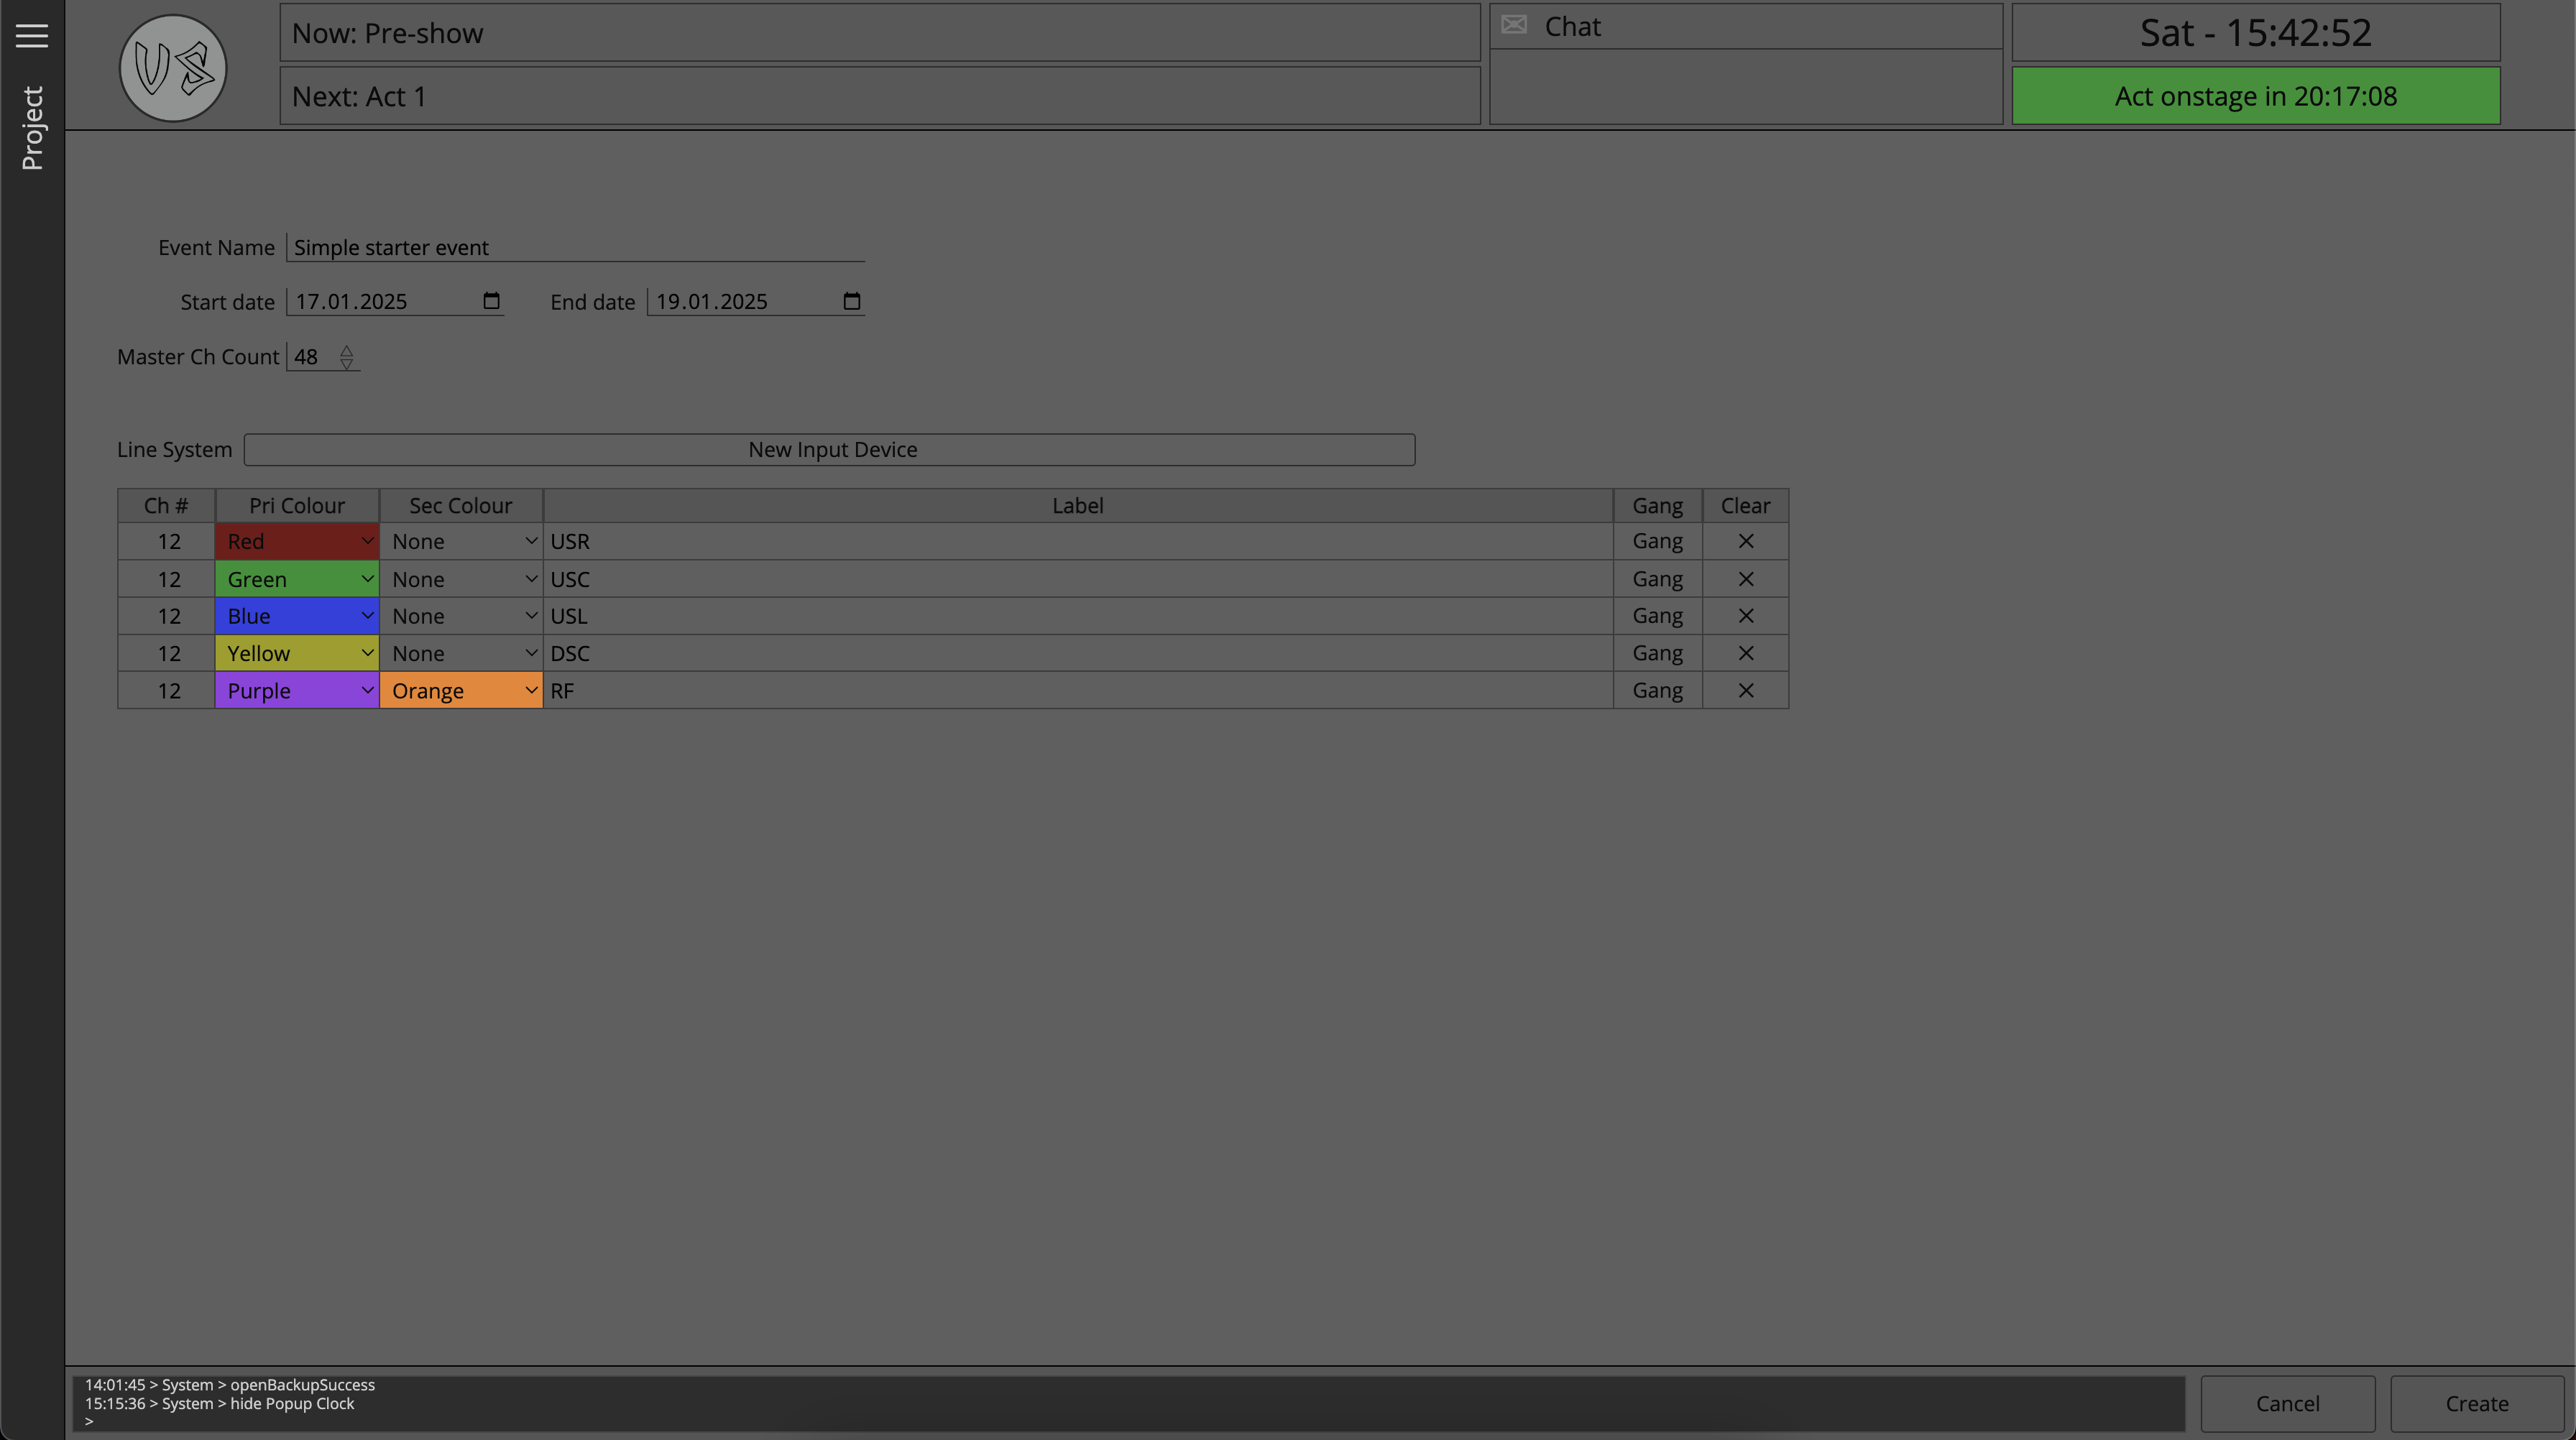
After starting a new project, the application is redirected to the Project page. From this page the user is able to define the scope of the project.
For more information on this page, check out the Edit Project Page
Let's go ahead and define a simple three day event with a basic line system.
All settings on the Edit Project page can be updated at any time, so if the user needs to come back and change the project configuration after creation they are able to do so.
Event Overview
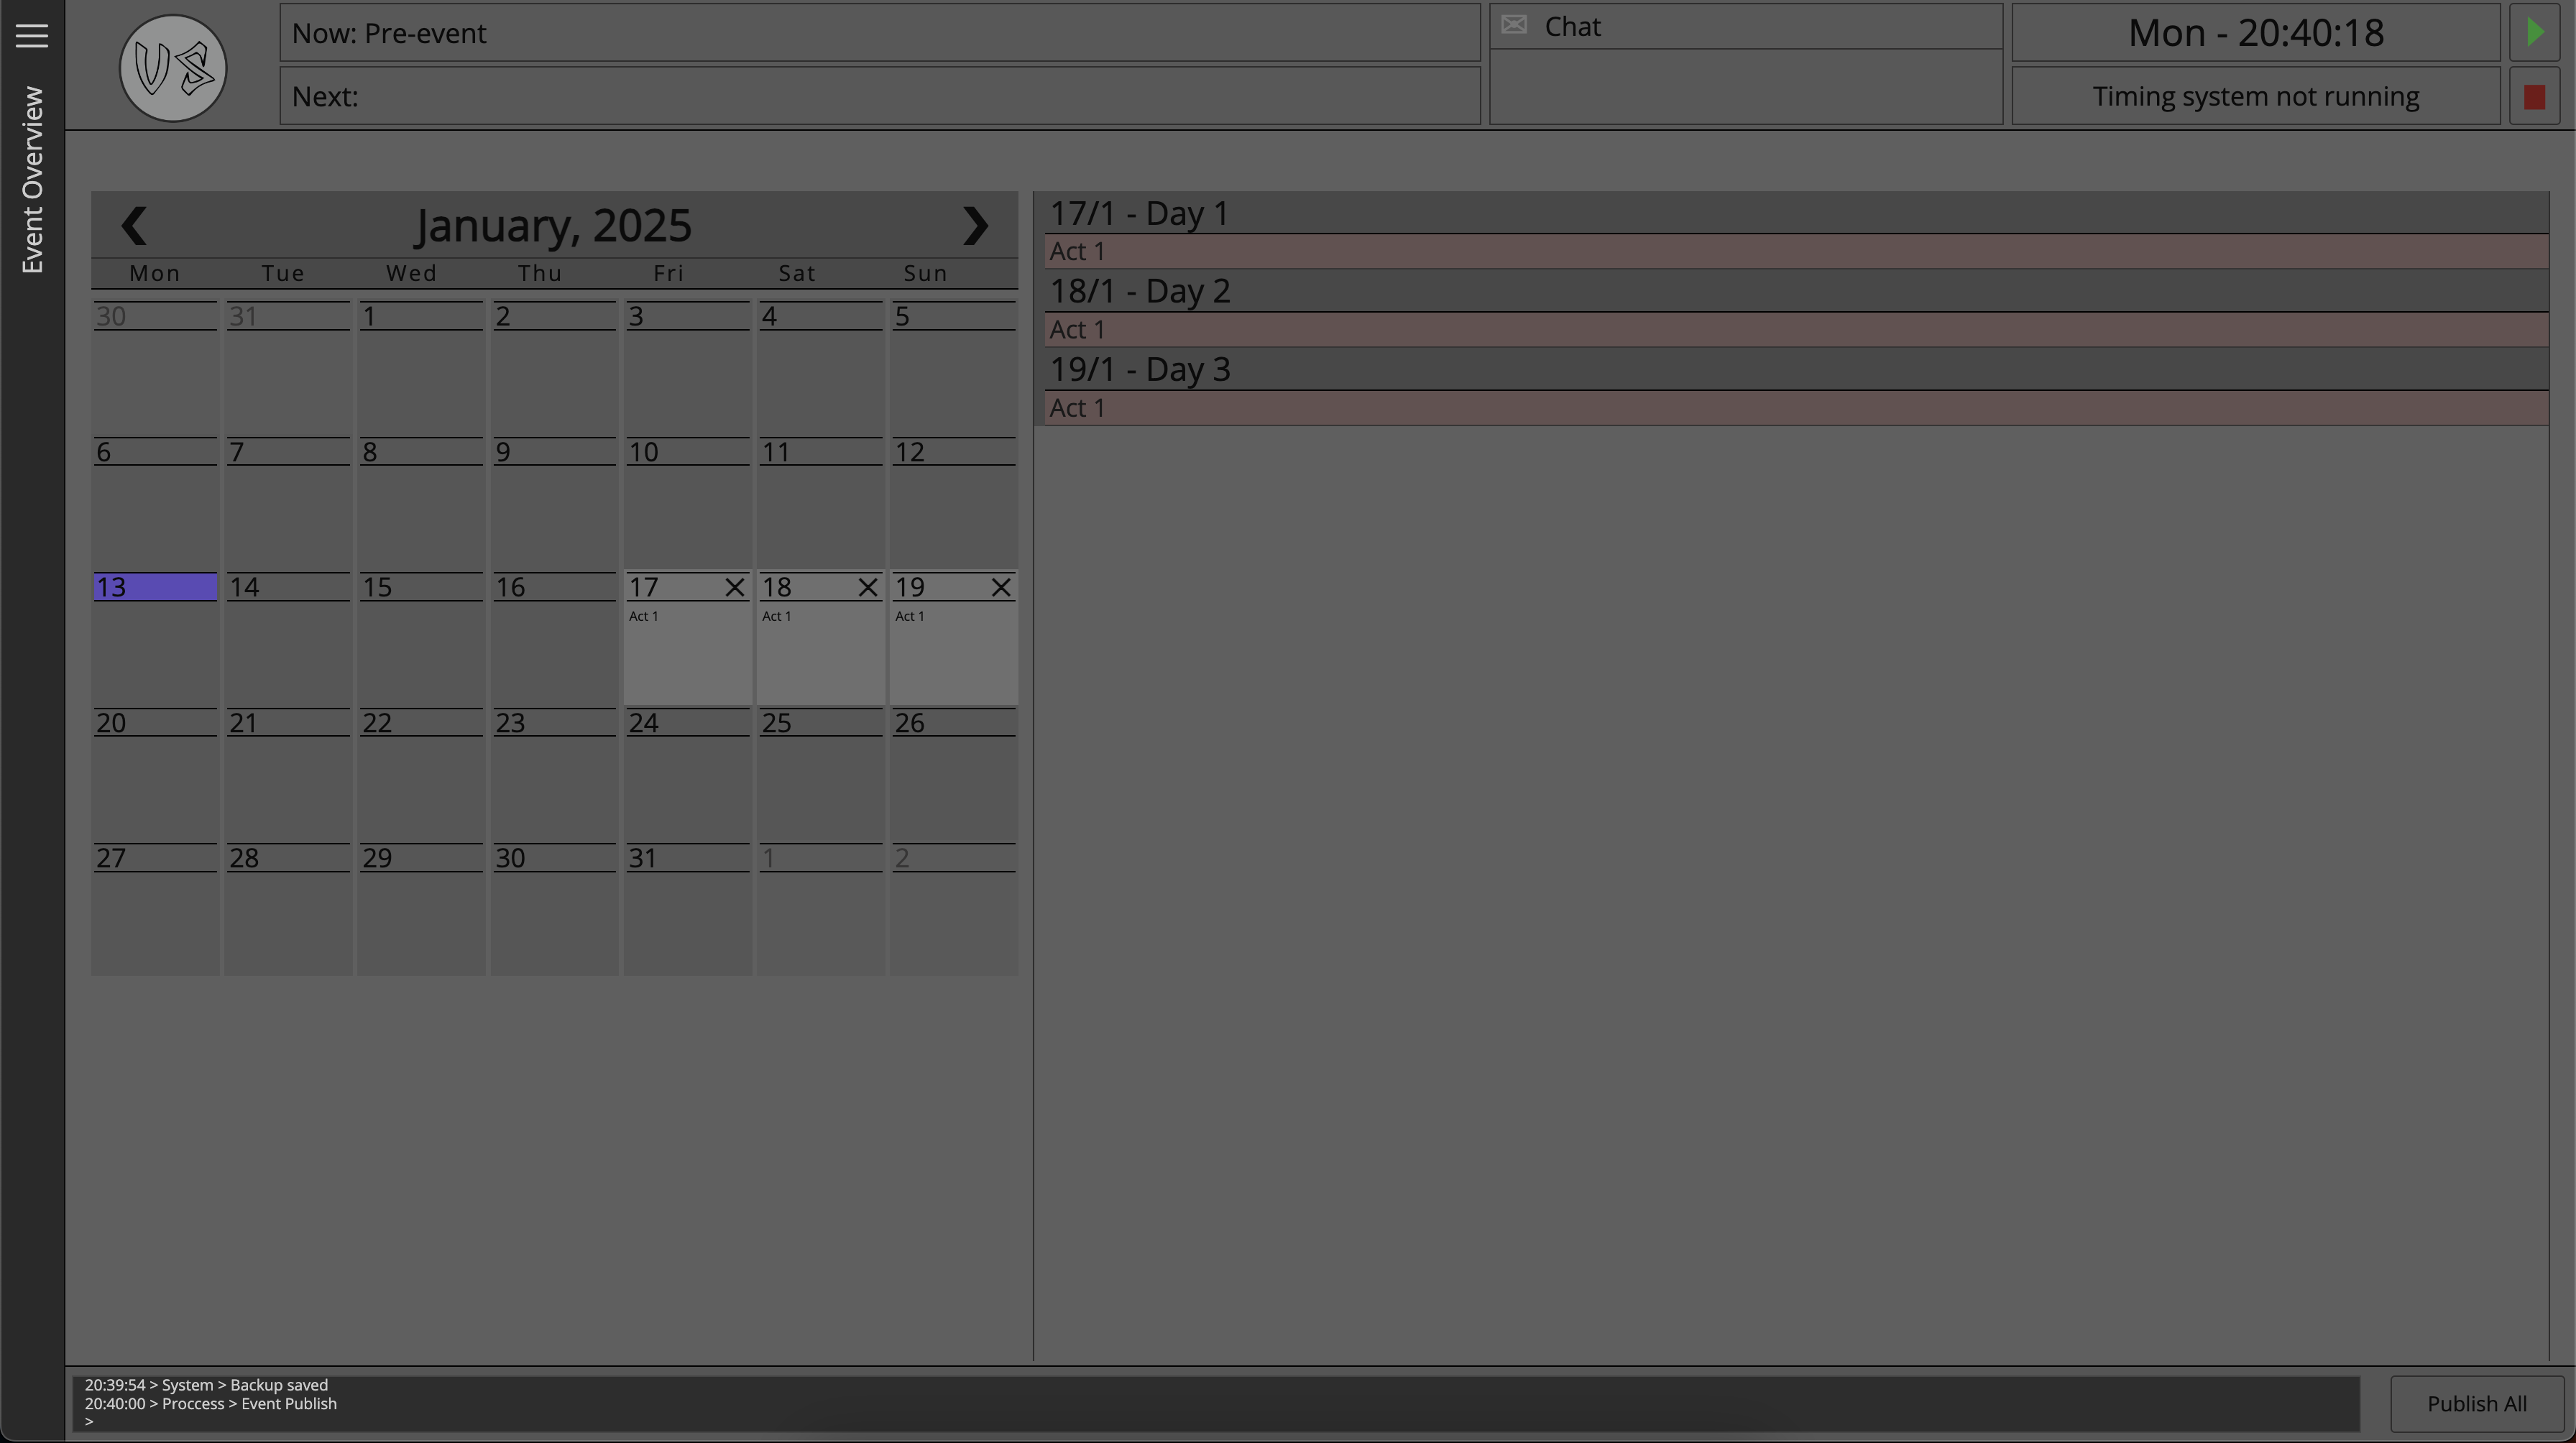
After choosing a location to save the project, the user will be directed to the Event Overview Page.
From the Event Overview page, the user is able to select a day from either the calender, or the list of days in the project overview section to the right of the page.
On selecting a day, the right hand-side pane will show the Running Order - a list of the day's acts initial information, as well as information on changeovers.
Here, the user can set times and 'Team Colours' as well as add, insert, or delete acts from the day.
The field for 'Team Colours' will only show if enabled in the Preferences Workspace Page.
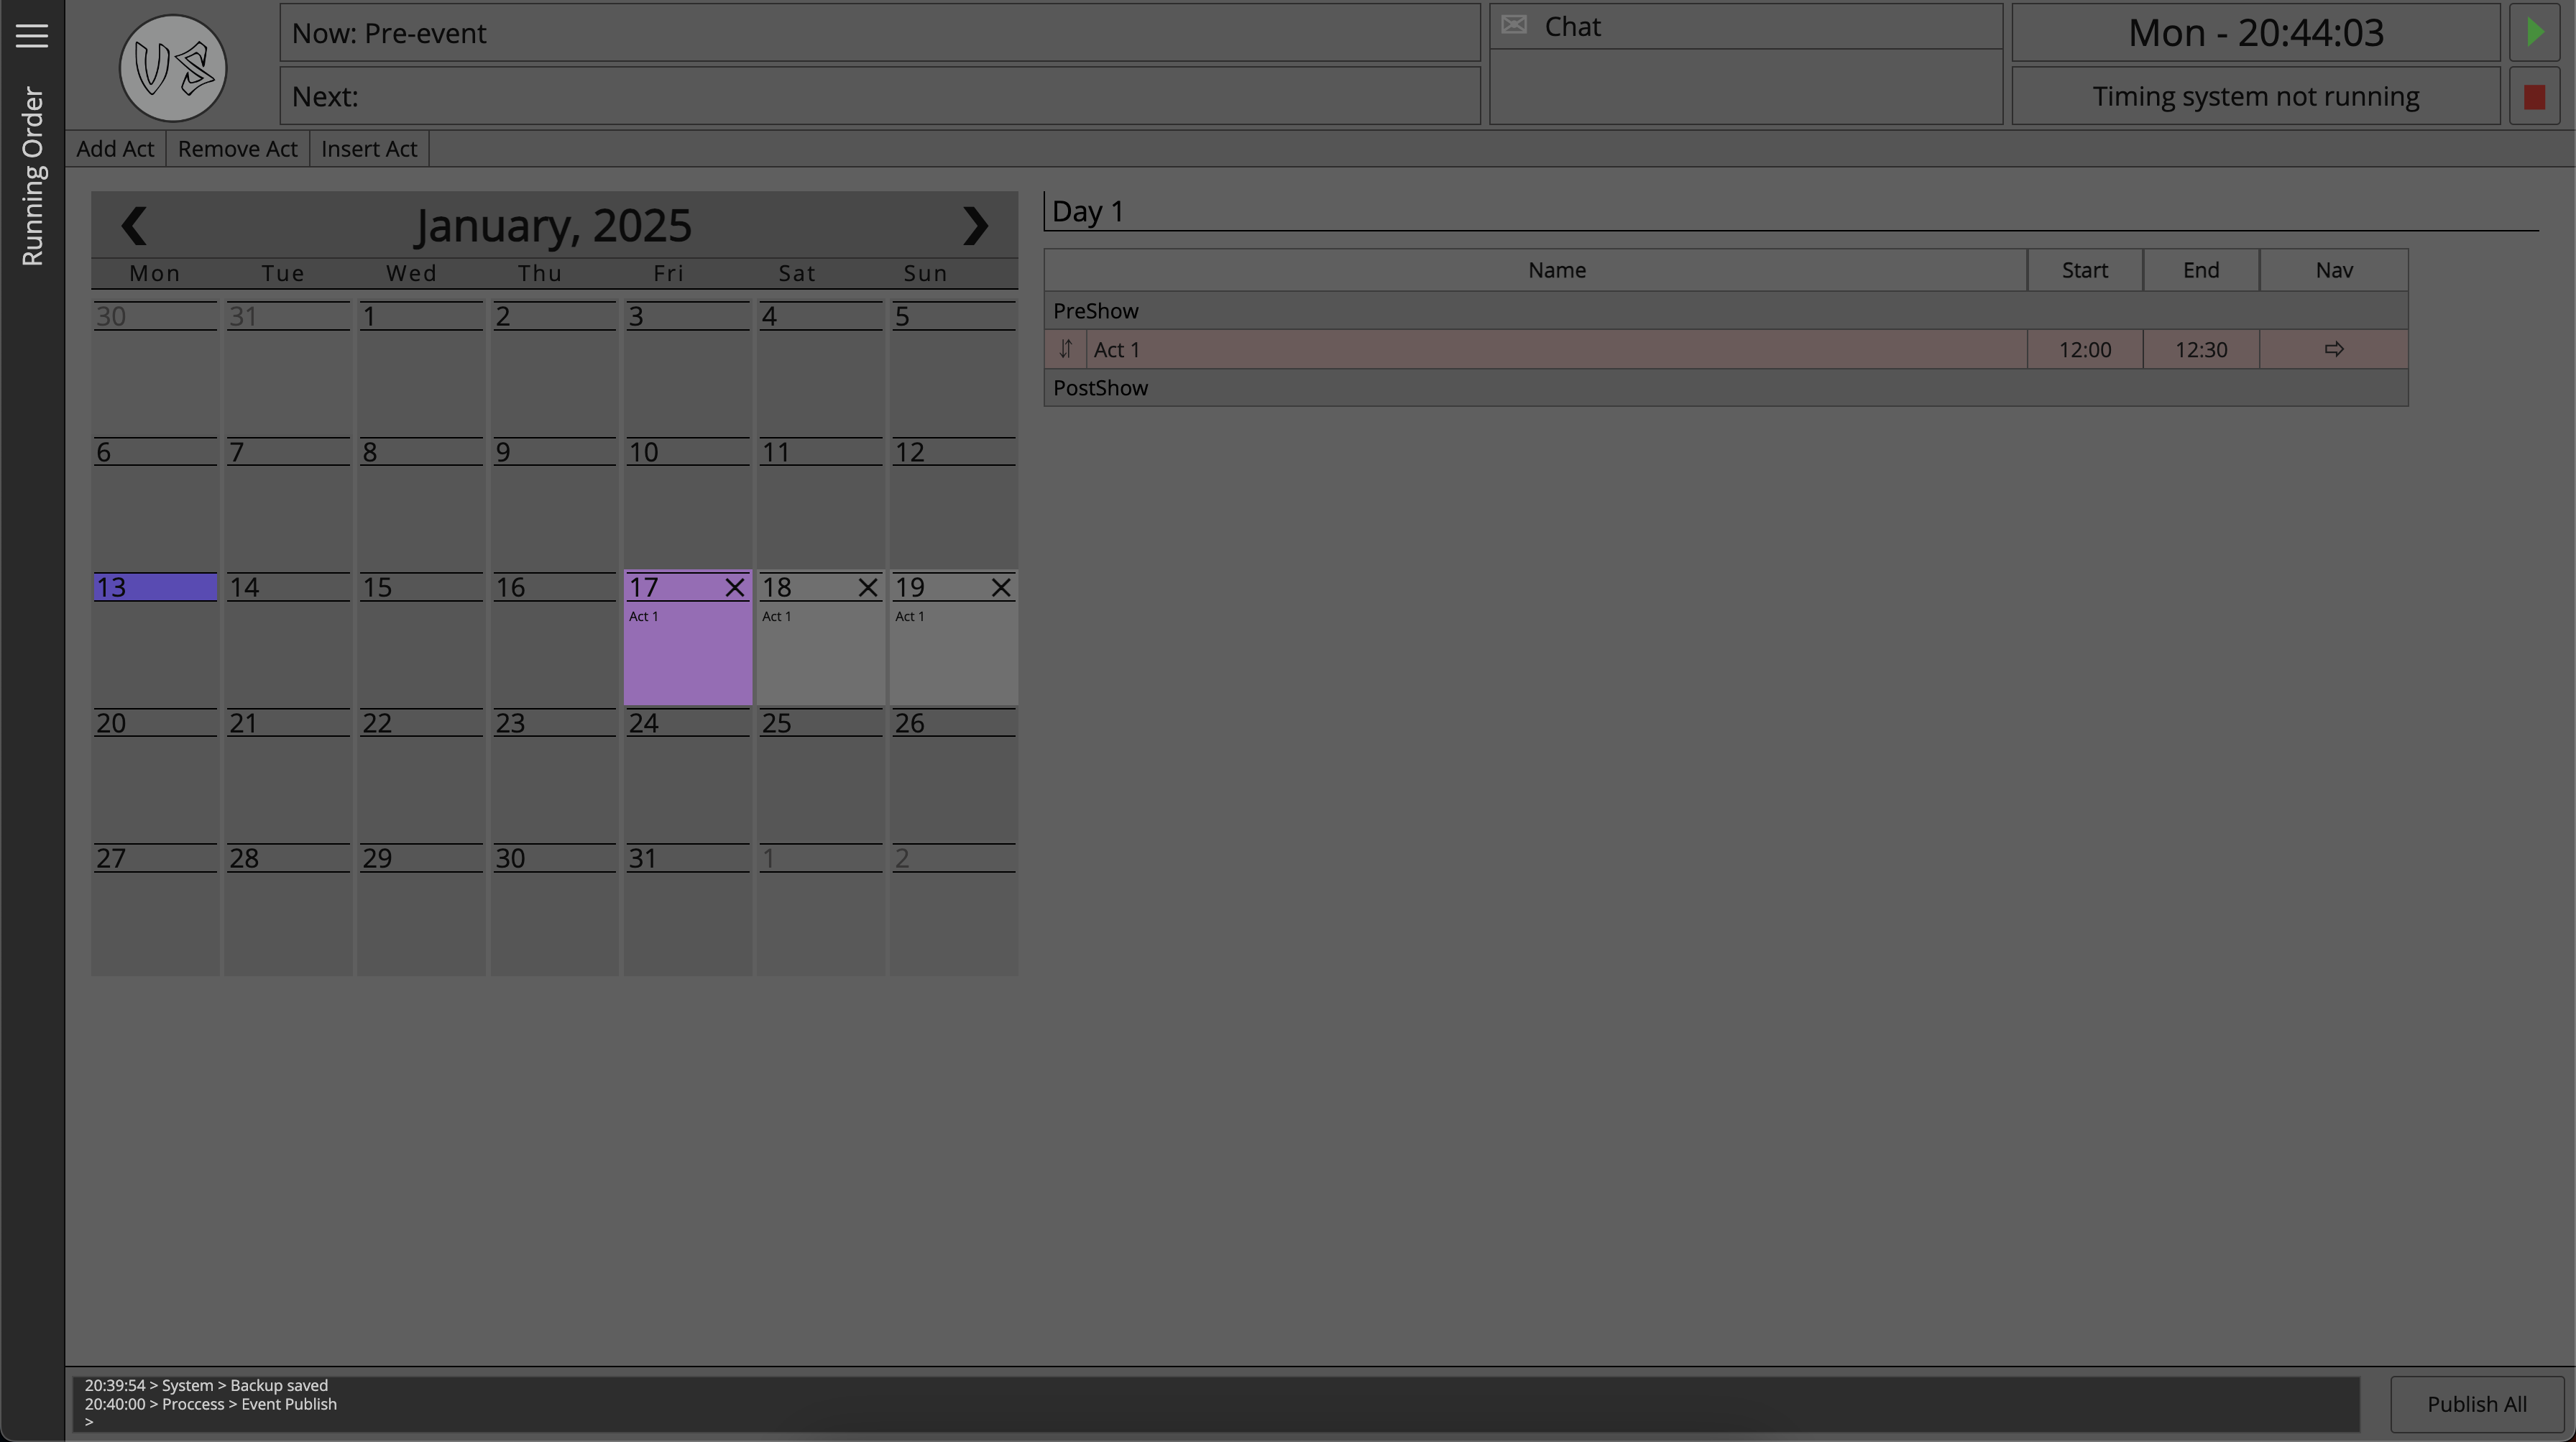
Let's go ahead and add a few acts, information such as the act's name, start and end times, and assign them to two different team colours.
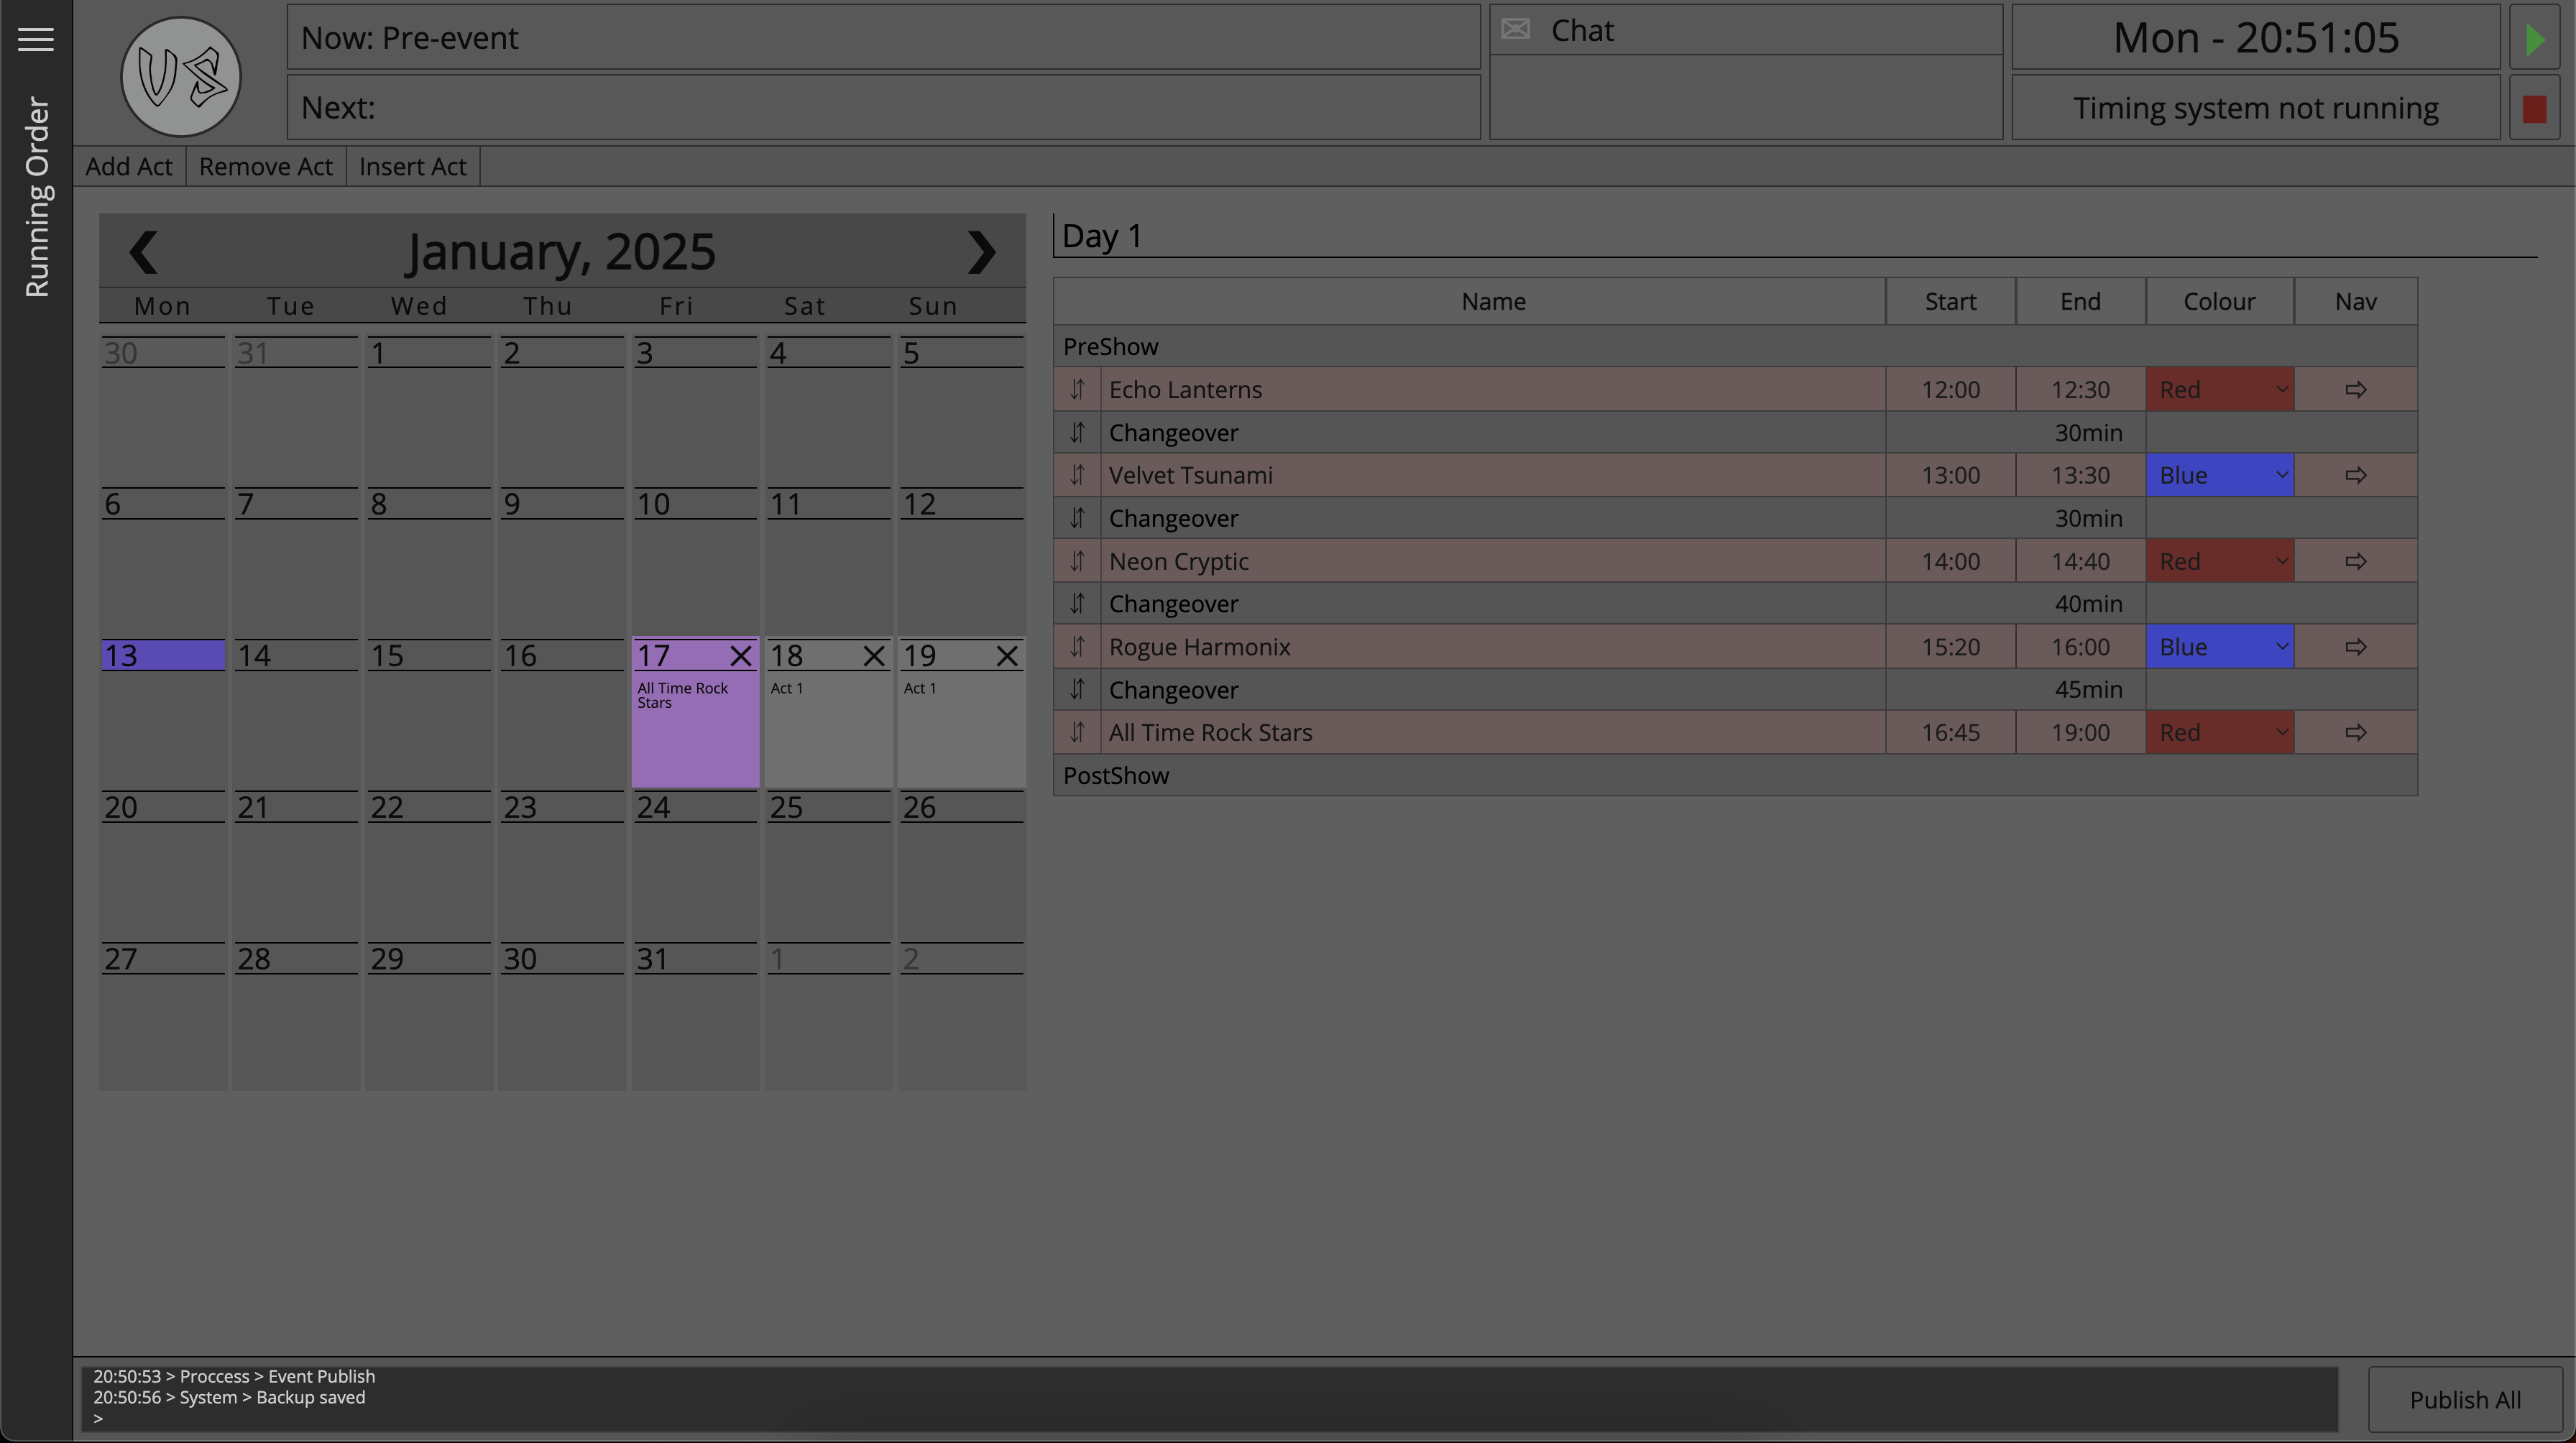
Once the act's information has been input, navigate to the Act Page for one of the acts using the arrow button to the right of the row.
Act Page
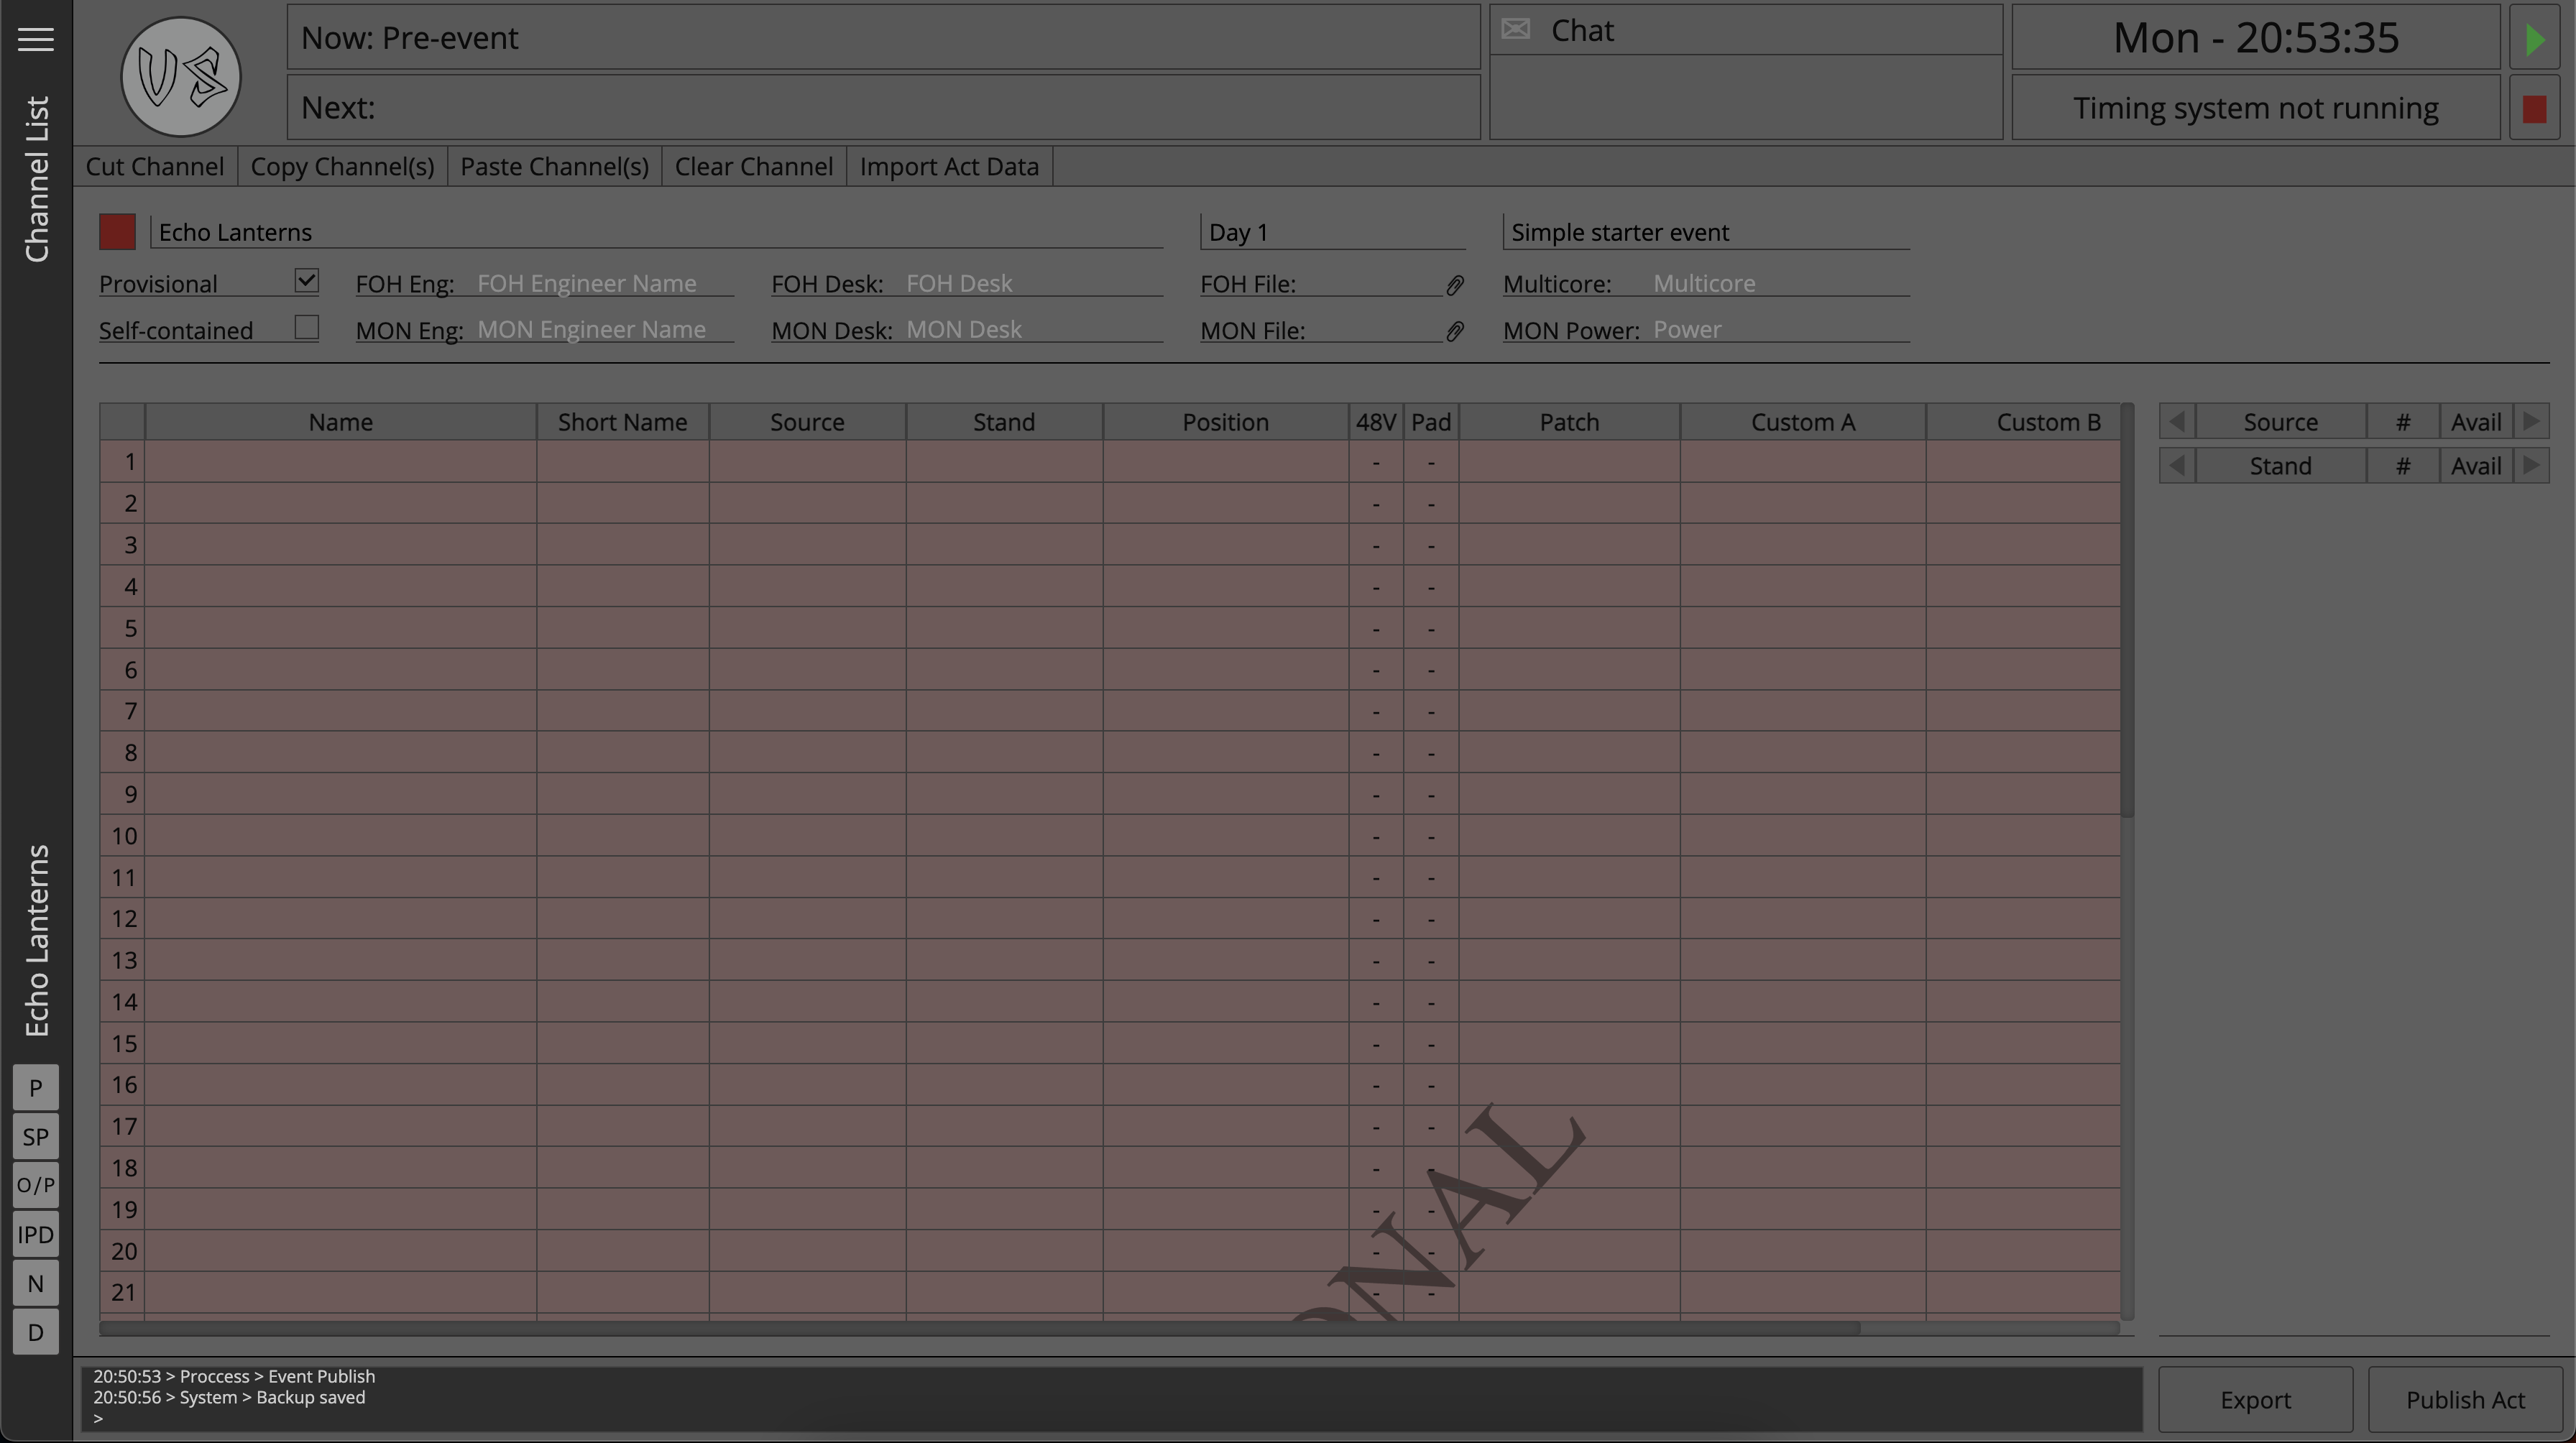
Selecting an act navigates the user to the Act Page. The Act Page is the main area where the user will input and update data which will then be available to other users on the network.
Lets go ahead and input some channel list data for the act.
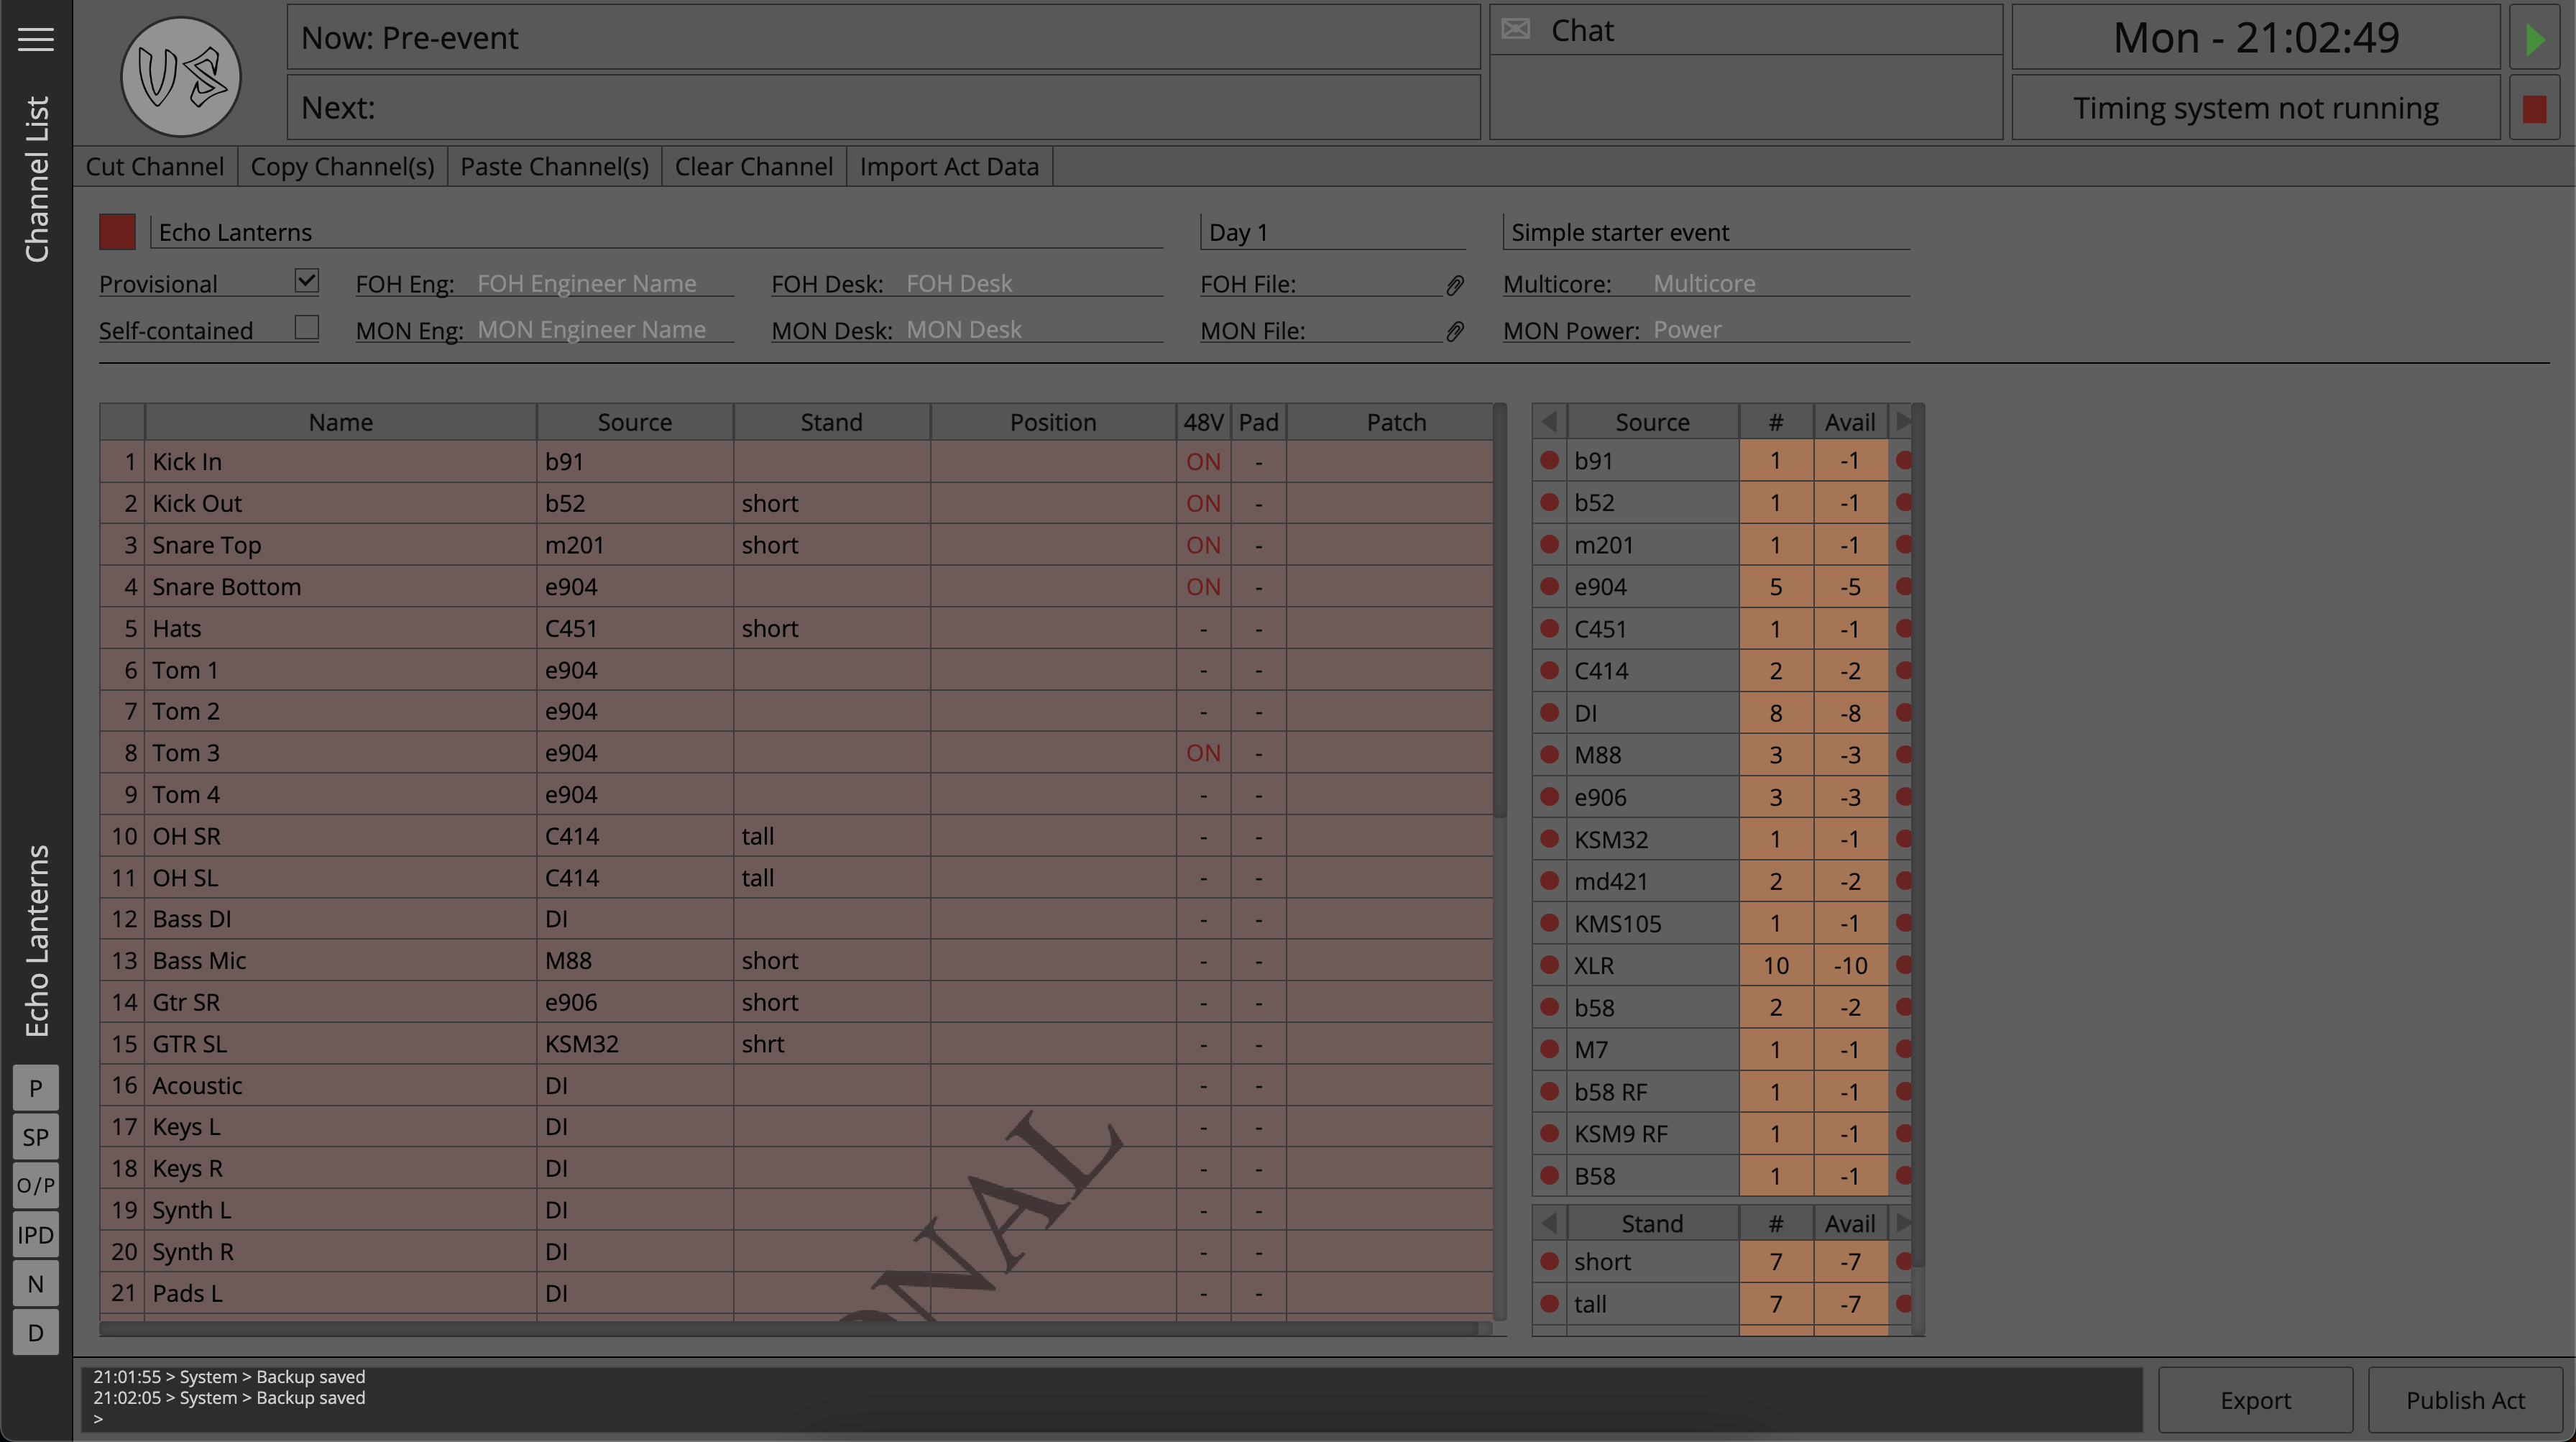
For presentation purposes some of the unneeded columns have been hidden, this can be done from the Workspace Preferences Page
Now that the act has some data in the channel list, it can be seen that the inventory summery tables have also been populated, to learn more about the inventory system within Master Patch please see the Inventory section.
With some data now in the channel list the next task to complete is building a stage plot. To navigate to the Stage Plot Builder page use the button on the side slider tab marked 'SP'.
Stage Plot Builder
For an in depth look at the stage plot builder within Master Patch, please check out the Stage Plot Builder section of the docs.
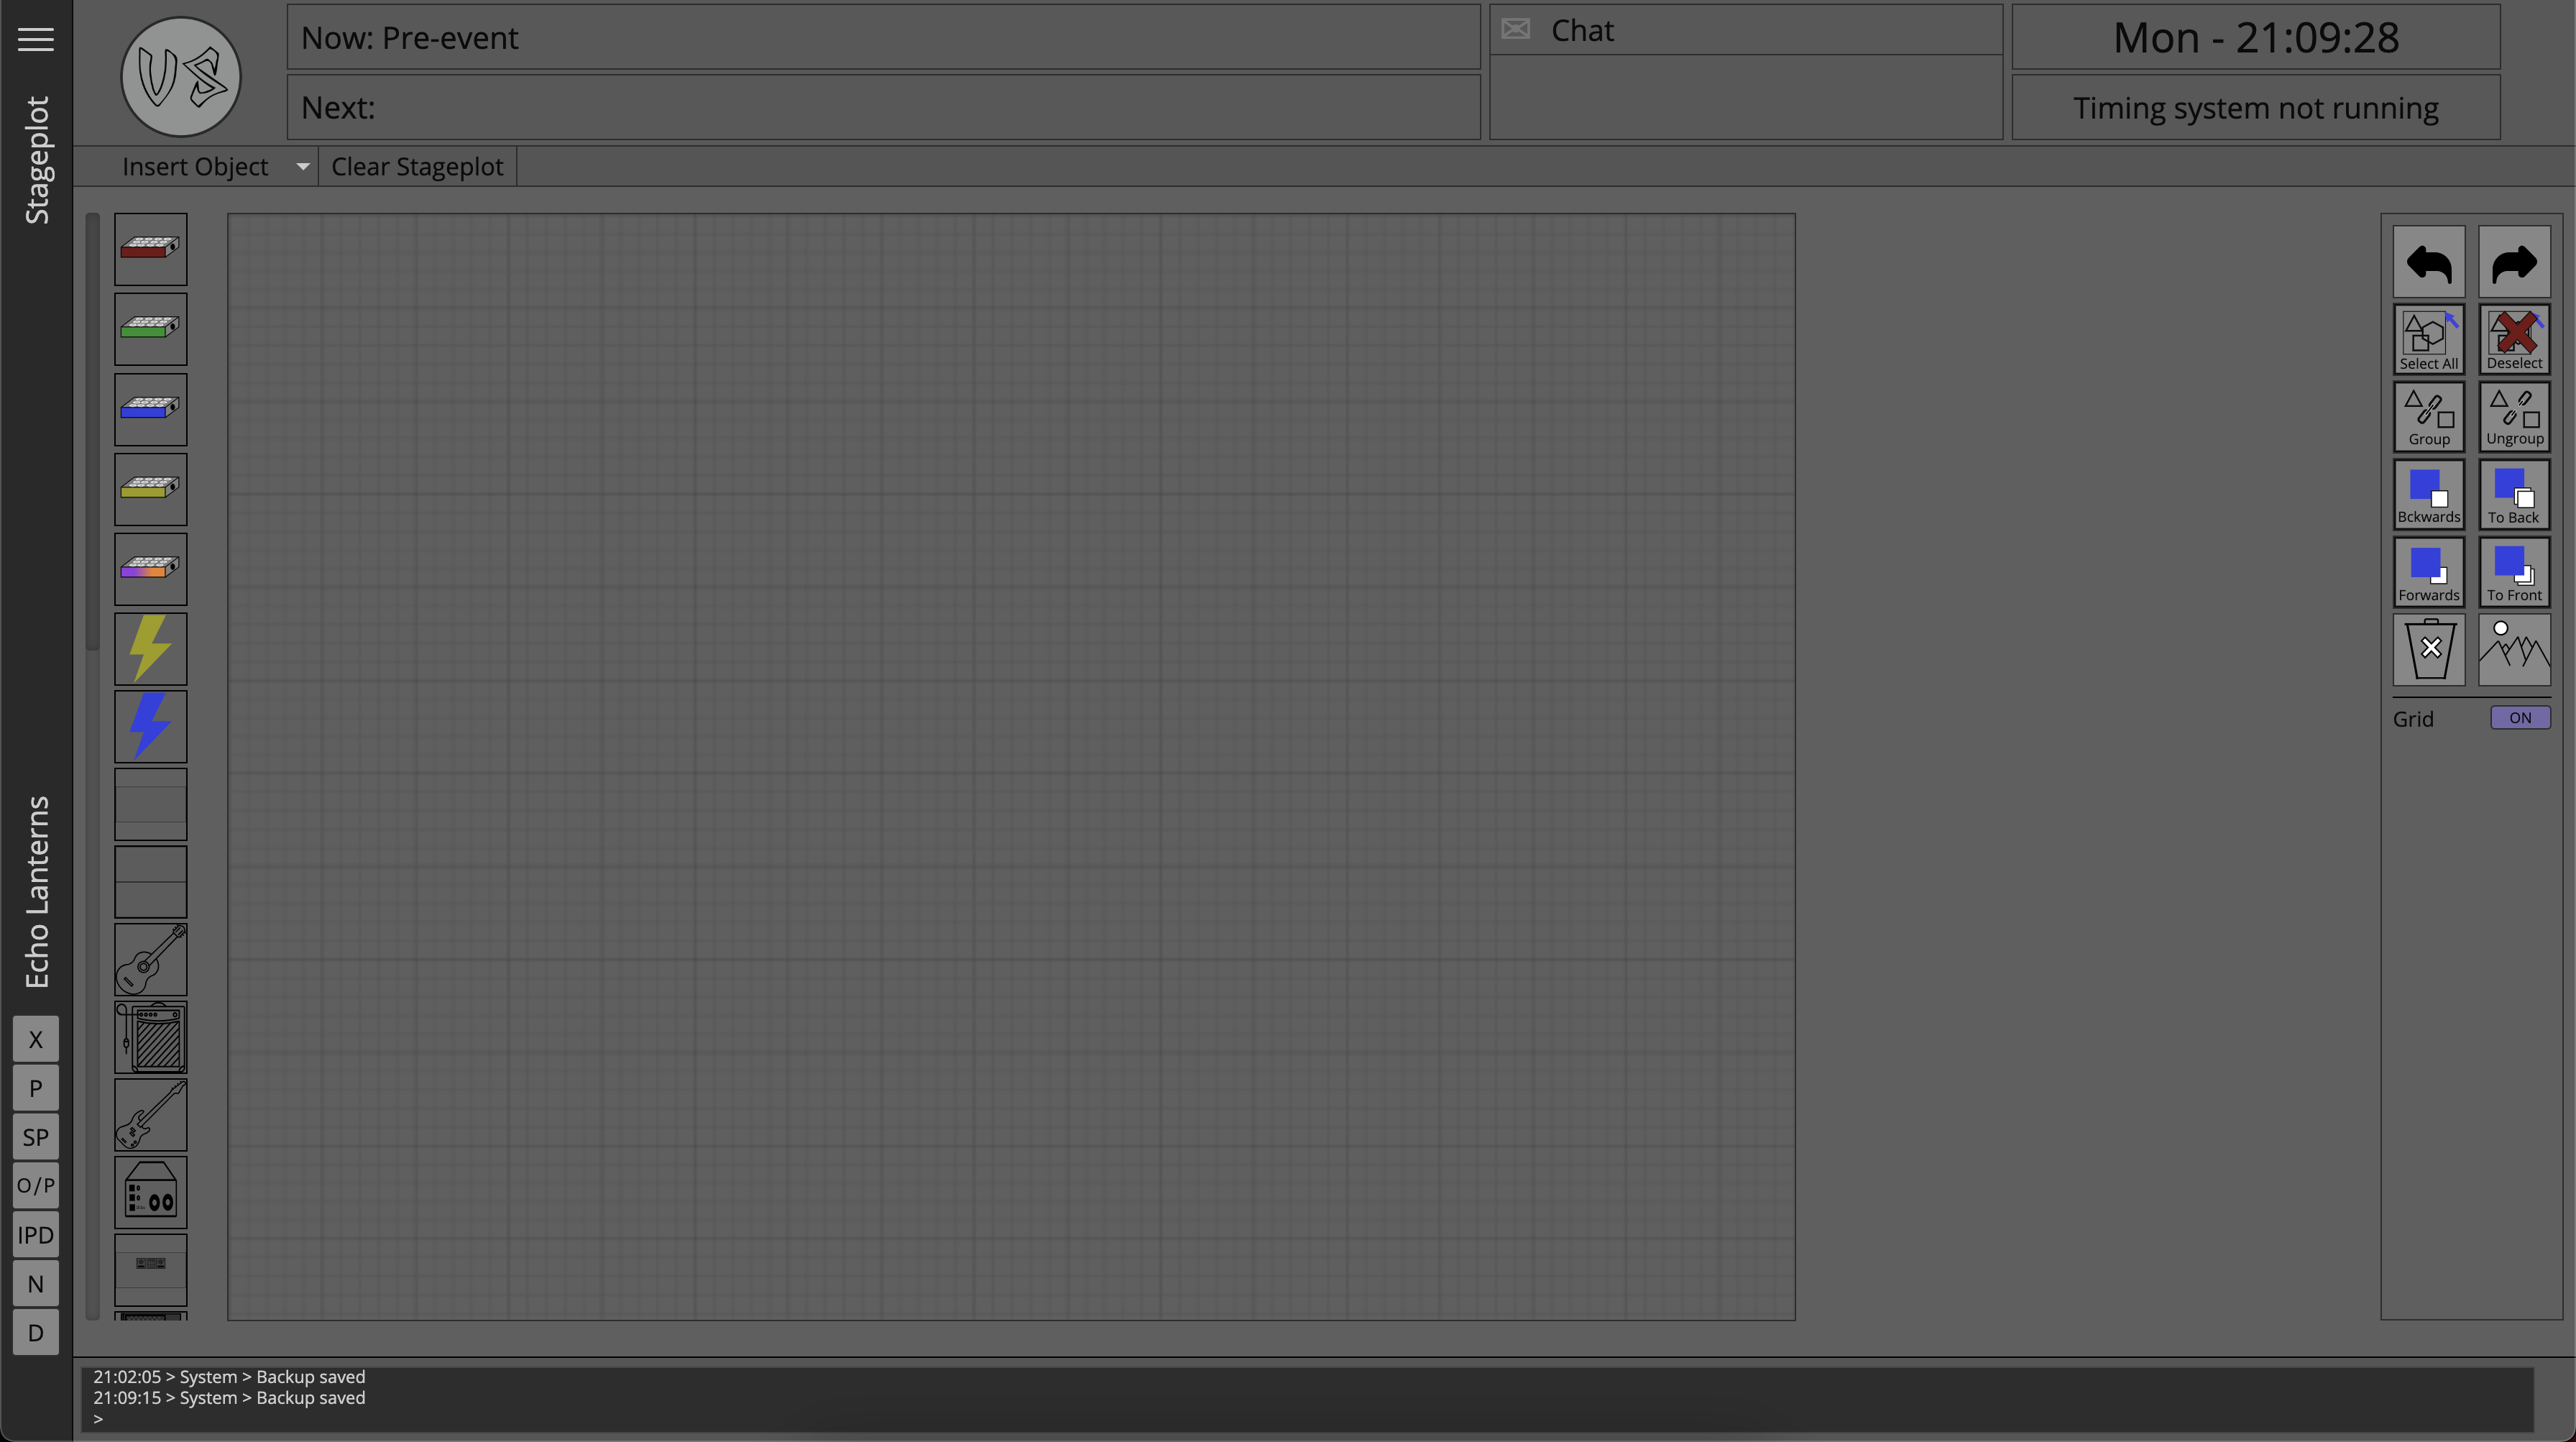
If the user had an image of a stage plot it could first be imported, set as the background and then annotated, however for this walkthrough the stage plot will be built manually.
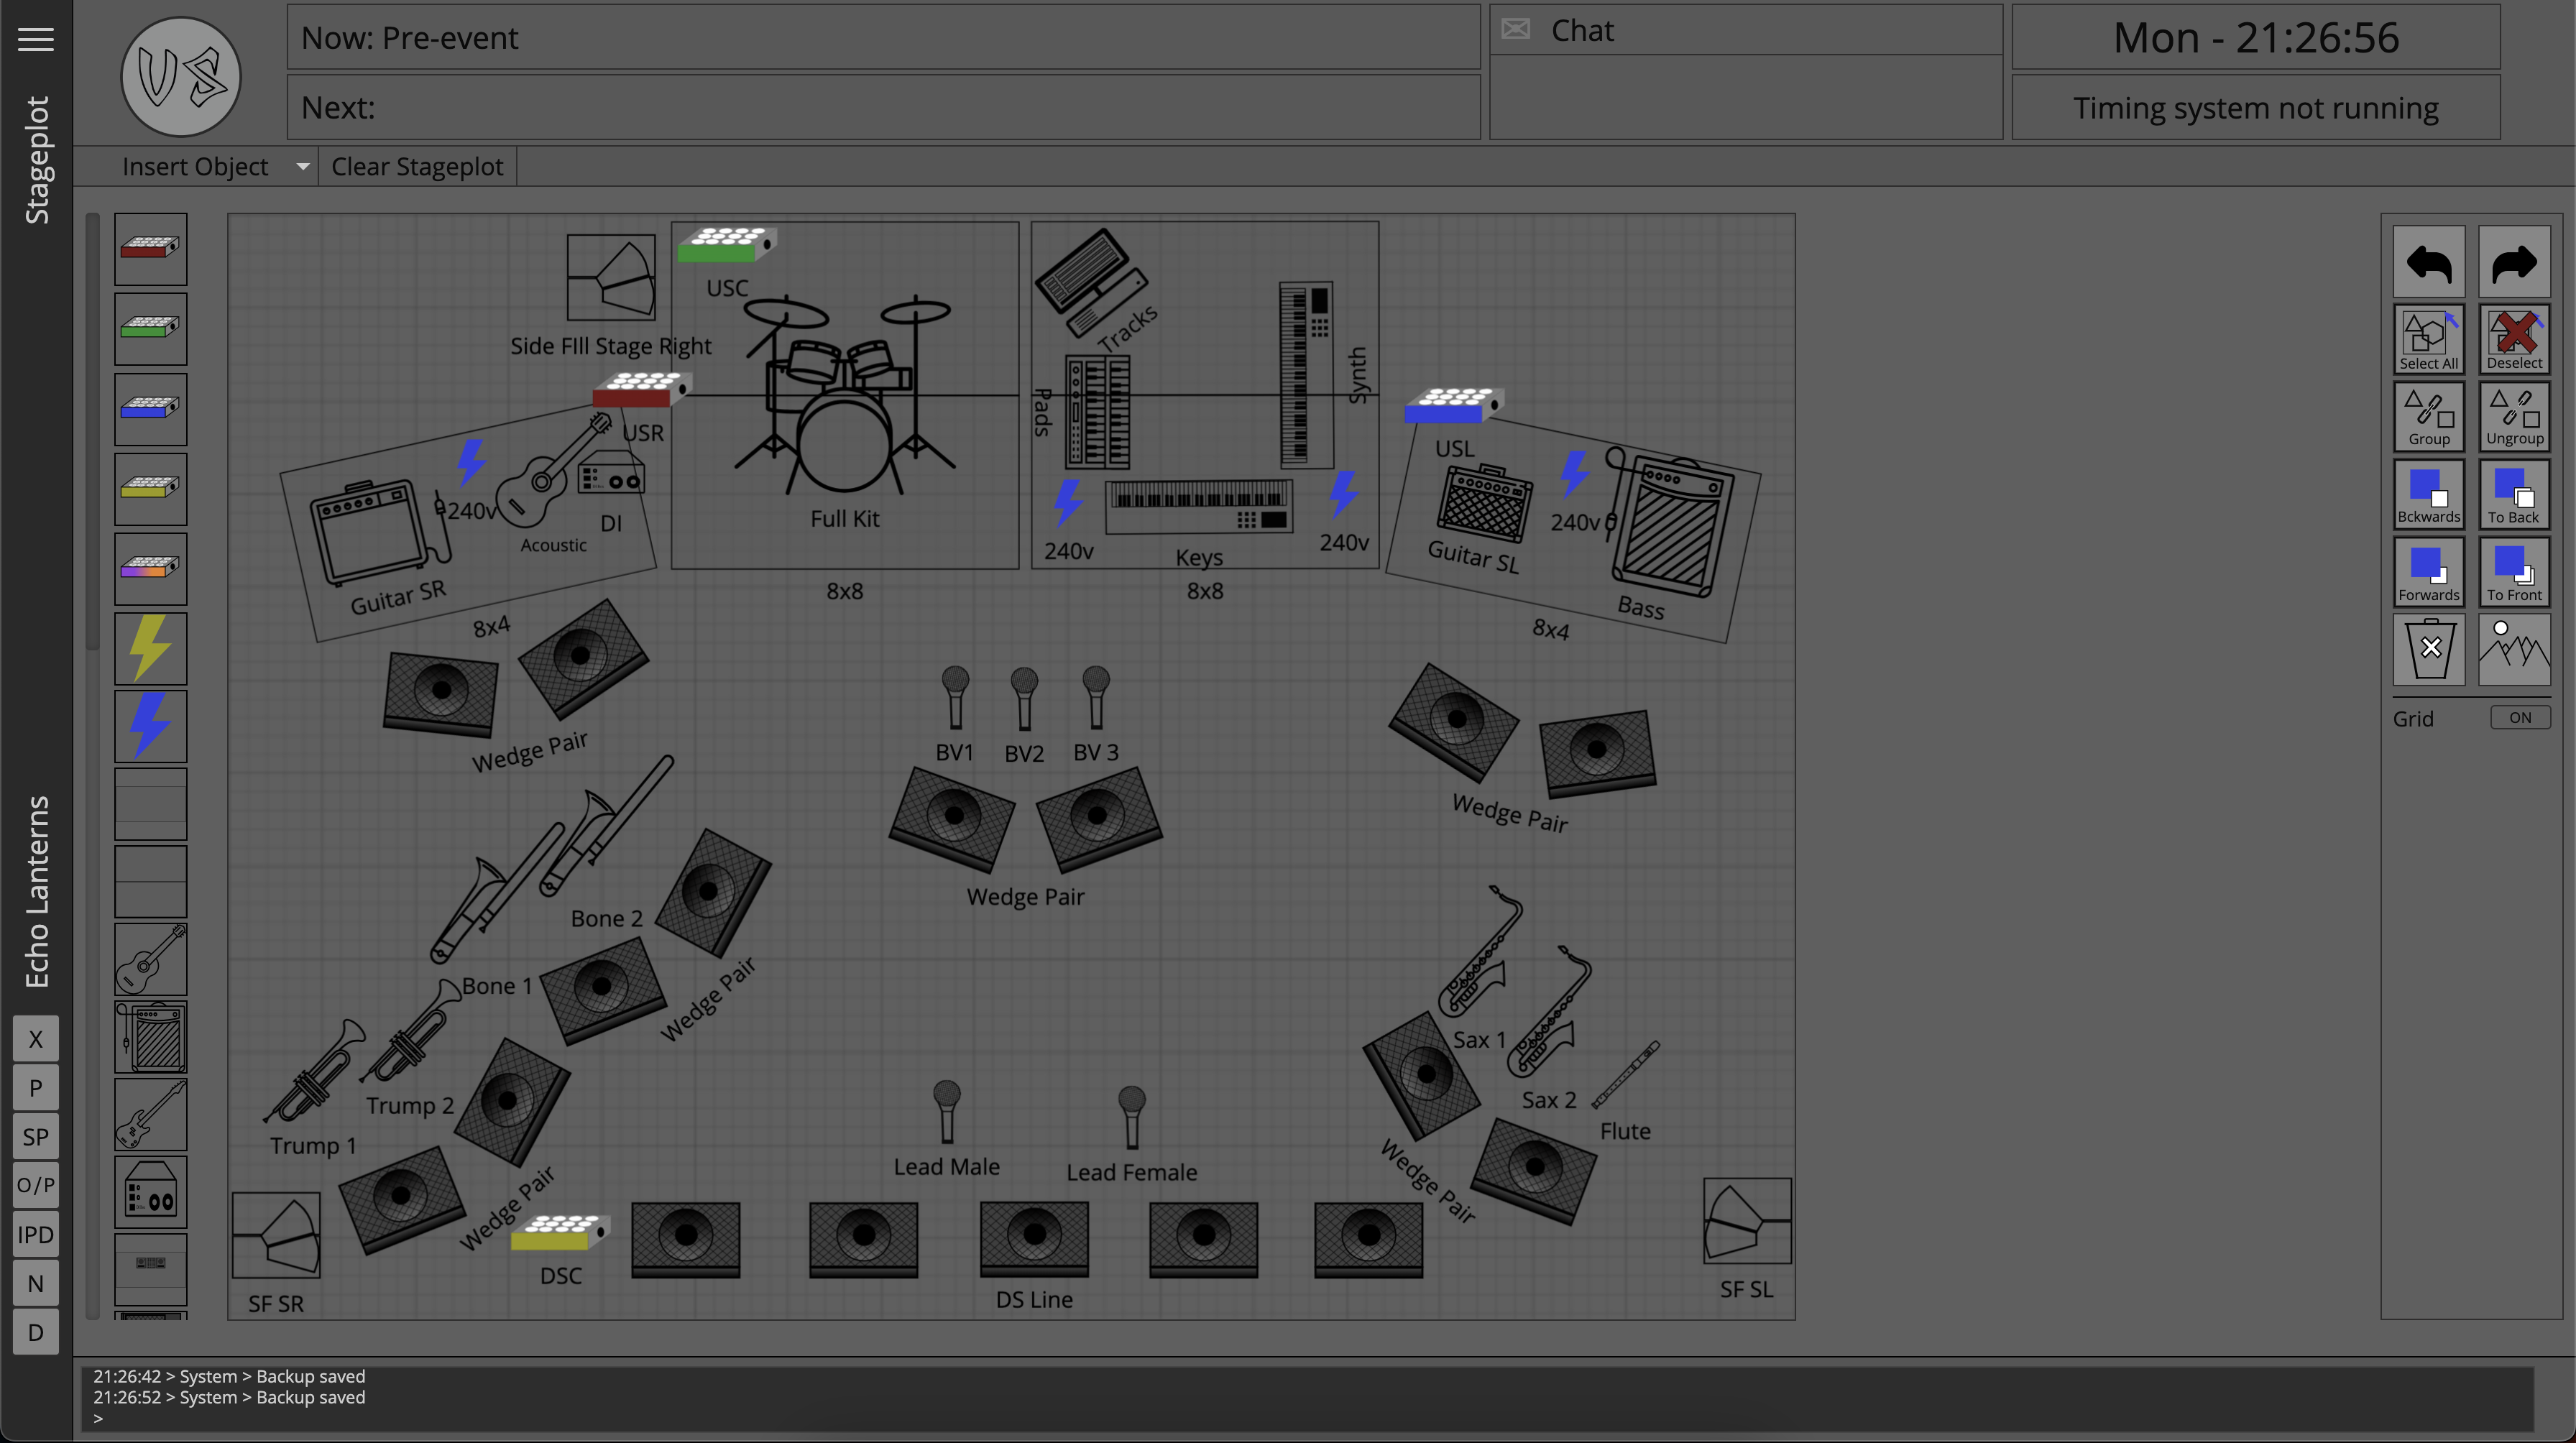
Stage plot icons can be imported from either the gallery to the left of the stage plot canvas, or from the drop down sections of the ribbon menu.
Icons can be manipulated from the panel on the right where actions such as grouping and layer positioning can be performed.
With the stage plot built, the user can now go and decide on the patch for the Act, one way to do this is from the Matrix Patch page, which can be navigated to using the Side Slider button labeled 'P'
Matrix Patch
A detailed breakdown of the Matrix Patch and its functionality can be found on the Matrix Patch Page.
The matrix patch page shows the channel list on the left, and the input devices as defined in the Edit Project Page along the top.
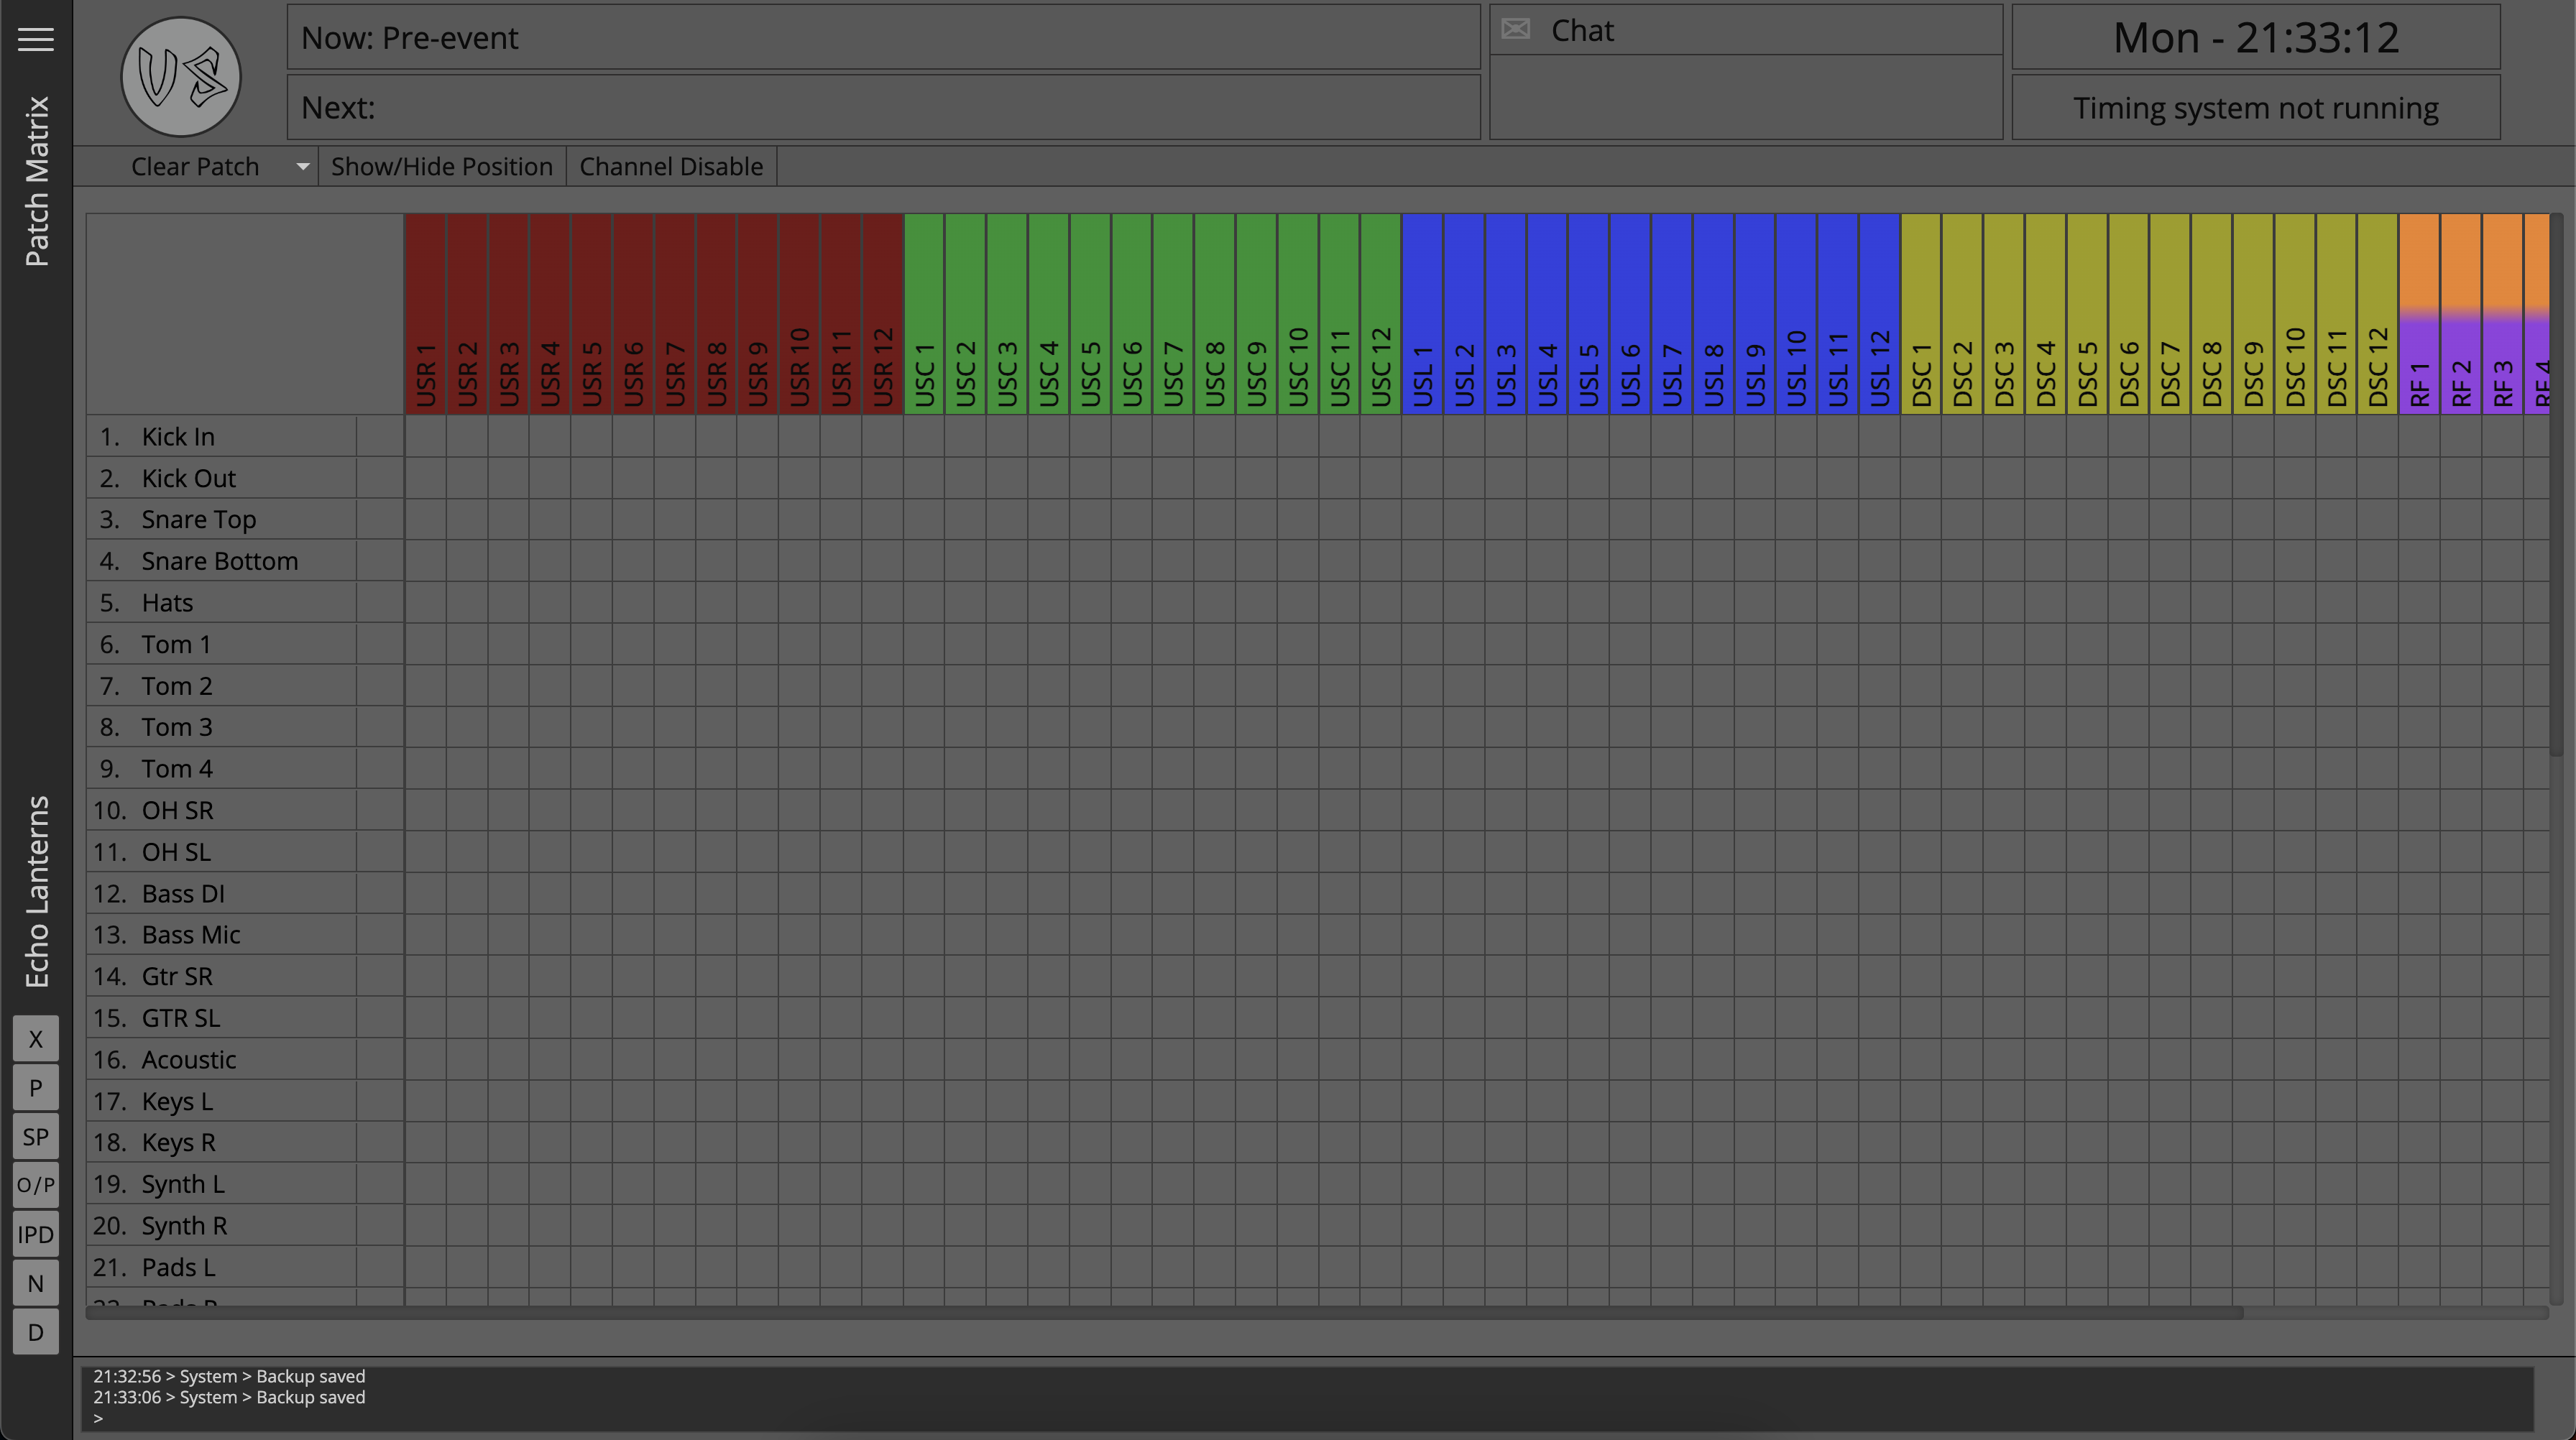
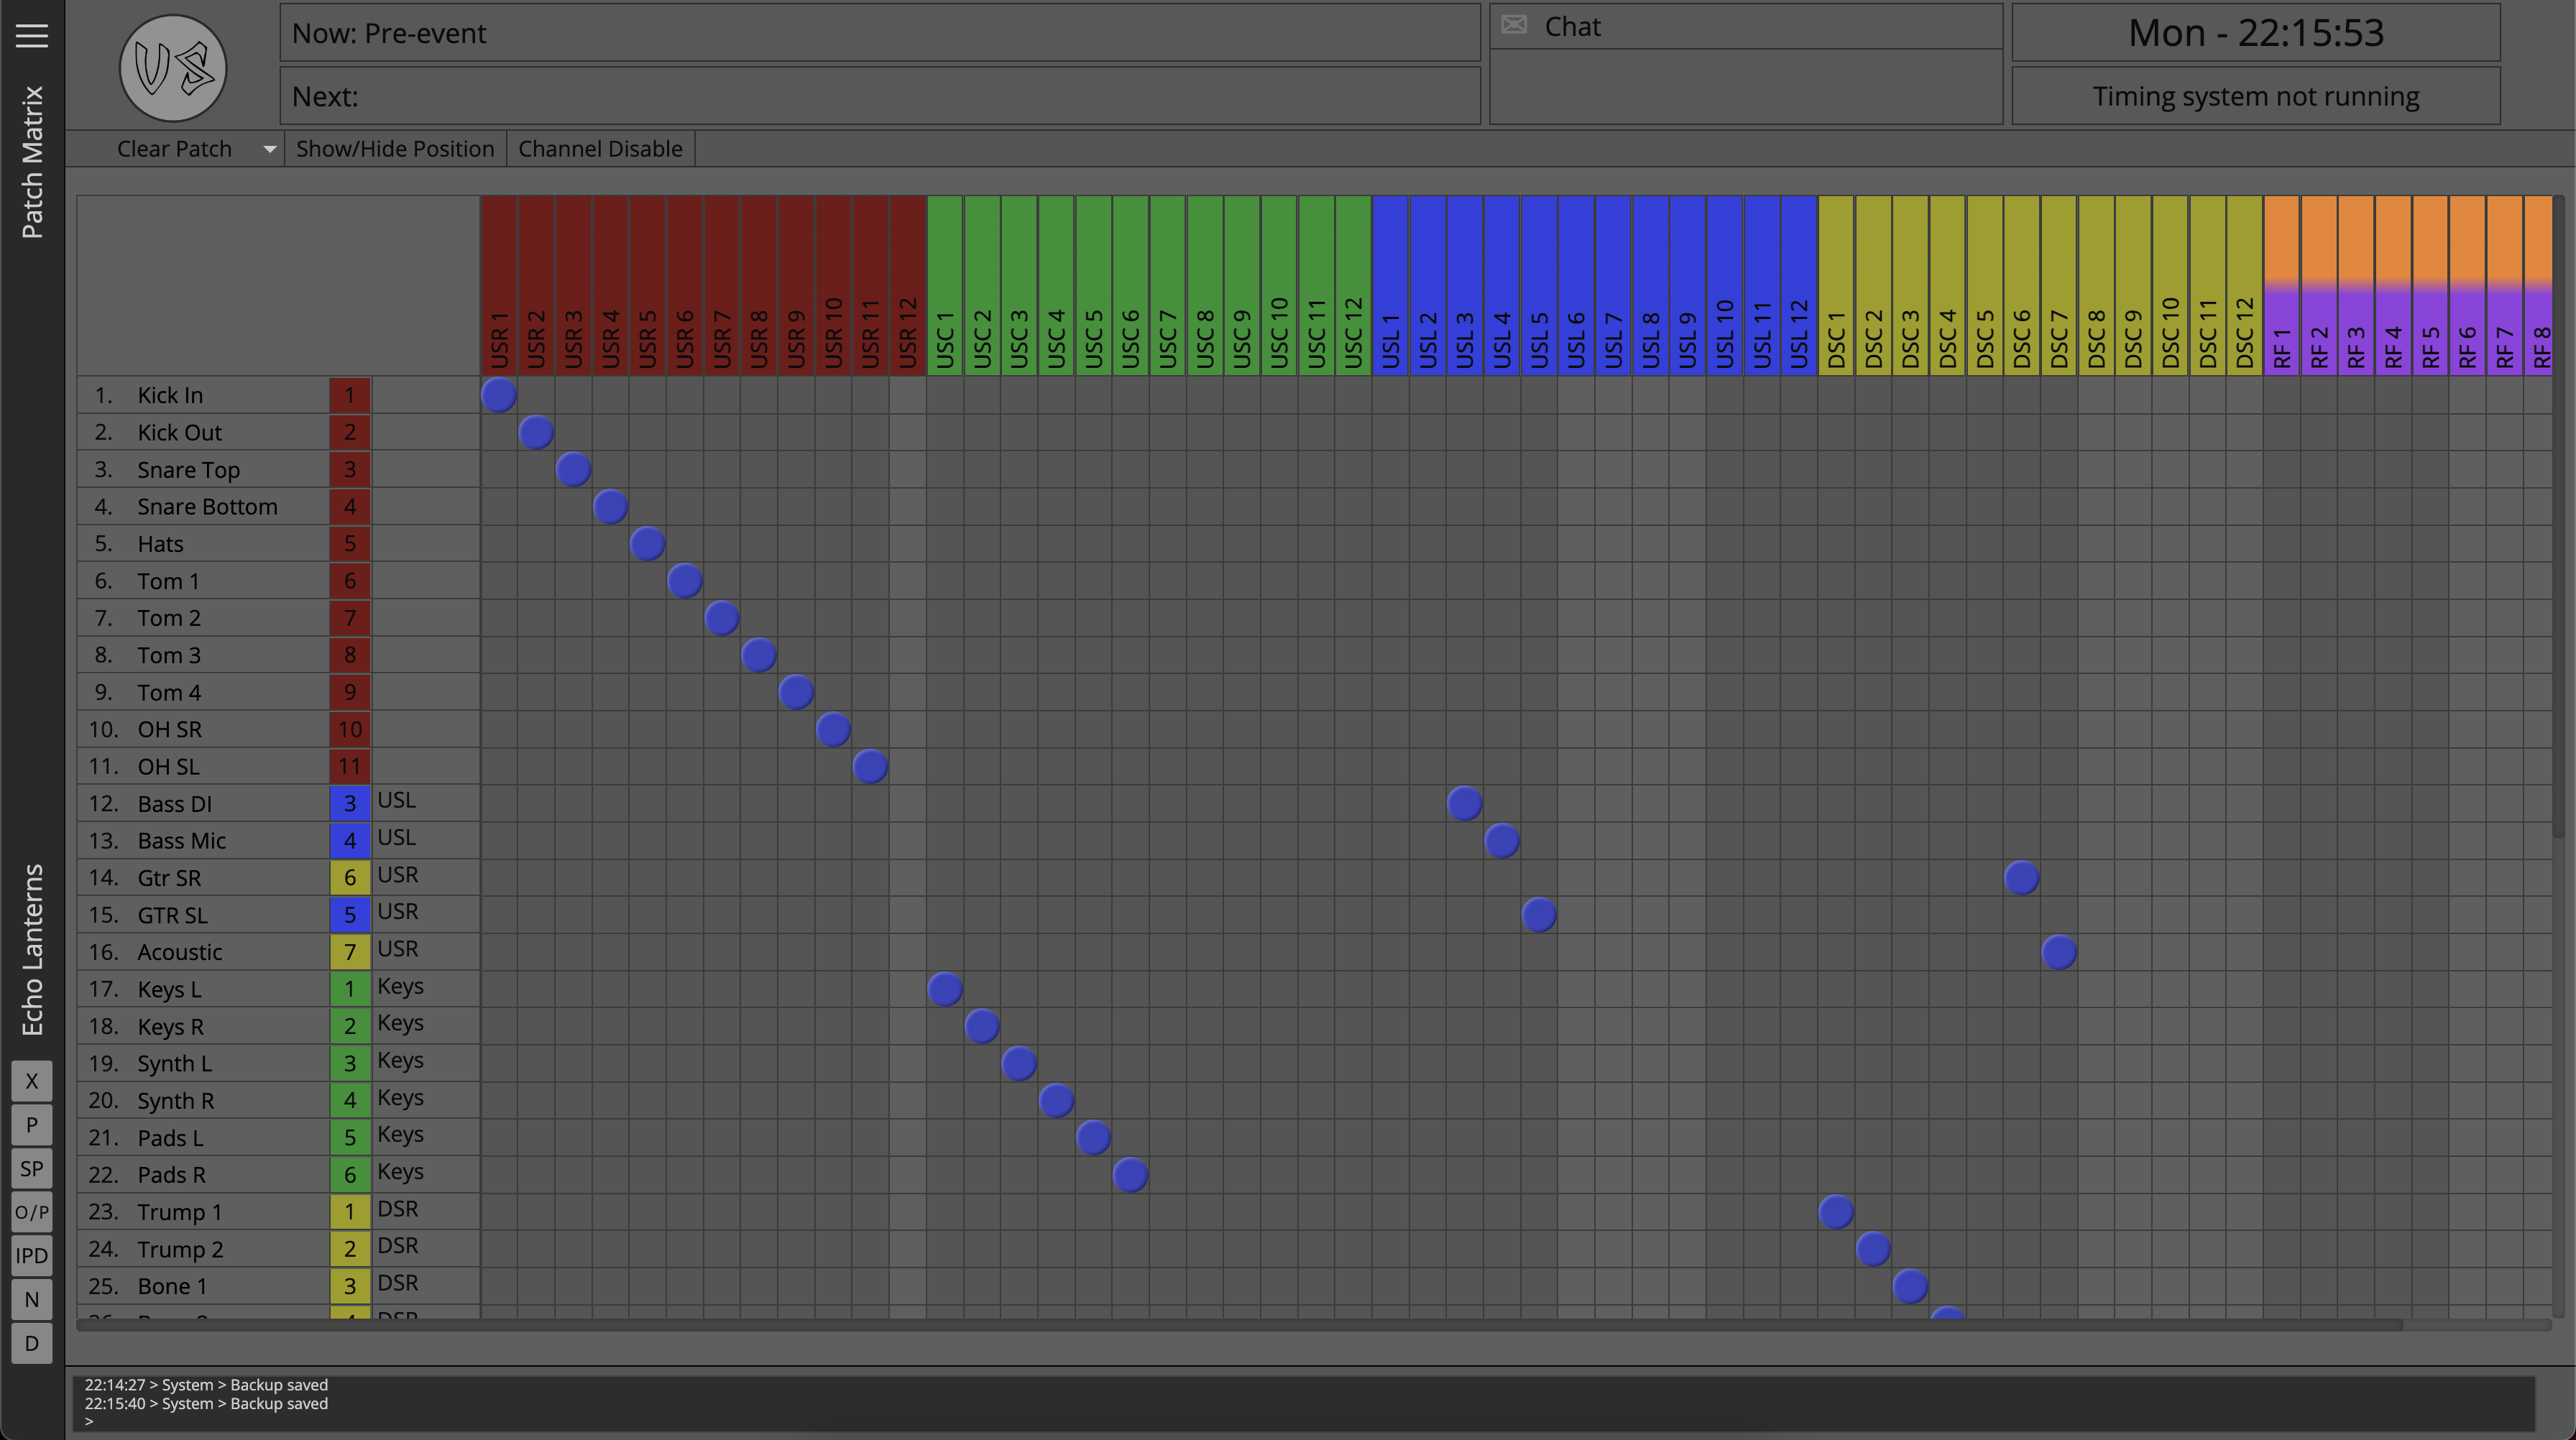
Build a patch for this act now that the stage plot has been defined, the position column can be shown to help when making decisions on the patch.
We can also view this patch from a different perspective from the Input Devices page of the side slider. The Input Devices page of the side slider can be navigated to using the button marked 'IPD' on the Side Slider.
Input Devices
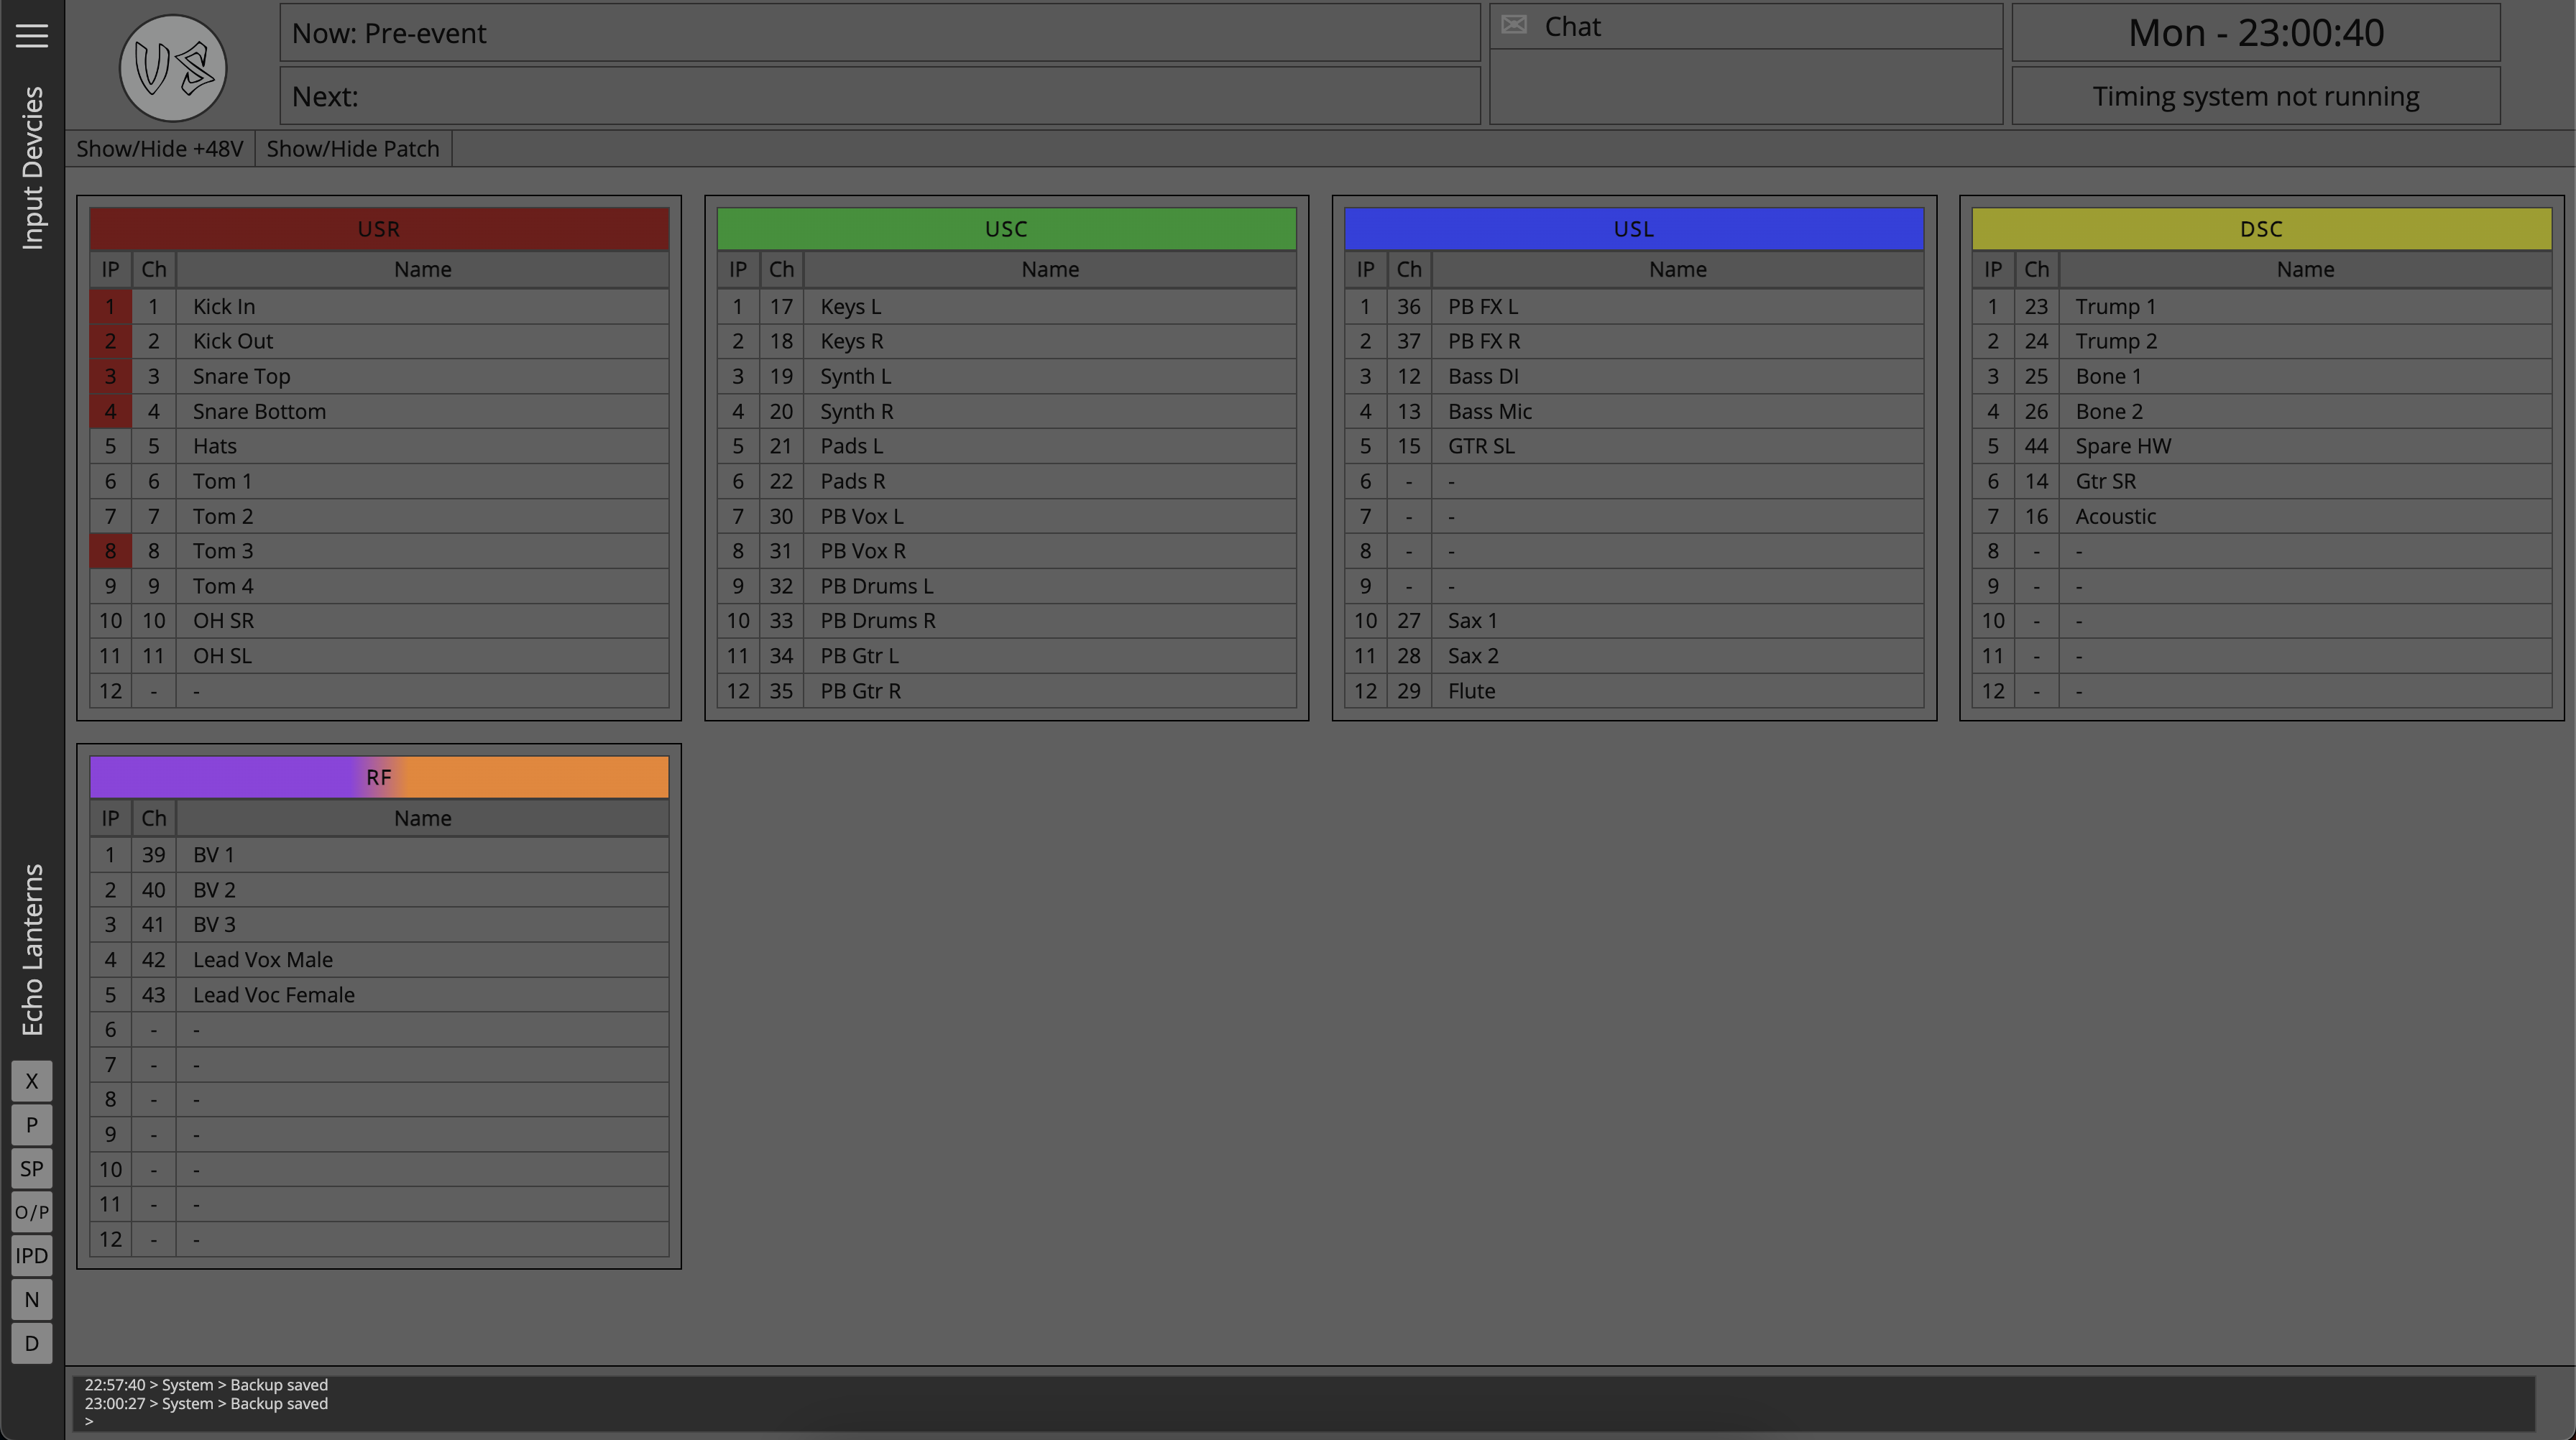
A detailed breakdown of the Input Devices page and its functionality can be found on the Input Devices Page.
The patch can be updated by dragging and dropping channels between devices, or alternatively entire devices can be swapped by dragging and dropping a device using the device label.
With the input patch built, the user can now go ahead and put together the output patch for the Act, this will be done from the Output Patch page of the Side Slider, which can be navigated to using the Side Slider button labeled 'O/P'.
Output Patch
A detailed breakdown of the Output Patch and its functionality can be found on the Output Patch Page.
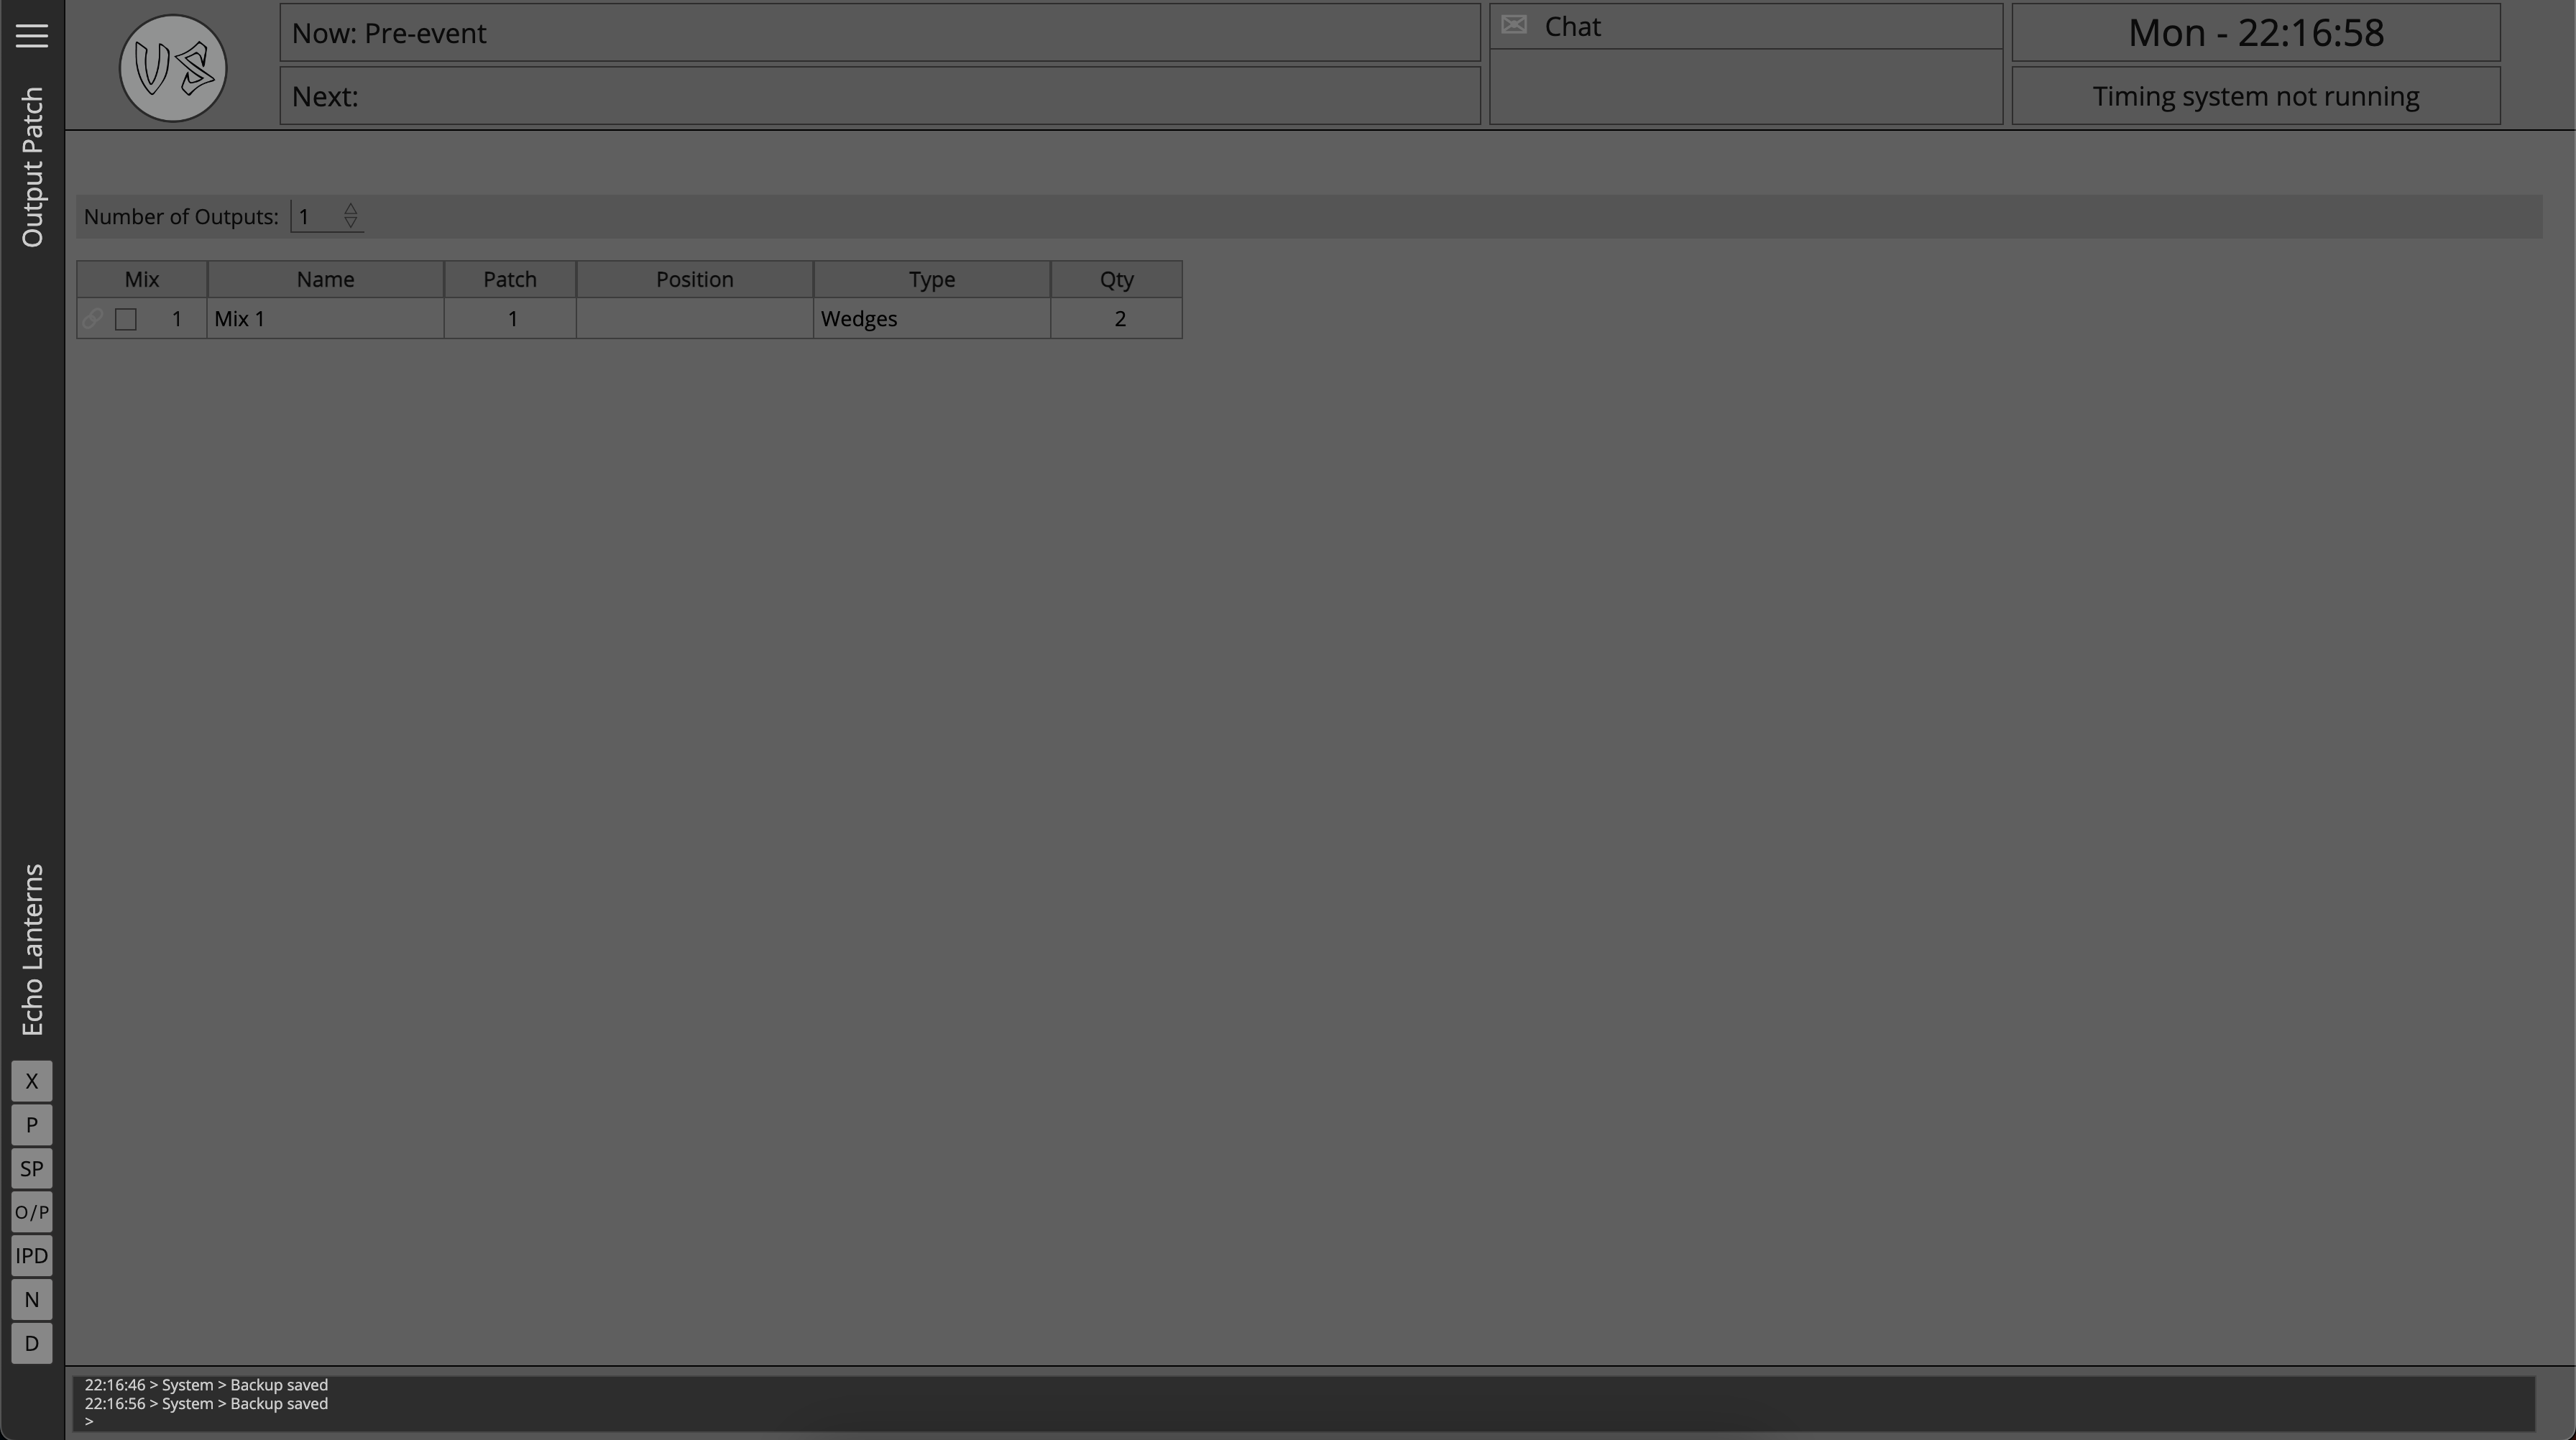
Go ahead and build the output patch now that the stage plot is defined.
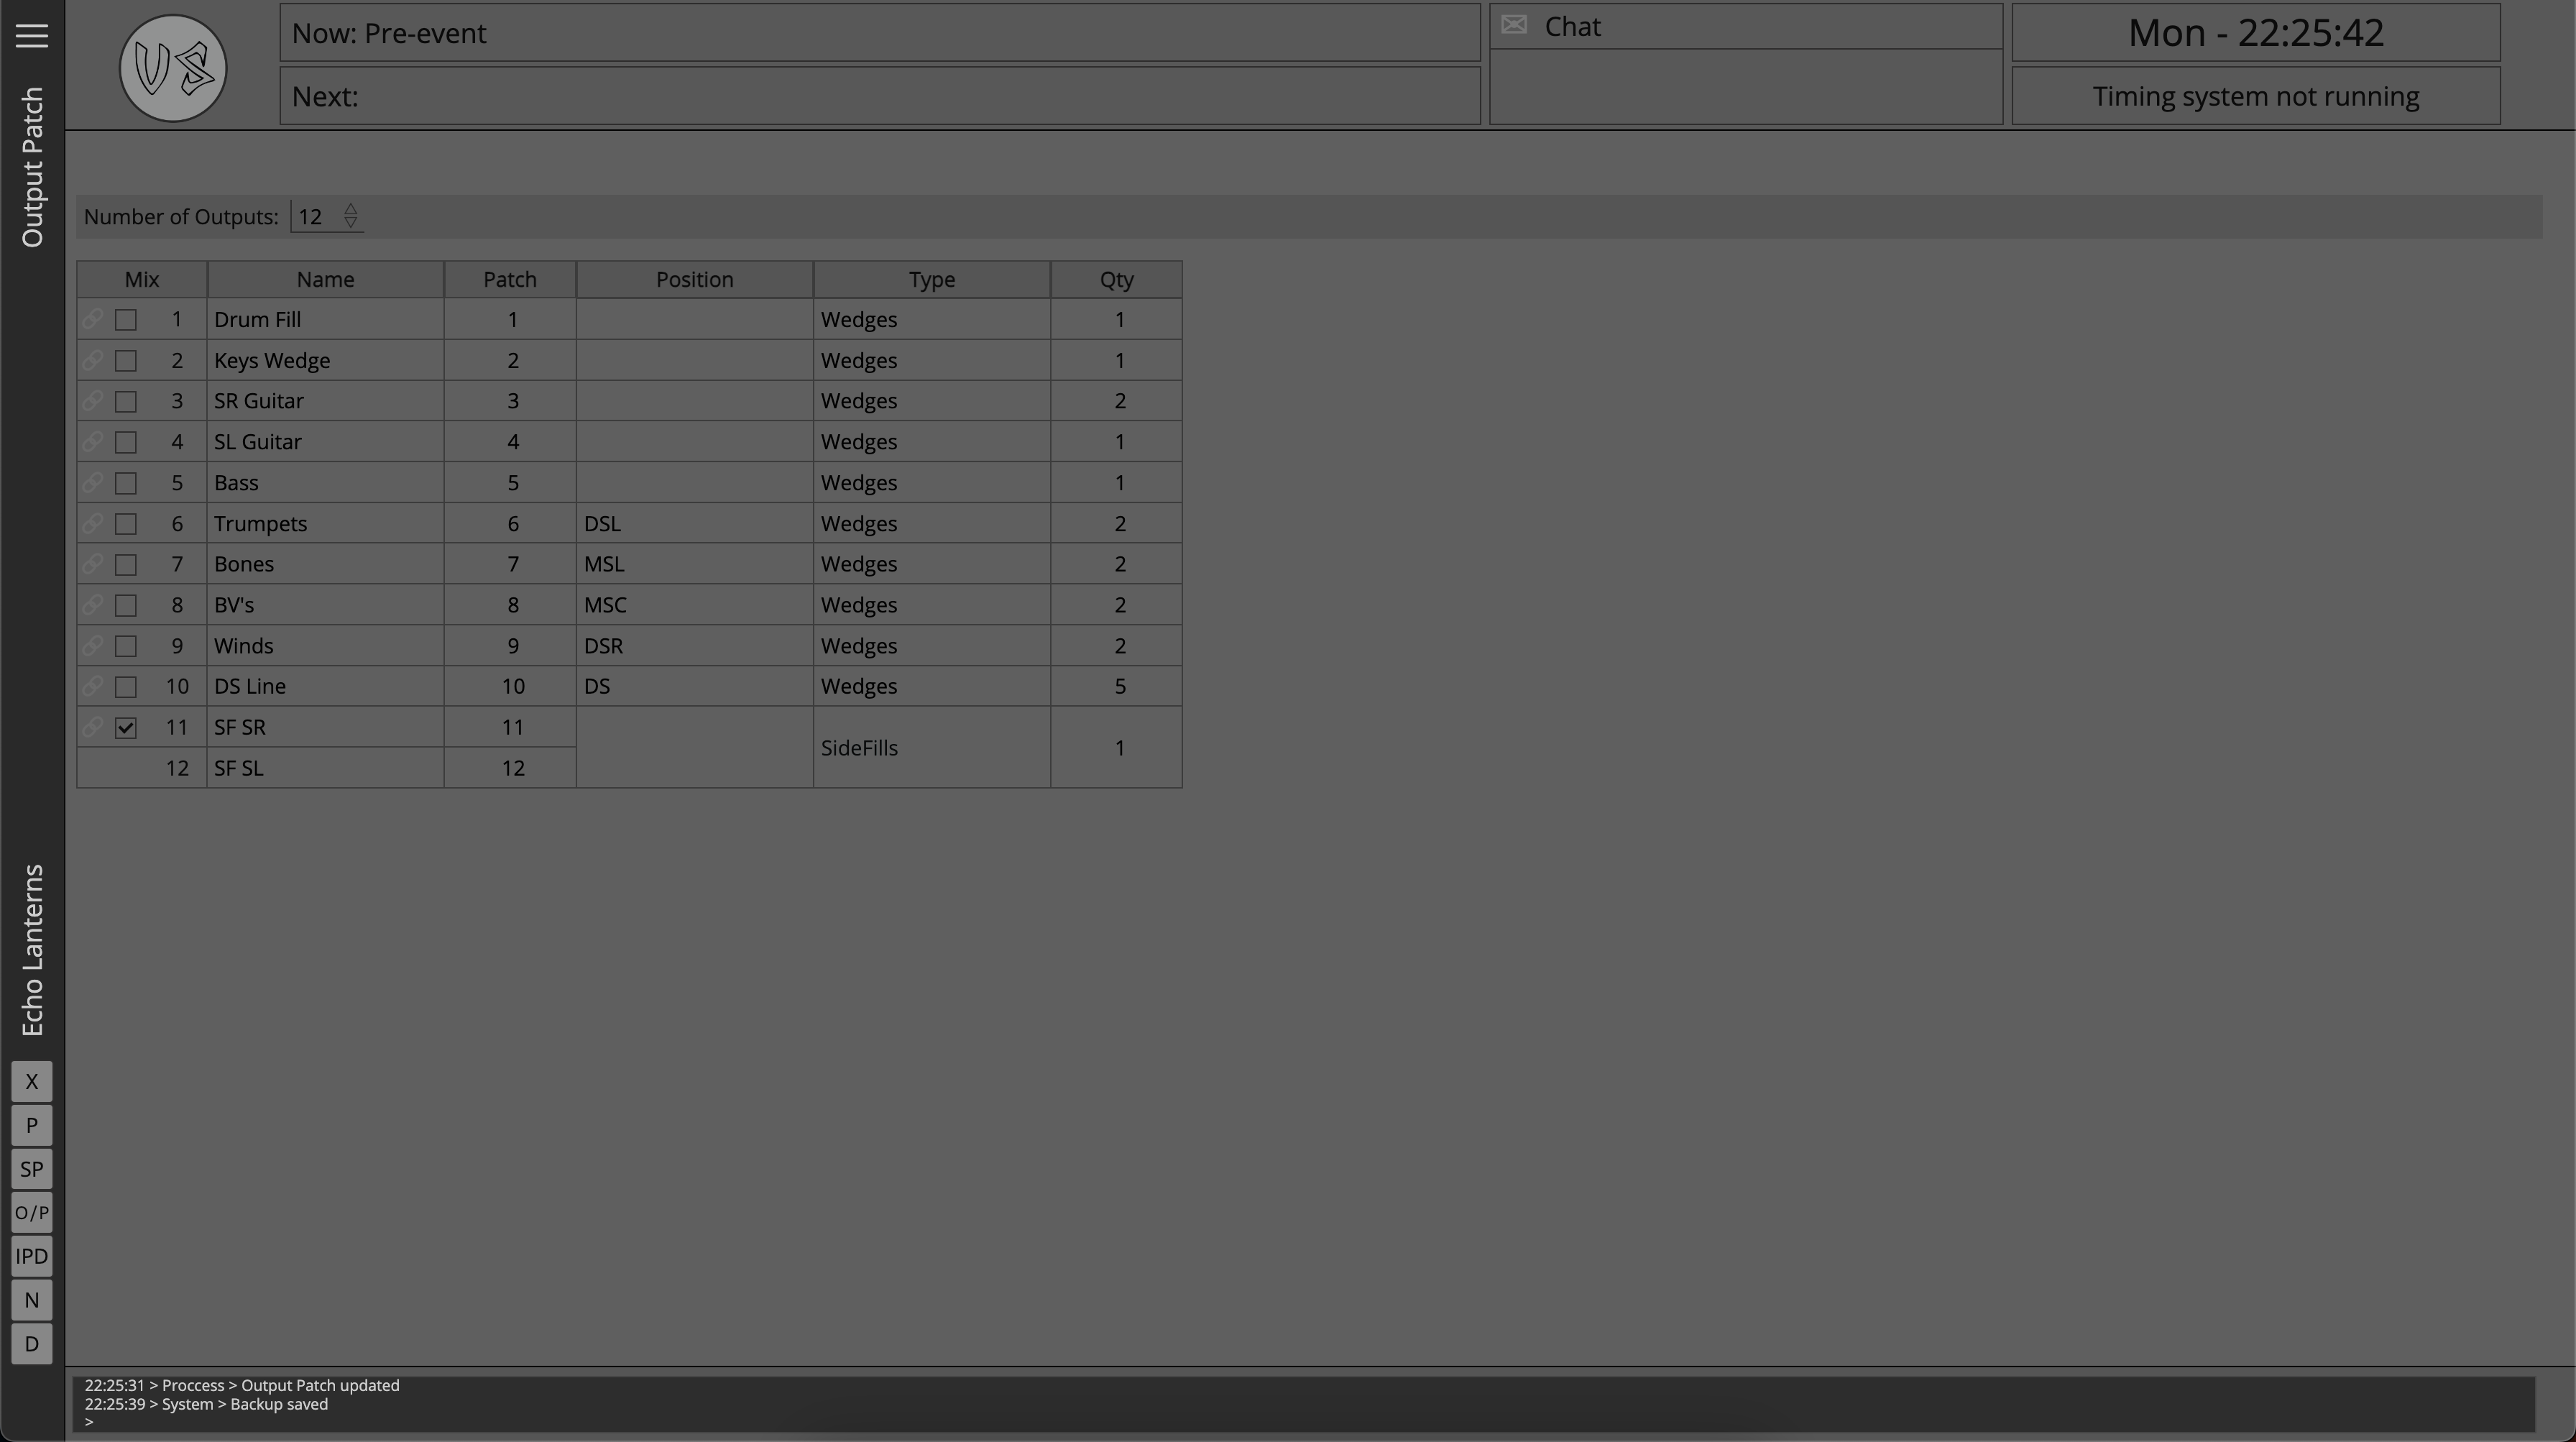
With the output patch filled out, it is time to input some other useful data about the act which we want to track, this can be done from the Other Data page of the side slider.
The Other Data page can be navigated to using the side slider button labelled 'D'
Other Data
A detailed breakdown of the Output Patch and its functionality can be found on the Other Data Page.
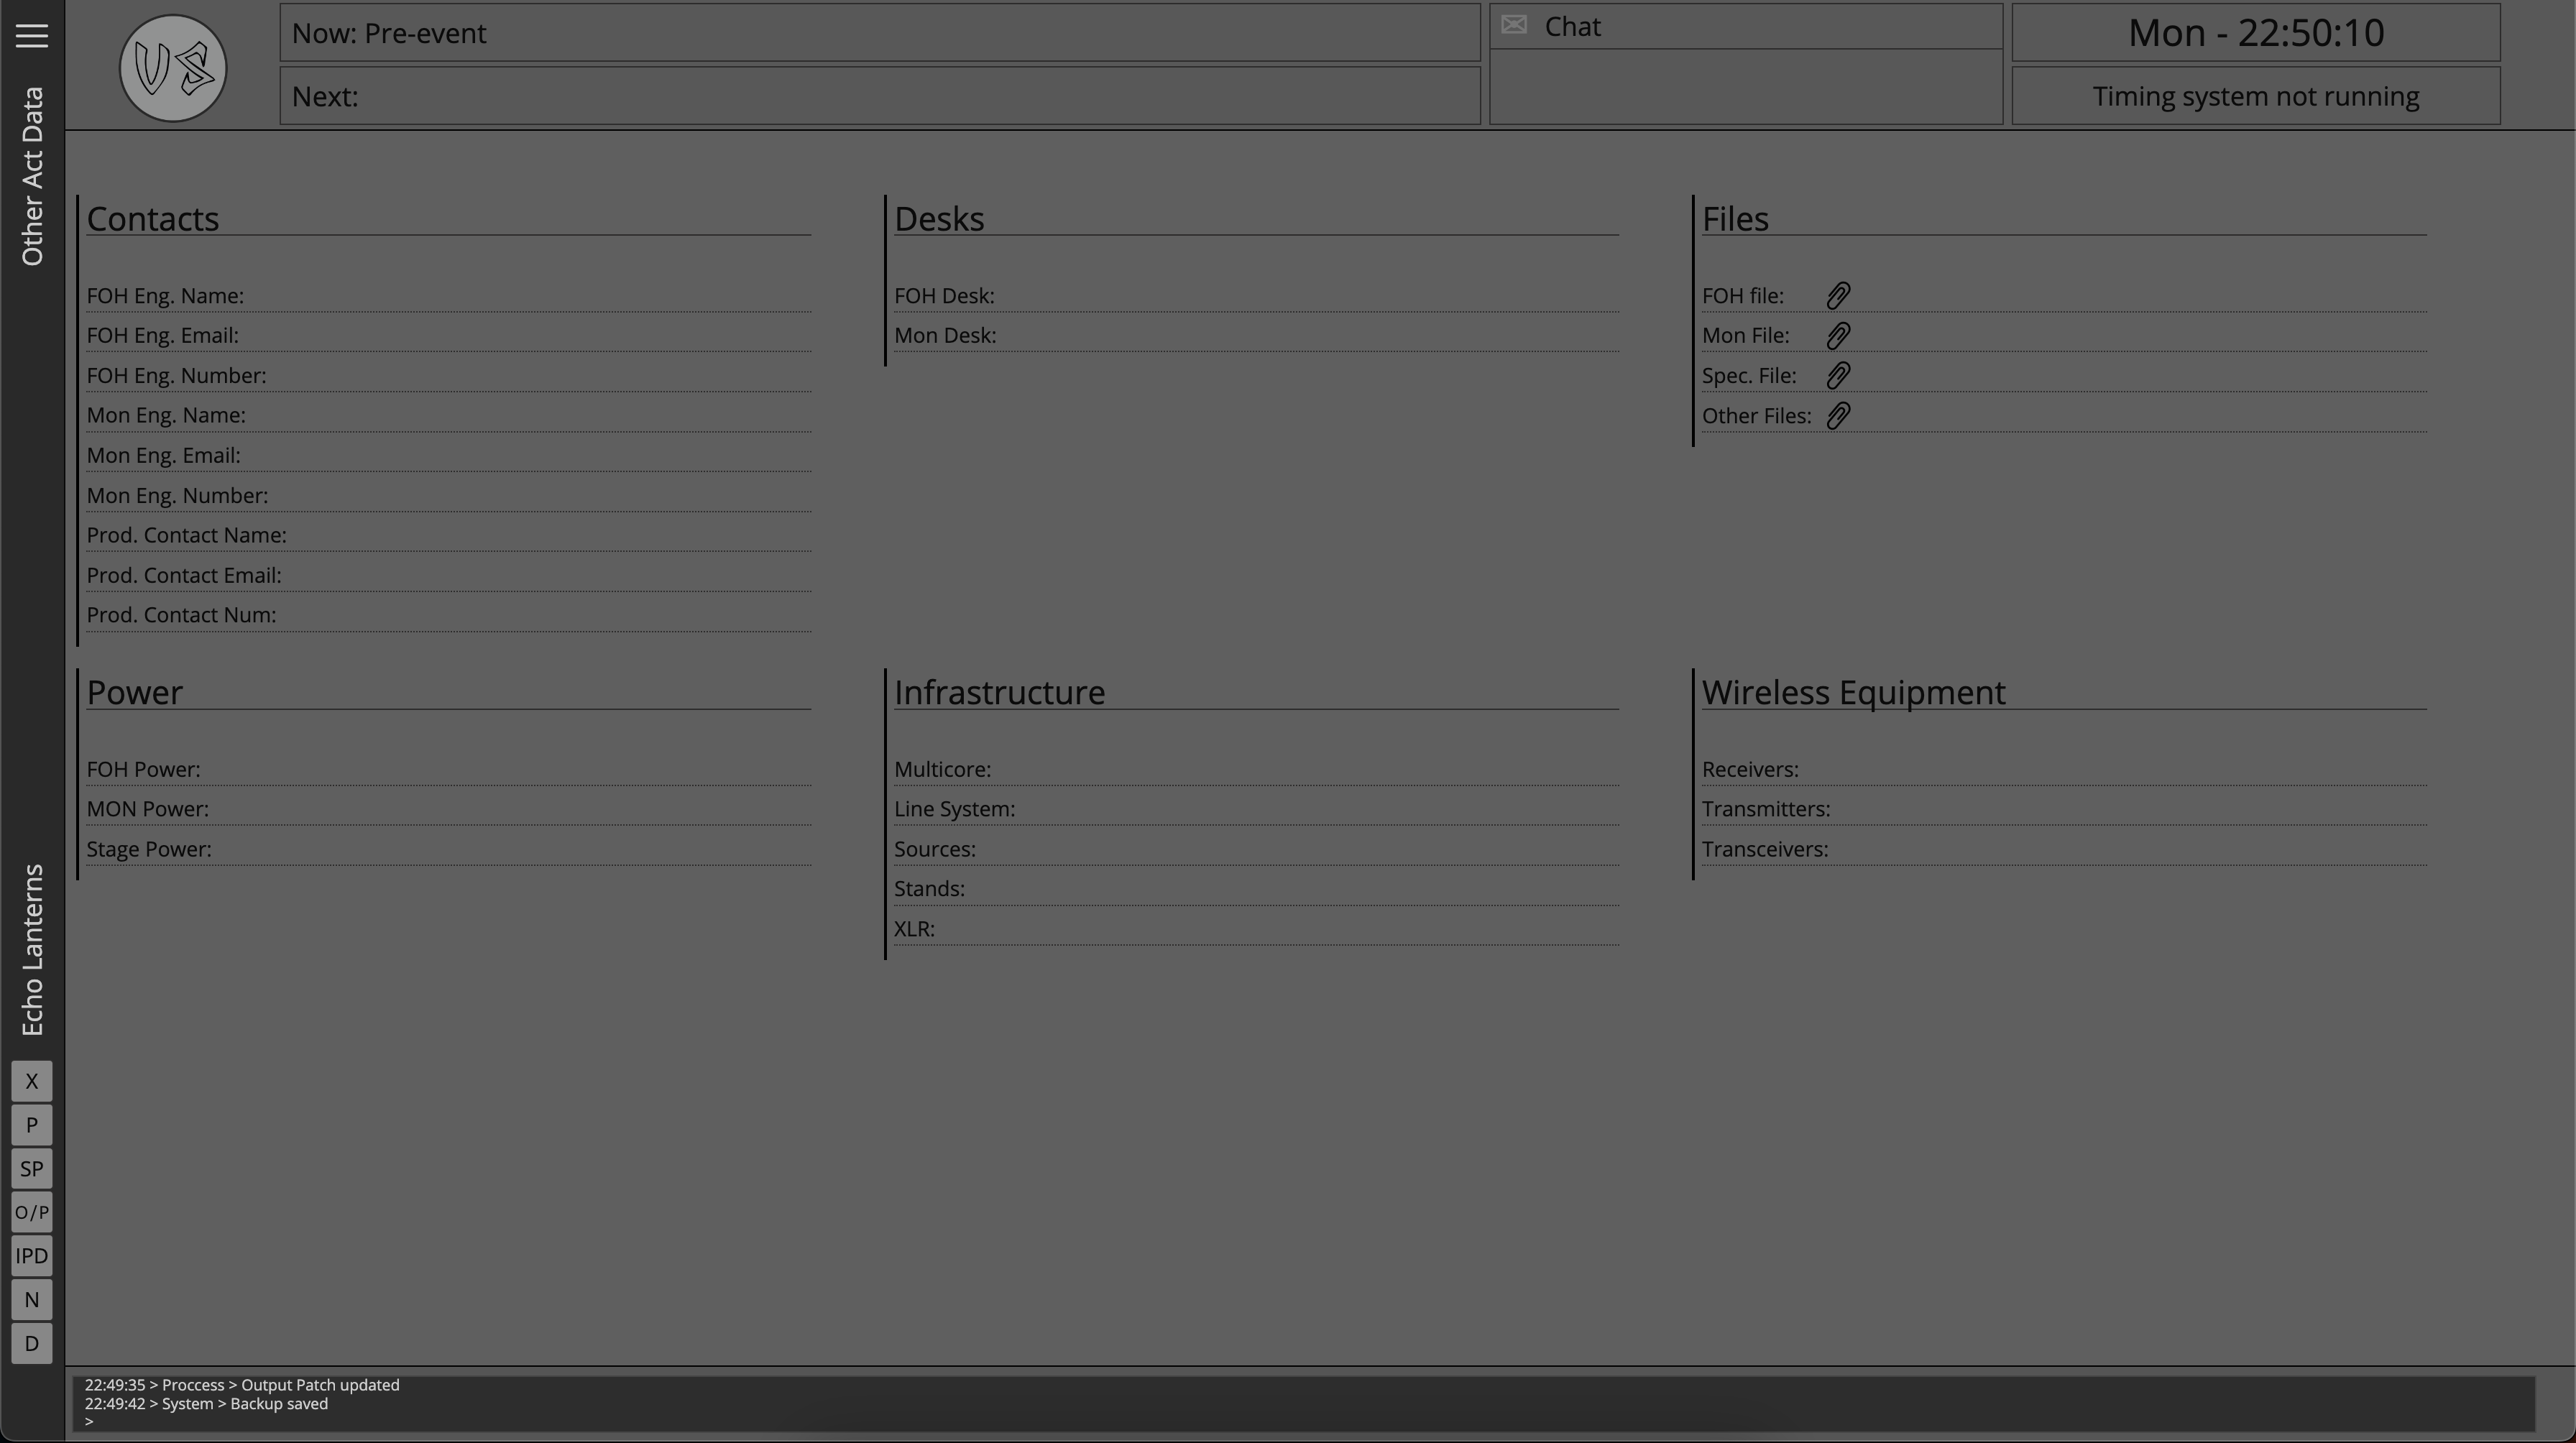
This page holds a number of useful fields for data that we might want to track across the event, go ahead and fill in some information.
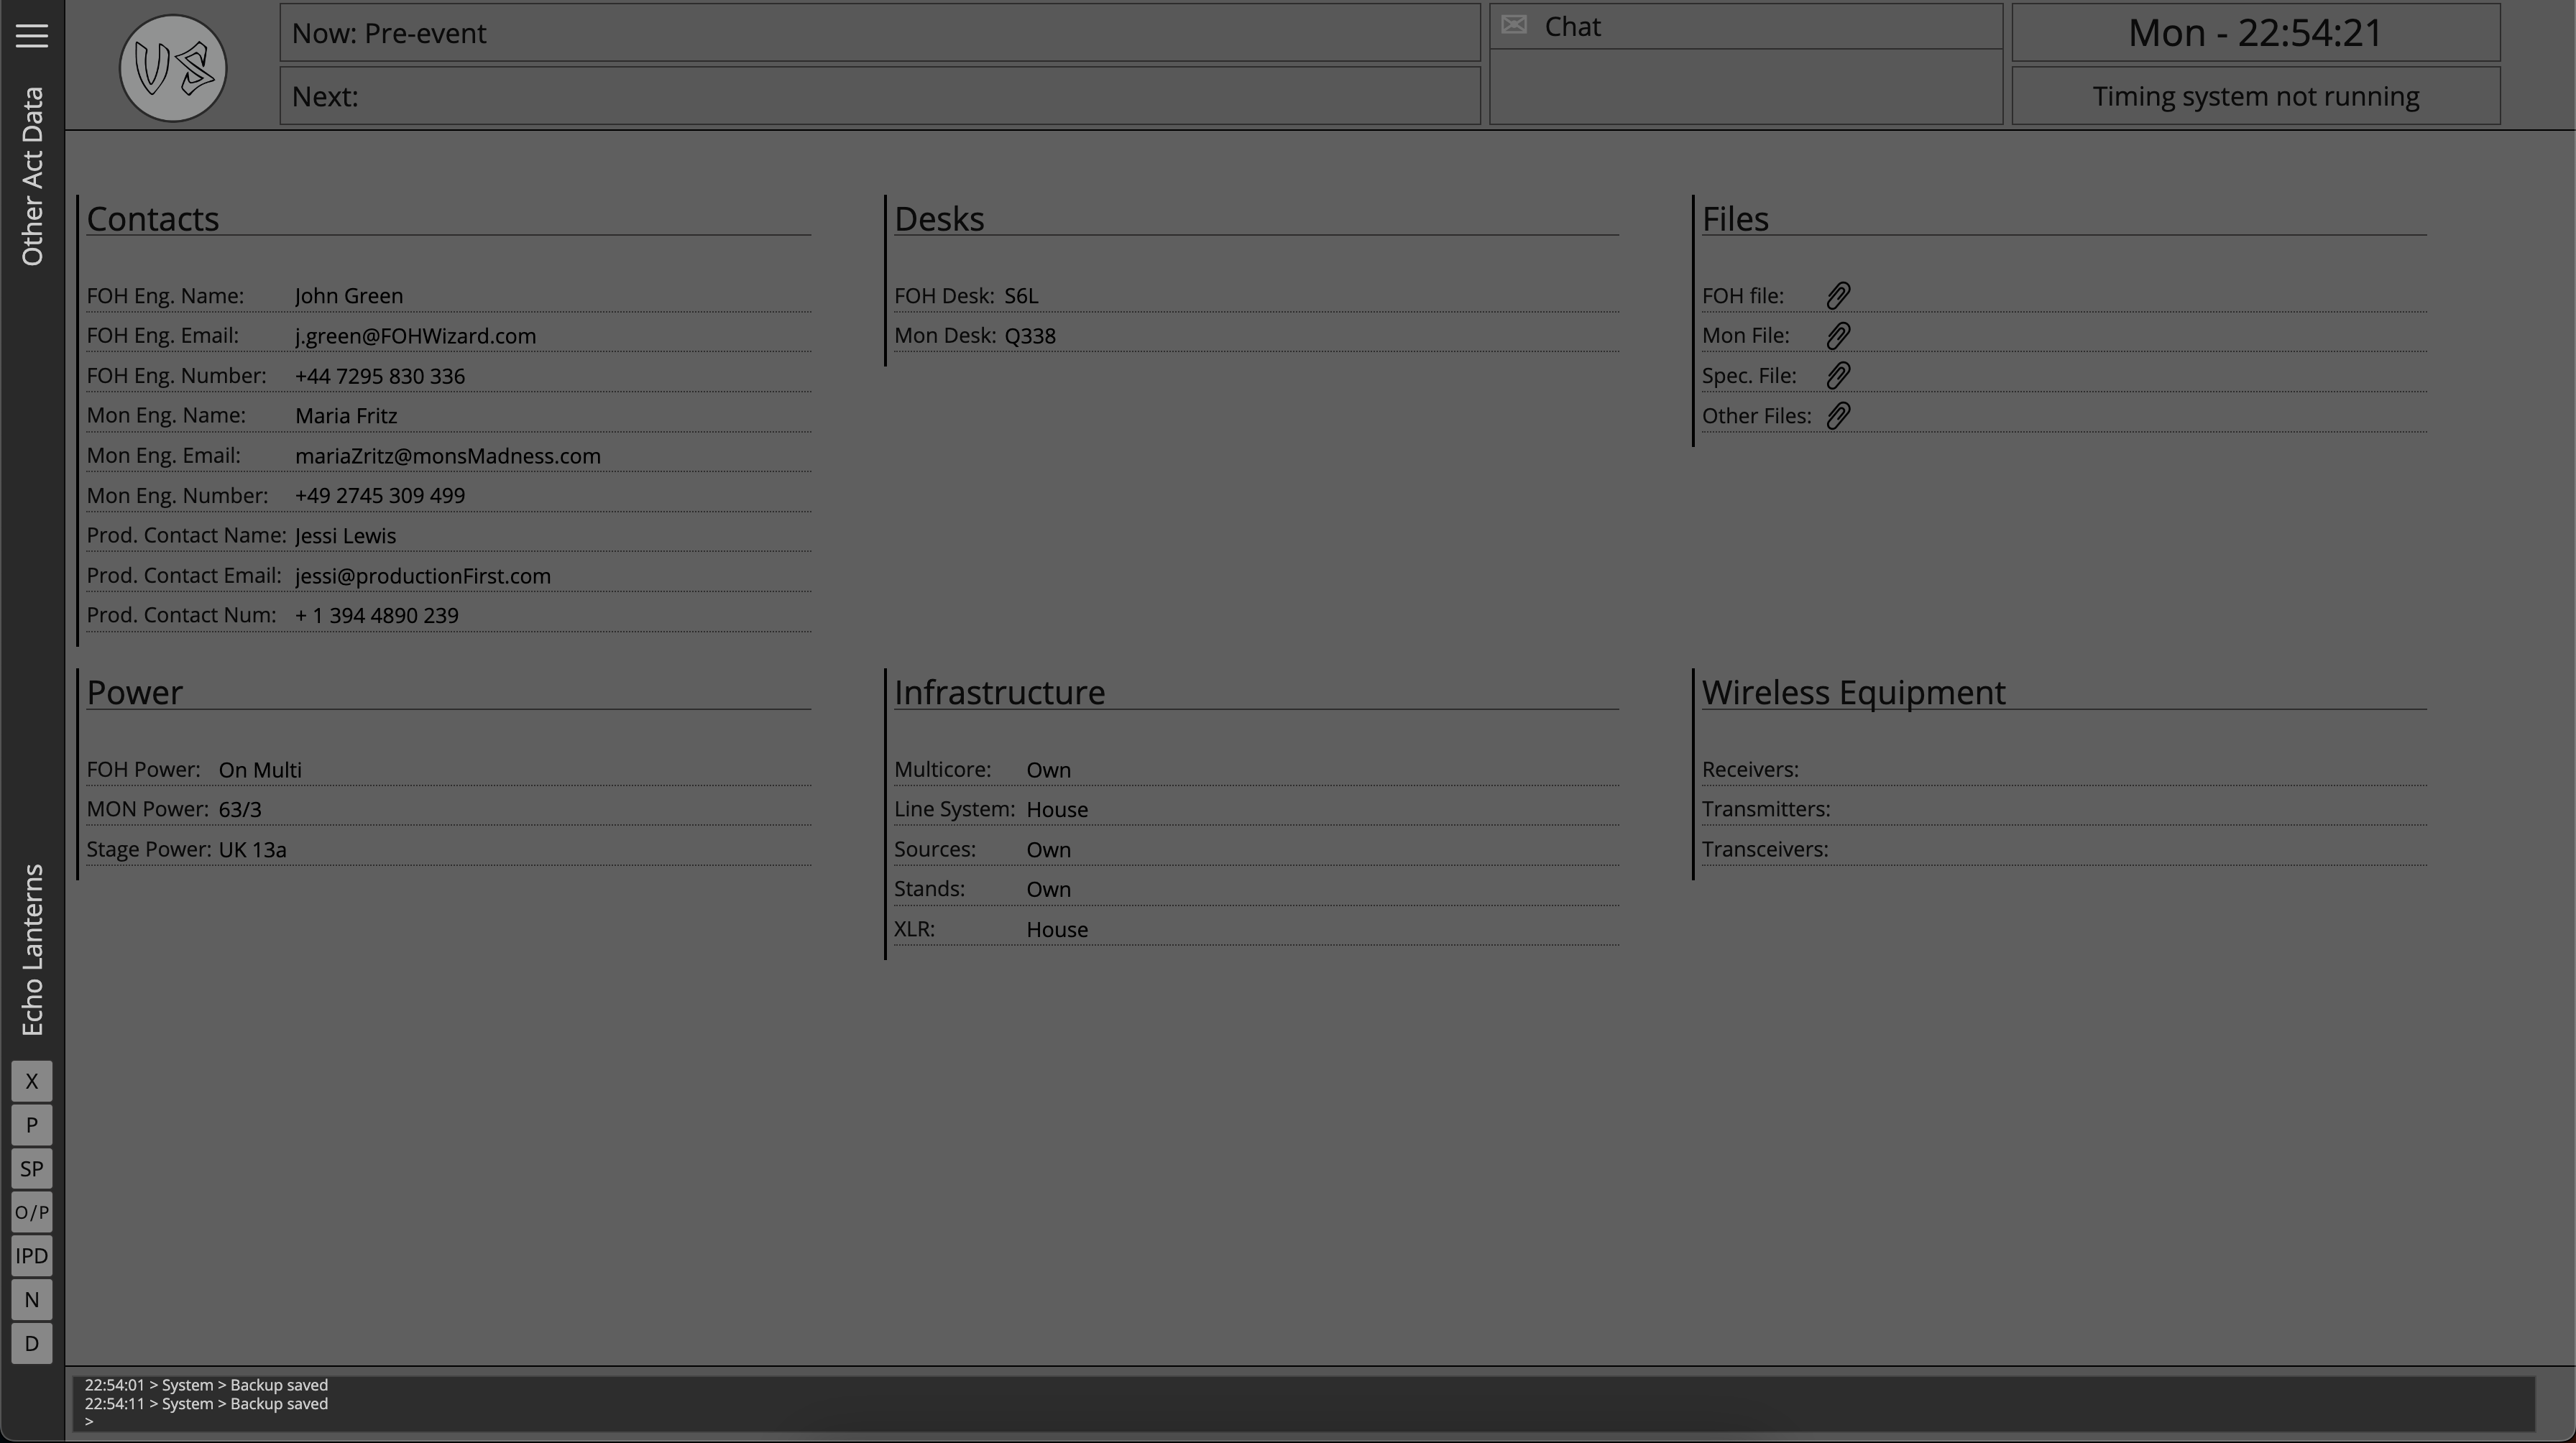
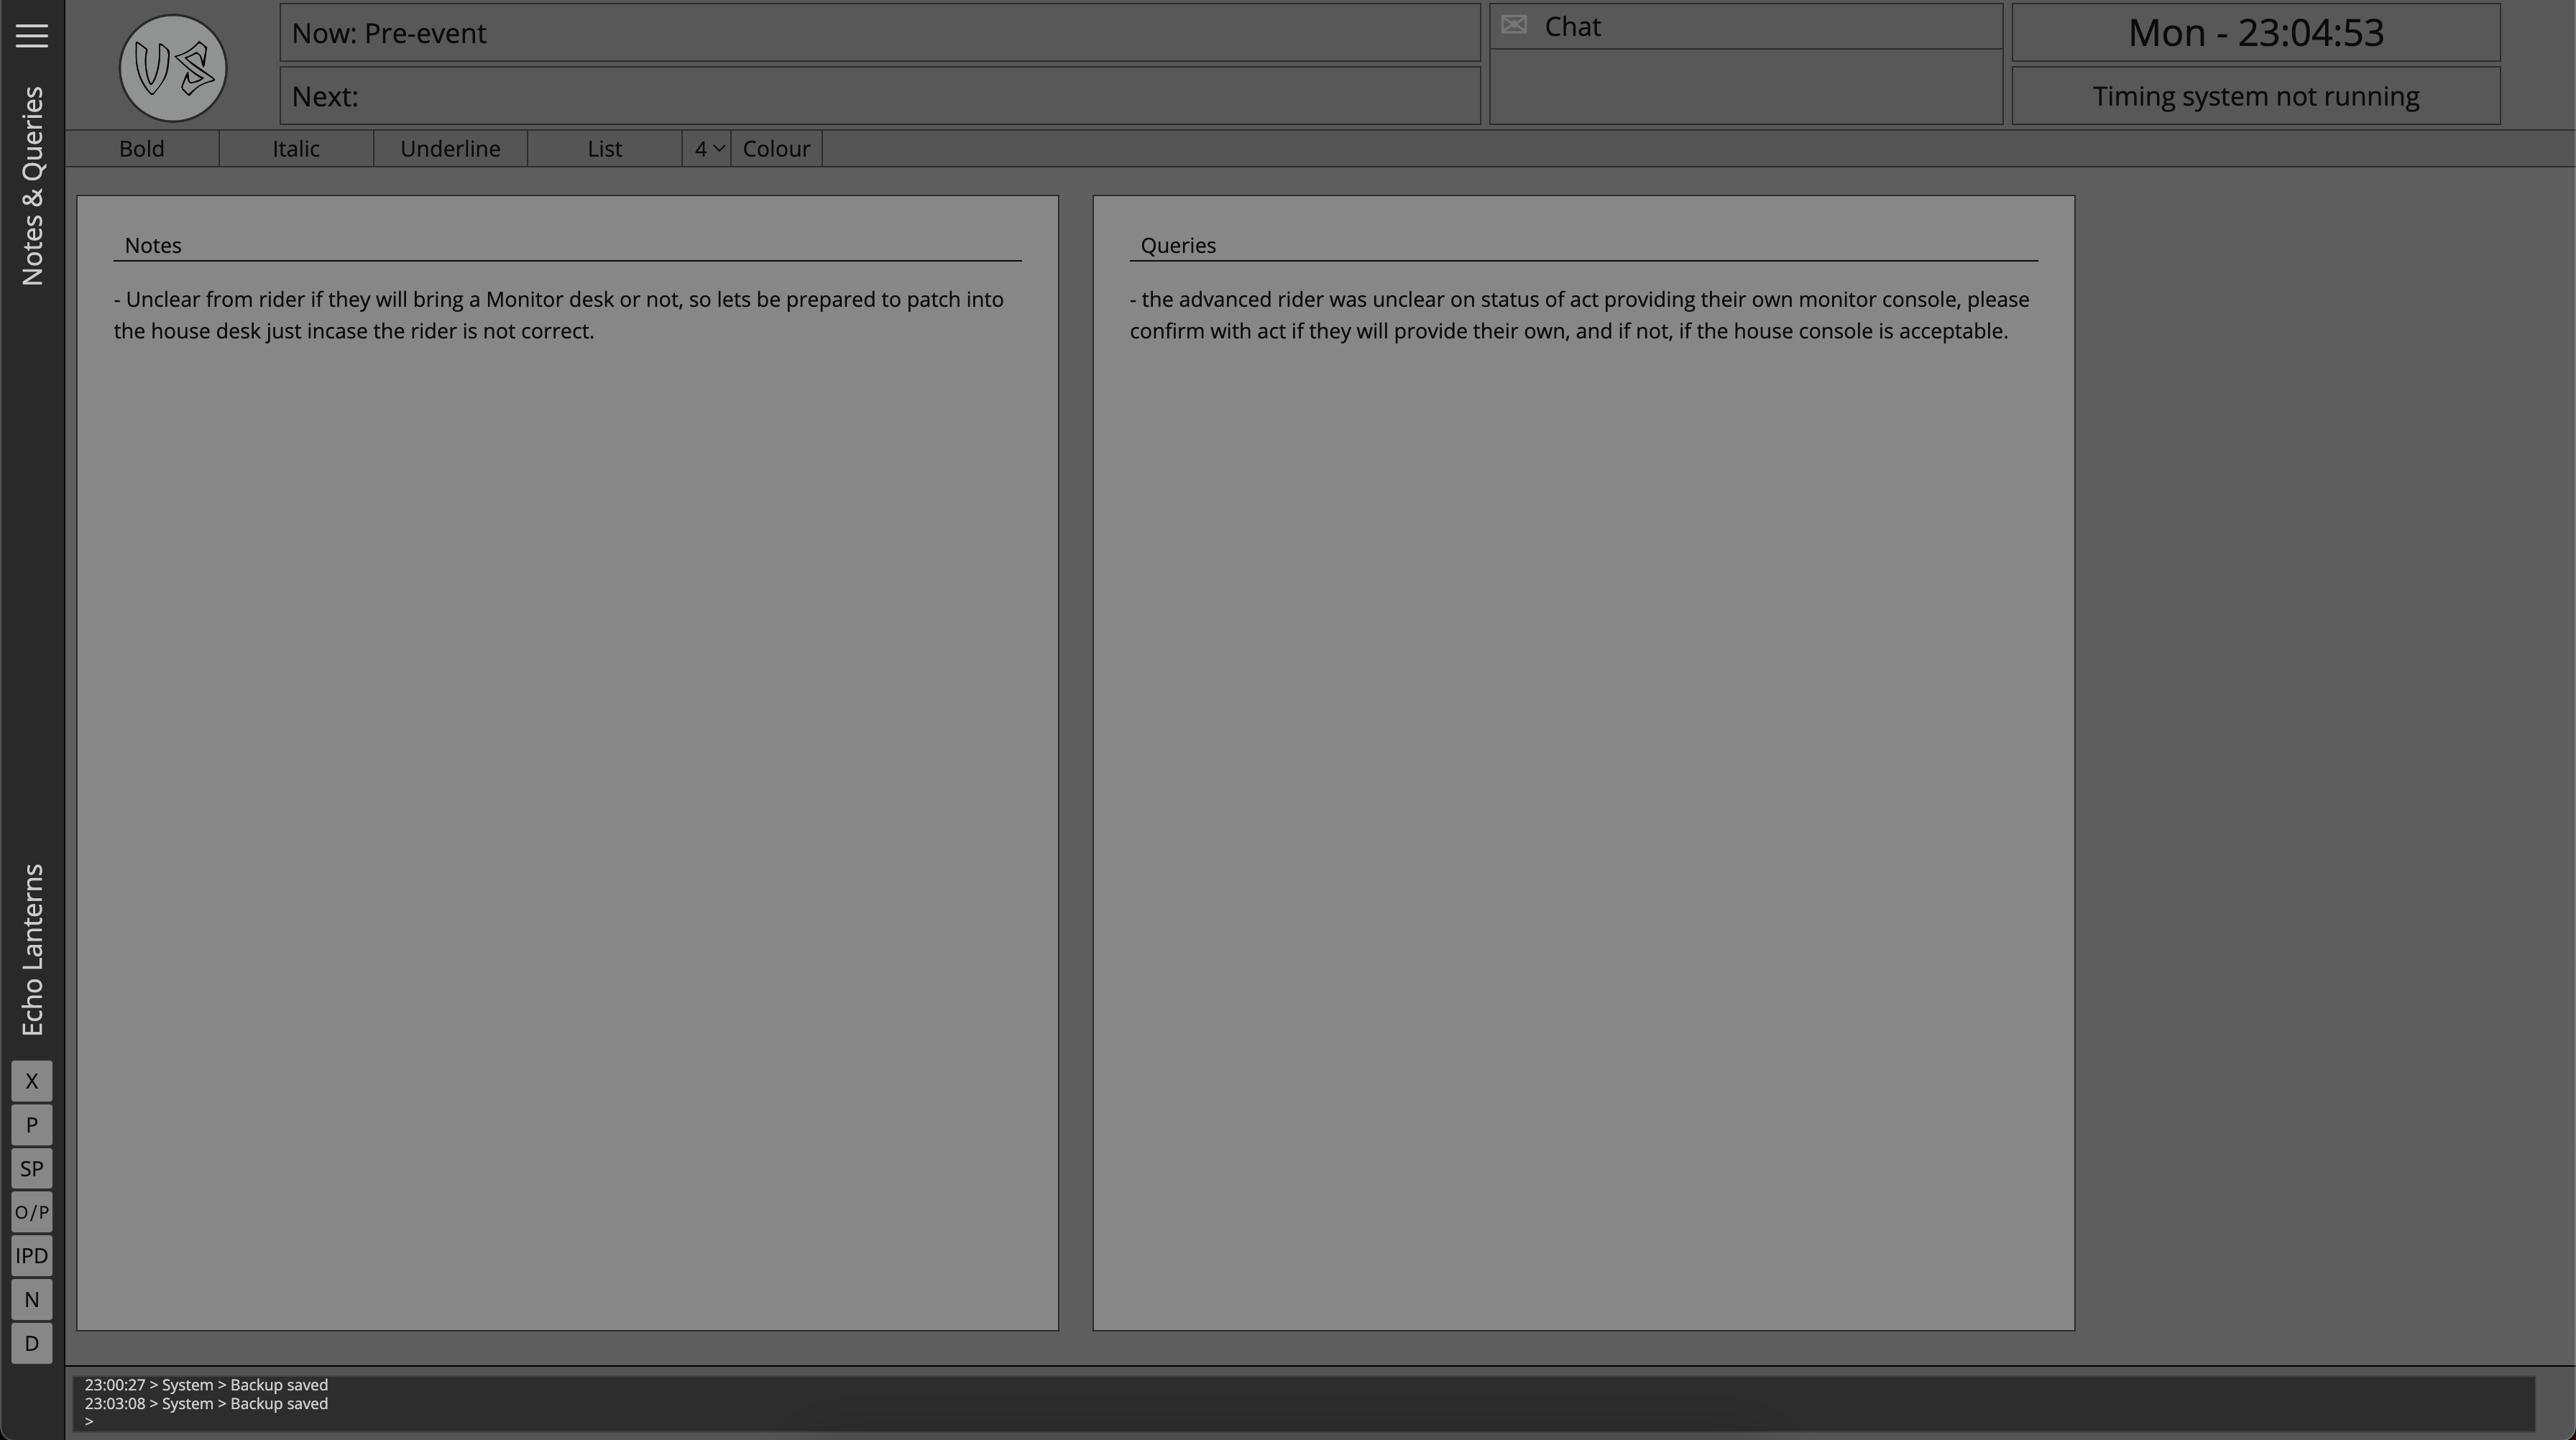
Let's assume that it was not clear from the rider if the act will bring their own monitor console or not, it might be important to follow this up with production to ensure that information wasn't miscommunicated, so head over to the notes and queries section of the side slider and add that data so that it tracked in the project.
The notes and queries section of the side slider can be navigated to using the button marked 'N' on the side slider.
Notes & Queries
A detailed breakdown of the Notes & Queries page and its functionality can be found on the Notes & Queries Page.
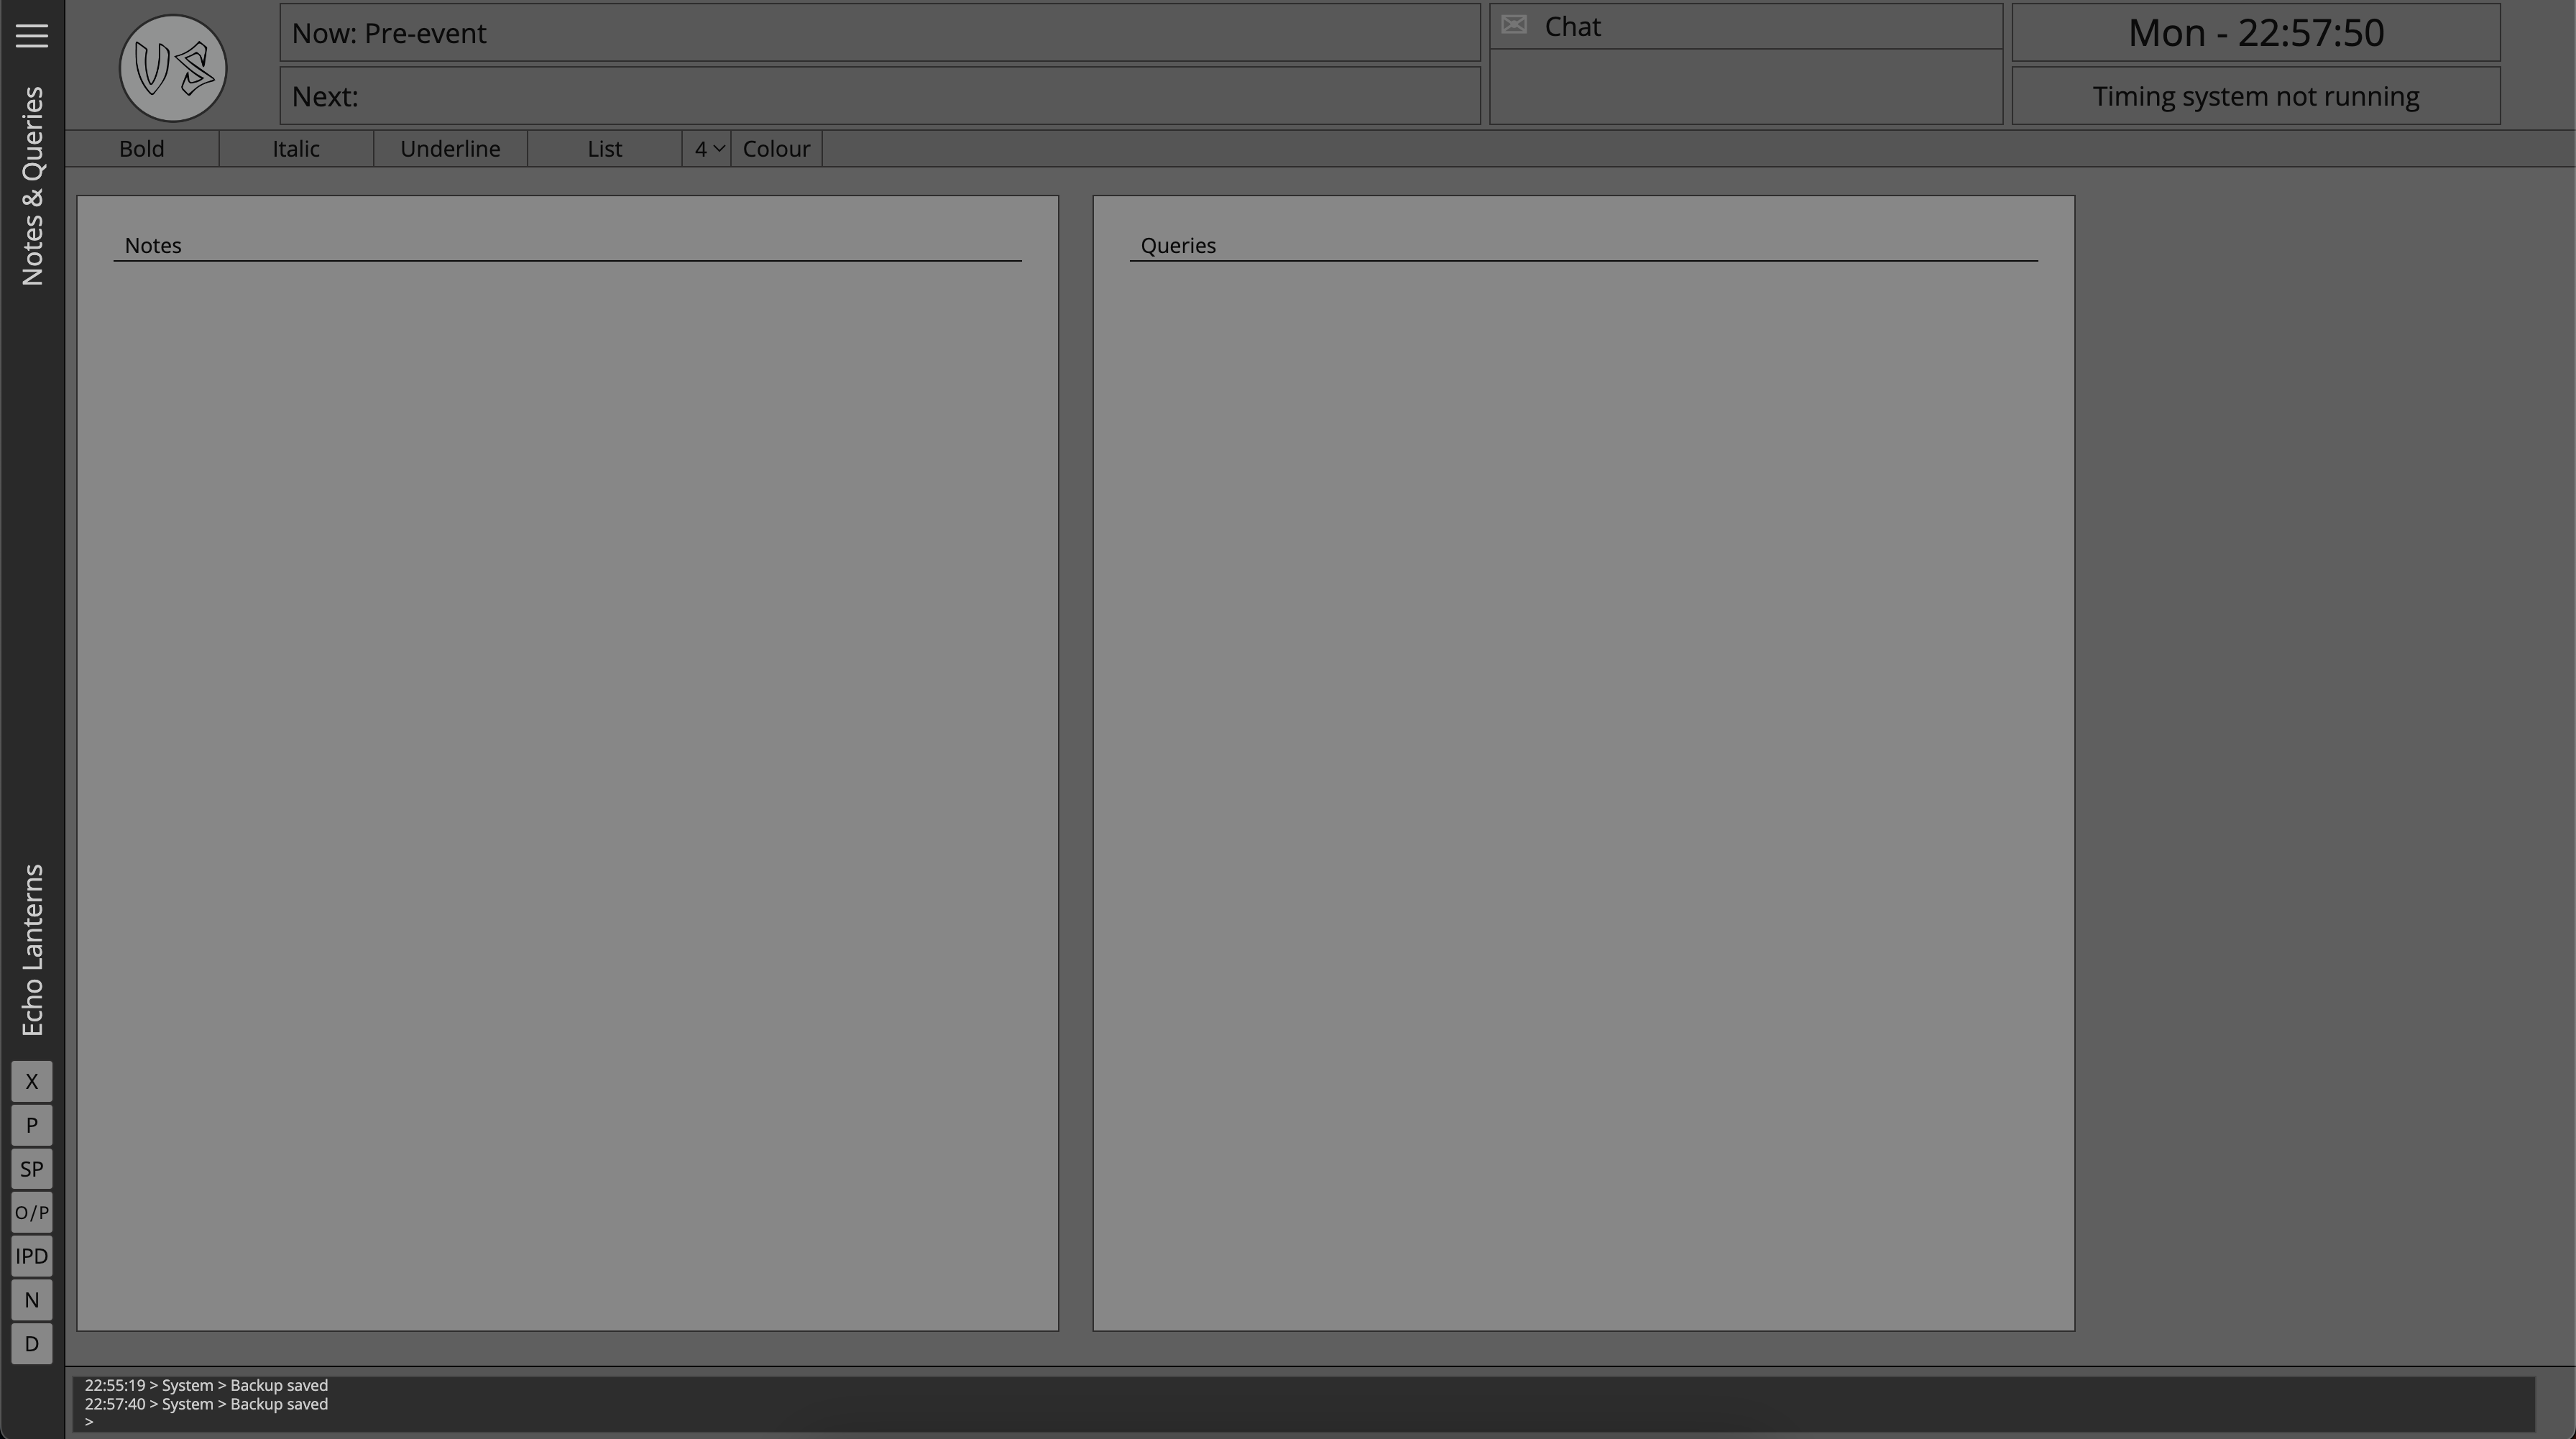
Go ahead and add a note for the audio team that this is an area of uncertainty, and also add another note to the Queries section to keep track of this unanswered question.
With all of the act data now input, double check everything and once happy publish it to the network so that other users on the network are able to access the data.
Head back to the Act page and in the lower right hand corner press the 'Publish Act' button.
For an in depth understand of publishing data to the network please read the Publishing pack of this site.
Next Steps
Congratulations! You have just built your first act and made use of Master Patch's core set of features, the rest of your team can now view this data and receive real time updates as information is updated and published.
In order to get the most out of Master Patch and Stage Viewers comprehensive feature sets, please read the rest of the docs site, each page and its functionality is explained in far greater depth than has been explained here and will provide a very solid base to continue optimizing deployments on productions.